What is the best open source bitcoin accounting/tax software, ideally that can be selfhosted? Something like CoinTracking. I tried Rotki but the transaction limit in the free version is too low and app in general is too complex, just seems geared towards shitcoins.
svrgnty
svrgnty@svrgnty.com
npub17wmr...kms8
Bitcoin
I've switched from CalyxOS to @GrapheneOS and so far liking it
ECB is telling you to buy bitcoin
GM, stack sats
Time to stack sats! Get some no-kyc #bitcoin with @peachbitcoin and use code SVRGNTY
Buy Bitcoin | Everything Bitcoin | svrgnty.com
Where to easily buy bitcoin.
what are your favorite podcasts @jack
Bitcoin is on sale! Get some now
Buy Bitcoin | Everything Bitcoin | svrgnty.com
Where to easily buy bitcoin.
Got to sit down with Kane McGukin and discuss bitcoin multisig on Navigating Bitcoin's Noise!
This was my first podcast experience so there is some fumbling 😅

Apple Podcasts
EP55 - Multisig Setup with Svrgnty
Podcast Episode · Navigating Bitcoin
GM
New tool available! SATS calculator to convert satoshis to #bitcoin (BTC) and FIAT (USD, EUR, CHF).
Satoshis Converter | svrgnty.com
Convert satoshis (SATS) to bitcoin (BTC) and FIAT (USD, EUR, CHF).
How to install Sparrow Wallet on Tails persistently #bitcoin
Tails is a portable and FOSS operating system that protects against surveillance and censorship, and can run on a USB stick.
Sparrow is a FOSS Bitcoin wallet for those who value financial self sovereignty. Sparrow’s emphasis is on security, privacy and usability.
 If you don't already have Tails, the instructions on their website are straightforward, just select the OS you will be using to create the USB stick and follow them.
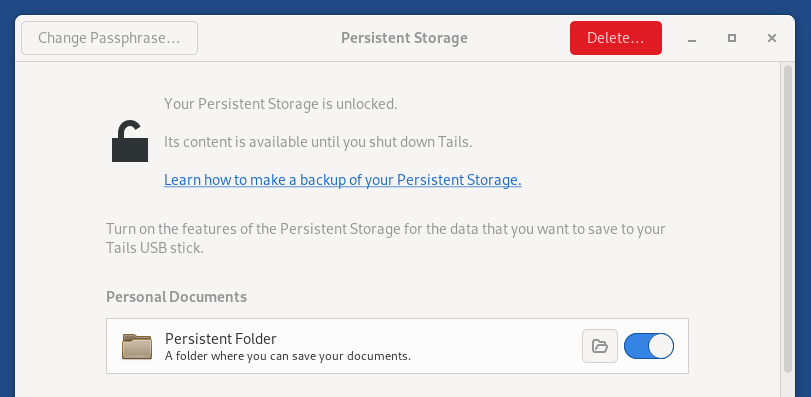
Once you have Tails, you will need to enable Persistent Storage and Dotfiles so that you can install Sparrow Wallet and add it in the navigation bar.
You can enable them during setup or from: Applications > Tails > Persistent Storage.
Once you have that set up, you can continue with installing Sparrow.
If you don't already have Tails, the instructions on their website are straightforward, just select the OS you will be using to create the USB stick and follow them.
Once you have Tails, you will need to enable Persistent Storage and Dotfiles so that you can install Sparrow Wallet and add it in the navigation bar.
You can enable them during setup or from: Applications > Tails > Persistent Storage.
Once you have that set up, you can continue with installing Sparrow.

 1. Start Tor browser and go to
 The version listed there will be the version downloaded. Currently the latest version is 1.9.1, if a new version comes out, just replace 1.9.1 in all the commands below with the version number you are installing.
2. Go to Applications > Utilities > Terminal to open a terminal and run the following command to create a Downloads directory:
mkdir ~/Persistent/Downloads
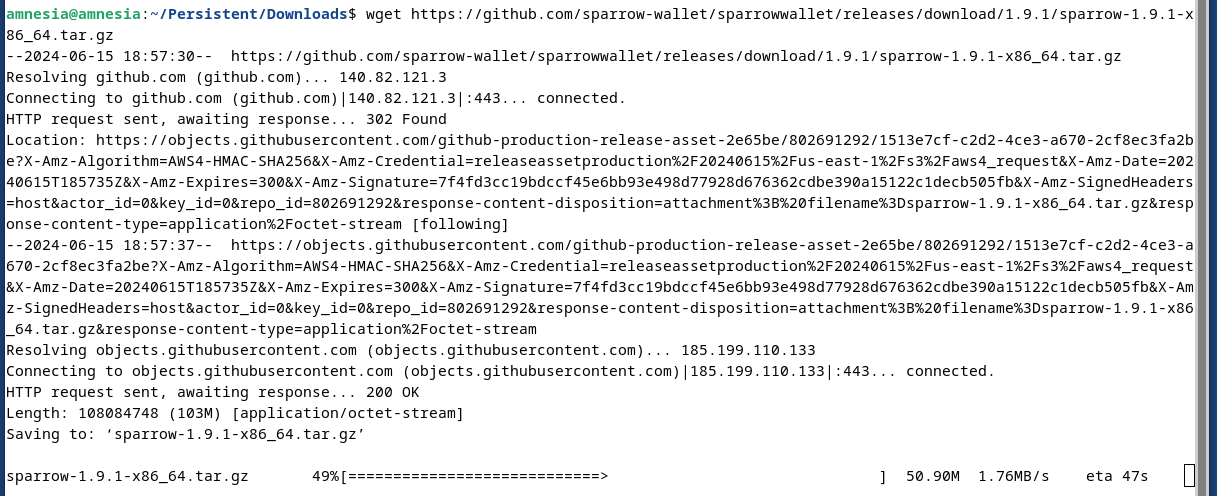
3. Next we will change to the newly created directory and download Sparrow Wallet:
cd ~/Persistent/Downloads
wget https://github.com/sparrowwallet/sparrow/releases/download/1.9.1/sparrow-1.9.1-x86_64.tar.gz
The version listed there will be the version downloaded. Currently the latest version is 1.9.1, if a new version comes out, just replace 1.9.1 in all the commands below with the version number you are installing.
2. Go to Applications > Utilities > Terminal to open a terminal and run the following command to create a Downloads directory:
mkdir ~/Persistent/Downloads
3. Next we will change to the newly created directory and download Sparrow Wallet:
cd ~/Persistent/Downloads
wget https://github.com/sparrowwallet/sparrow/releases/download/1.9.1/sparrow-1.9.1-x86_64.tar.gz
 4. Next, let's download the manifest files to verify the software:
wget https://github.com/sparrowwallet/sparrow/releases/download/1.9.1/sparrow-1.9.1-manifest.txt
wget https://github.com/sparrowwallet/sparrow/releases/download/1.9.1/sparrow-1.9.1-manifest.txt.asc
curl https://keybase.io/craigraw/pgp_keys.asc | gpg --import
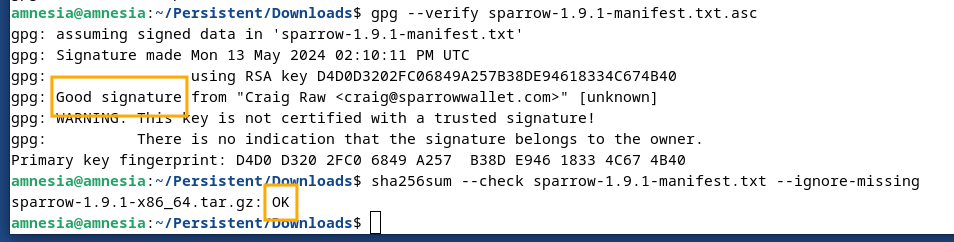
5. Now let's verify Sparrow Wallet with the following 2 commands:
gpg --verify sparrow-1.9.1-manifest.txt.asc
sha256sum --check sparrow-1.9.1-manifest.txt --ignore-missing
For the first command, you will see "This key is not certified with a trusted signature!". This means that PGP doesn't place a high level of trust in the key downloaded from the internet. For this step to be considered successful, look for Good signature.
If the output of the second command does not end with OK, do not proceed. If it ends in OK you are good to go.
4. Next, let's download the manifest files to verify the software:
wget https://github.com/sparrowwallet/sparrow/releases/download/1.9.1/sparrow-1.9.1-manifest.txt
wget https://github.com/sparrowwallet/sparrow/releases/download/1.9.1/sparrow-1.9.1-manifest.txt.asc
curl https://keybase.io/craigraw/pgp_keys.asc | gpg --import
5. Now let's verify Sparrow Wallet with the following 2 commands:
gpg --verify sparrow-1.9.1-manifest.txt.asc
sha256sum --check sparrow-1.9.1-manifest.txt --ignore-missing
For the first command, you will see "This key is not certified with a trusted signature!". This means that PGP doesn't place a high level of trust in the key downloaded from the internet. For this step to be considered successful, look for Good signature.
If the output of the second command does not end with OK, do not proceed. If it ends in OK you are good to go.
 6. Unzip the downloaded version in the Persistent folder:
tar -xvzf sparrow-1.9.1-x86_64.tar.gz -C ~/Persistent
7. Create a Desktop icon to more easily access the application:
mkdir -p /live/persistence/TailsData_unlocked/dotfiles/.local/share/applications/
nano /live/persistence/TailsData_unlocked/dotfiles/.local/share/applications/sparrow.desktop
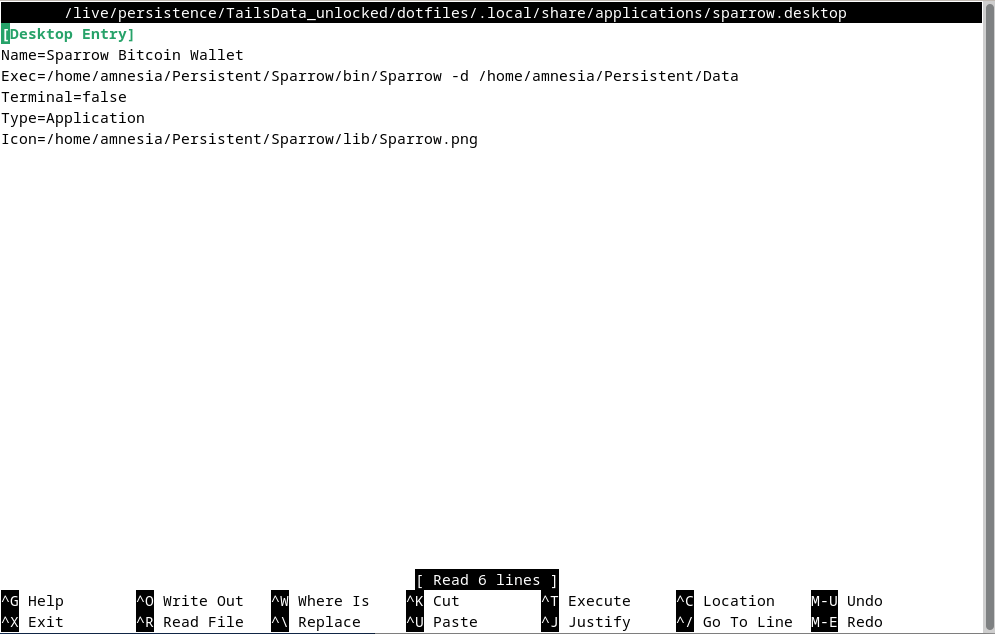
8. Paste the following in nano, then press CTRL + X, followed by Y to save:
[Desktop Entry]
Name=Sparrow Bitcoin Wallet
Exec=/home/amnesia/Persistent/Sparrow/bin/Sparrow -d /home/amnesia/Persistent/Data
Terminal=false
Type=Application
Icon=/home/amnesia/Persistent/Sparrow/lib/Sparrow.png
6. Unzip the downloaded version in the Persistent folder:
tar -xvzf sparrow-1.9.1-x86_64.tar.gz -C ~/Persistent
7. Create a Desktop icon to more easily access the application:
mkdir -p /live/persistence/TailsData_unlocked/dotfiles/.local/share/applications/
nano /live/persistence/TailsData_unlocked/dotfiles/.local/share/applications/sparrow.desktop
8. Paste the following in nano, then press CTRL + X, followed by Y to save:
[Desktop Entry]
Name=Sparrow Bitcoin Wallet
Exec=/home/amnesia/Persistent/Sparrow/bin/Sparrow -d /home/amnesia/Persistent/Data
Terminal=false
Type=Application
Icon=/home/amnesia/Persistent/Sparrow/lib/Sparrow.png
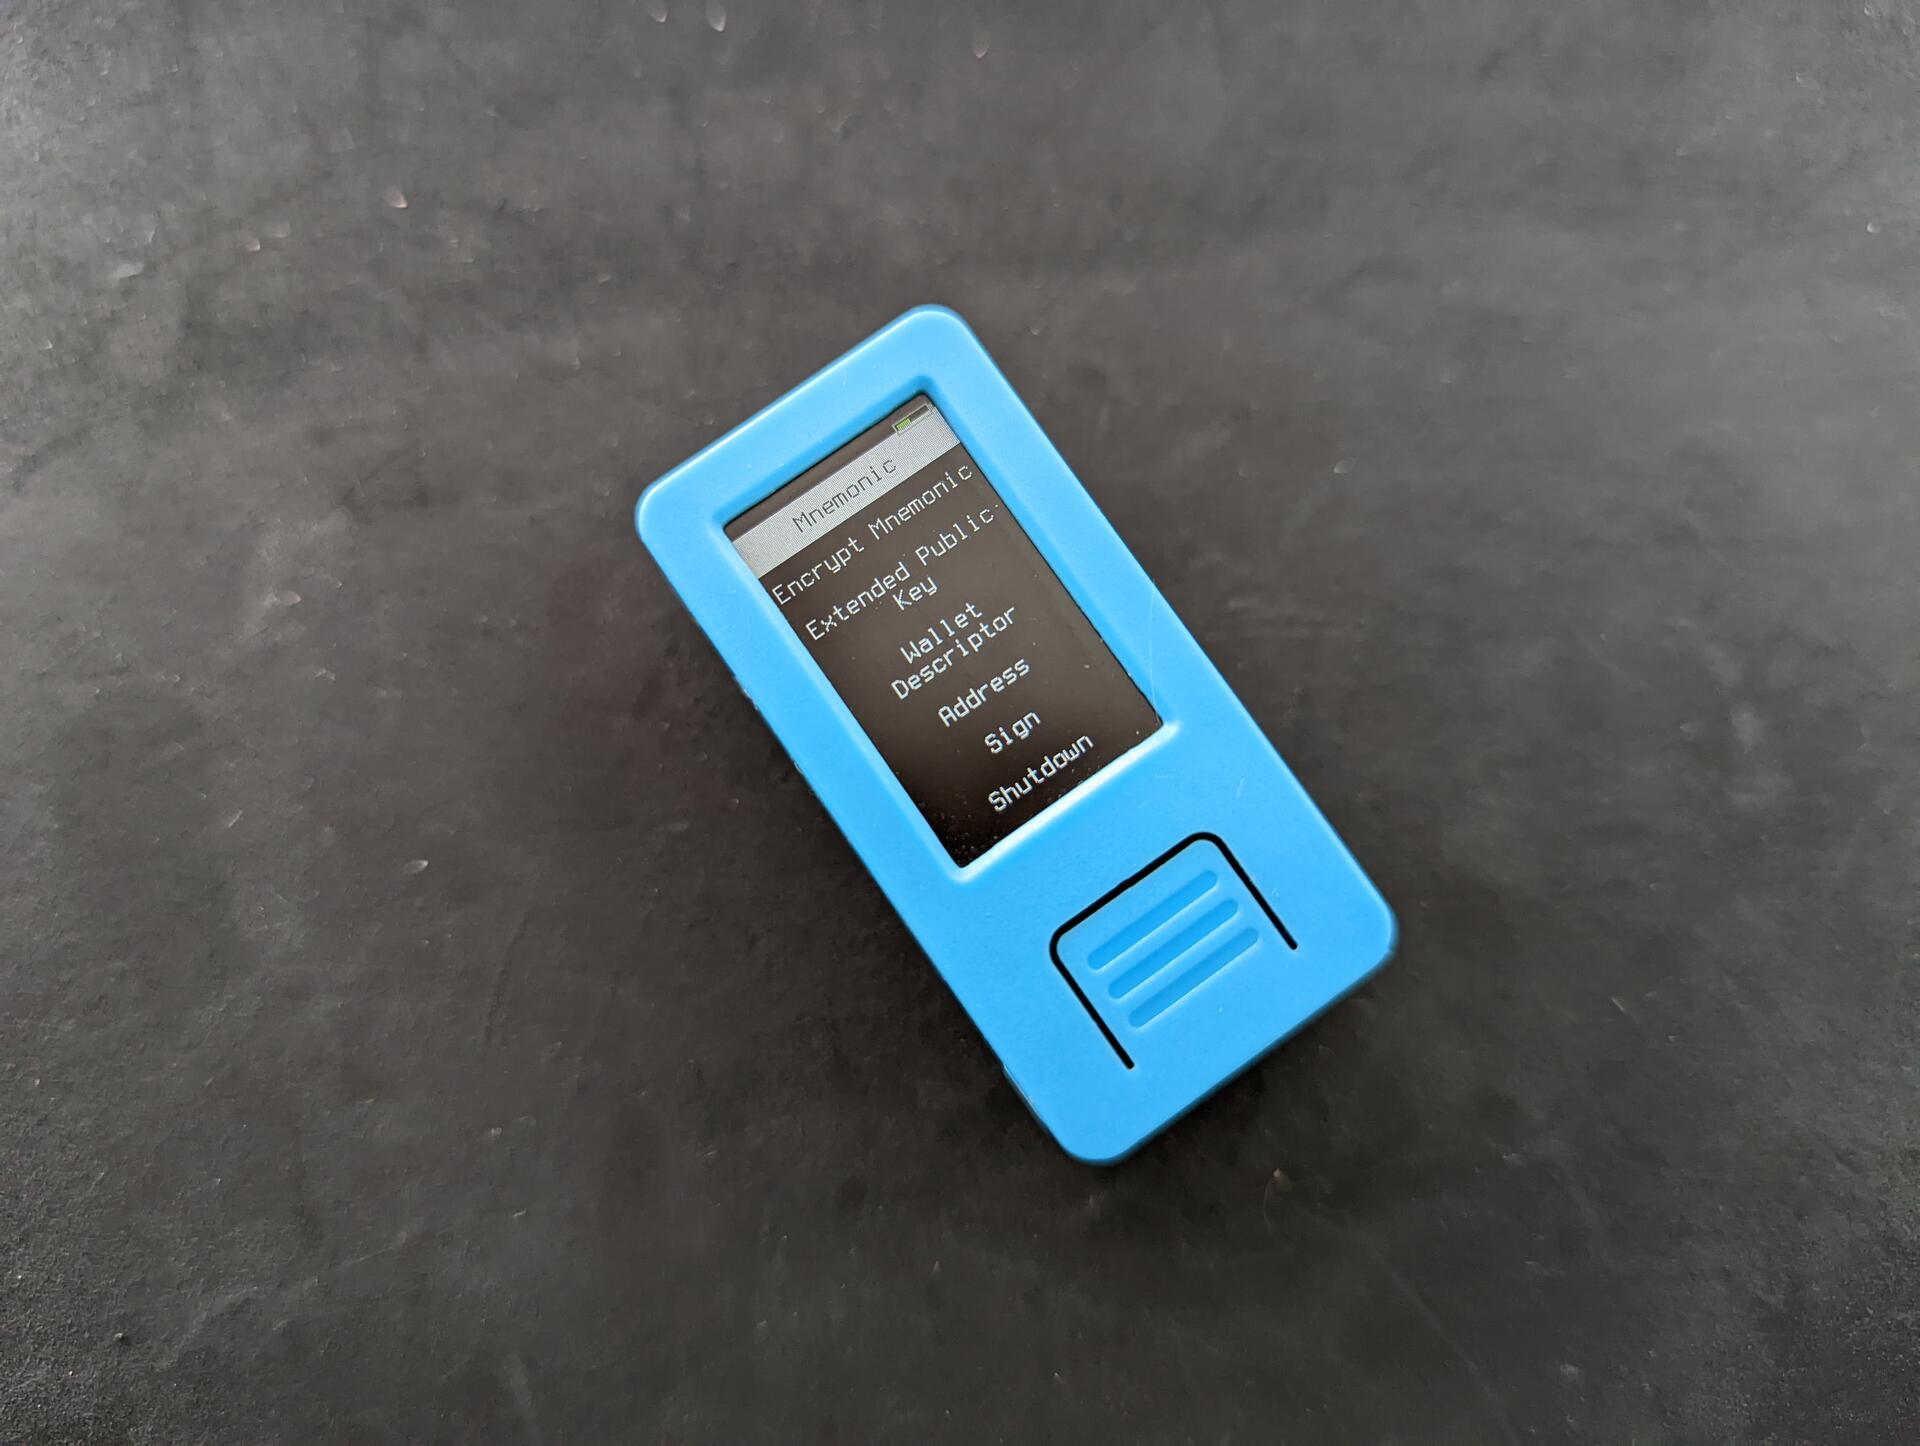
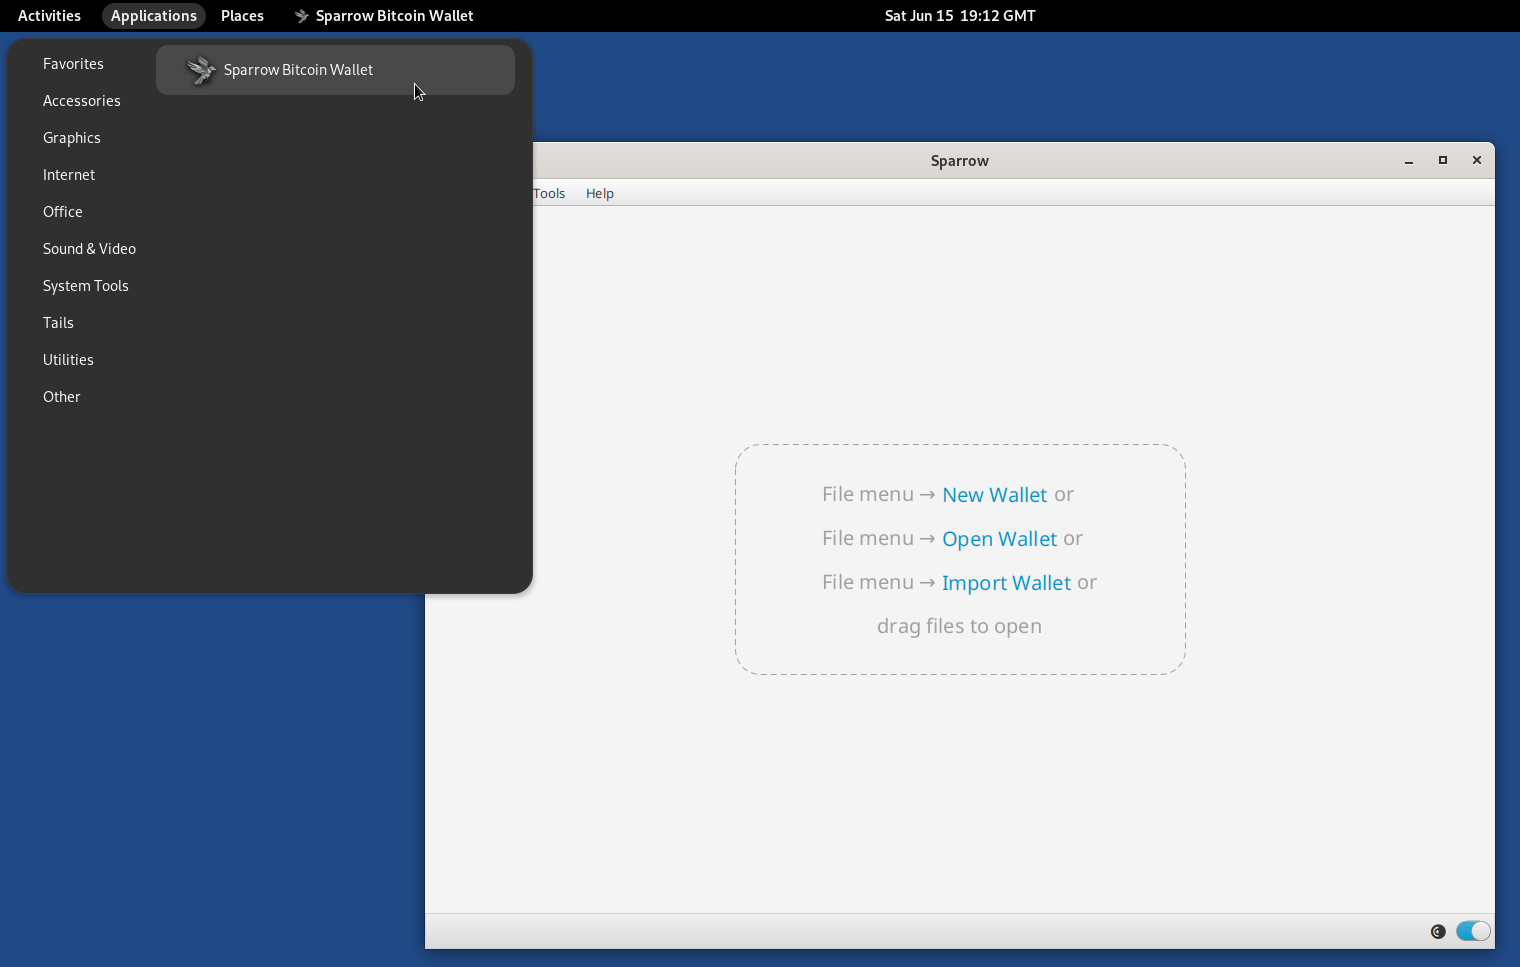
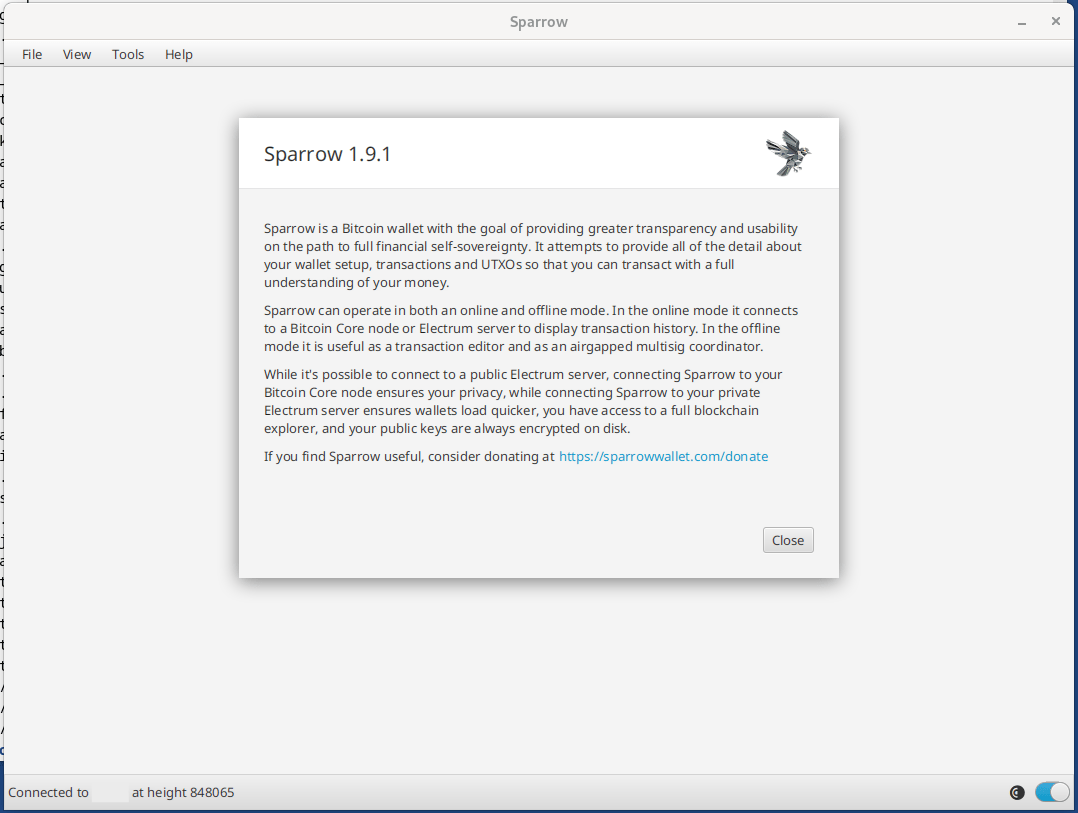
 And there you have it 💪, restart and then you can open Sparrow Wallet from the navigation bar in Applications > Other > Sparrow Bitcoin Wallet
or from from the terminal:
~/Persistent/Sparrow/bin/Sparrow -d ~/Persistent/Data
And there you have it 💪, restart and then you can open Sparrow Wallet from the navigation bar in Applications > Other > Sparrow Bitcoin Wallet
or from from the terminal:
~/Persistent/Sparrow/bin/Sparrow -d ~/Persistent/Data
 Sparrow is now installed in ~/Persistent/Sparrow/ and your Sparrow confs and wallets will be in ~/Persistent/Data allowing for easy updates.
To update Sparrow when a new version is available, just repeat steps 3 to 6 replacing the version number.
If you liked, also check out the post below and for more bitcoin resources
View quoted note →
Sparrow is now installed in ~/Persistent/Sparrow/ and your Sparrow confs and wallets will be in ~/Persistent/Data allowing for easy updates.
To update Sparrow when a new version is available, just repeat steps 3 to 6 replacing the version number.
If you liked, also check out the post below and for more bitcoin resources
View quoted note →
If you don't already have Tails, the instructions on their website are straightforward, just select the OS you will be using to create the USB stick and follow them.
Tails - Install Tails
GitHub
Release 2.4.0 · sparrowwallet/sparrow
Add BIP375 PSBT fields and verify DLEQ proofs for hardware wallet support when sending to silent payments addresses
Format display of addresses in ...
4. Next, let's download the manifest files to verify the software:
wget https://github.com/sparrowwallet/sparrow/releases/download/1.9.1/sparrow-1.9.1-manifest.txt
wget https://github.com/sparrowwallet/sparrow/releases/download/1.9.1/sparrow-1.9.1-manifest.txt.asc
curl https://keybase.io/craigraw/pgp_keys.asc | gpg --import
5. Now let's verify Sparrow Wallet with the following 2 commands:
gpg --verify sparrow-1.9.1-manifest.txt.asc
sha256sum --check sparrow-1.9.1-manifest.txt --ignore-missing
For the first command, you will see "This key is not certified with a trusted signature!". This means that PGP doesn't place a high level of trust in the key downloaded from the internet. For this step to be considered successful, look for Good signature.
If the output of the second command does not end with OK, do not proceed. If it ends in OK you are good to go.
6. Unzip the downloaded version in the Persistent folder:
tar -xvzf sparrow-1.9.1-x86_64.tar.gz -C ~/Persistent
7. Create a Desktop icon to more easily access the application:
mkdir -p /live/persistence/TailsData_unlocked/dotfiles/.local/share/applications/
nano /live/persistence/TailsData_unlocked/dotfiles/.local/share/applications/sparrow.desktop
8. Paste the following in nano, then press CTRL + X, followed by Y to save:
[Desktop Entry]
Name=Sparrow Bitcoin Wallet
Exec=/home/amnesia/Persistent/Sparrow/bin/Sparrow -d /home/amnesia/Persistent/Data
Terminal=false
Type=Application
Icon=/home/amnesia/Persistent/Sparrow/lib/Sparrow.png
And there you have it 💪, restart and then you can open Sparrow Wallet from the navigation bar in Applications > Other > Sparrow Bitcoin Wallet
or from from the terminal:
~/Persistent/Sparrow/bin/Sparrow -d ~/Persistent/Data
Sparrow is now installed in ~/Persistent/Sparrow/ and your Sparrow confs and wallets will be in ~/Persistent/Data allowing for easy updates.
To update Sparrow when a new version is available, just repeat steps 3 to 6 replacing the version number.
If you liked, also check out the post below and Everything Bitcoin | svrgnty.com
Bitcoin for financial sovereignty
Gm
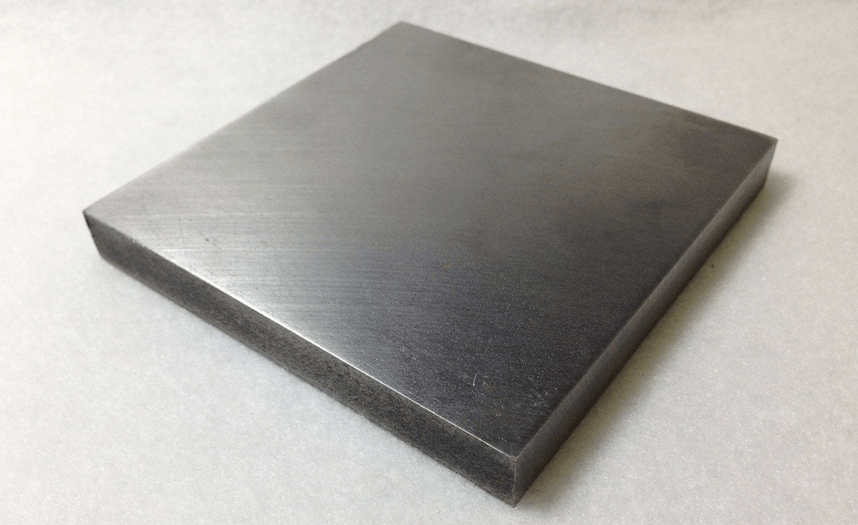
It's crucial to secure your #bitcoin seeds on metal. Putting your seed to metal ensures durability and longevity, protecting it from physical damage, fire, and water, and safeguarding your bitcoin.
Here are some best practices and tips on how to do that:
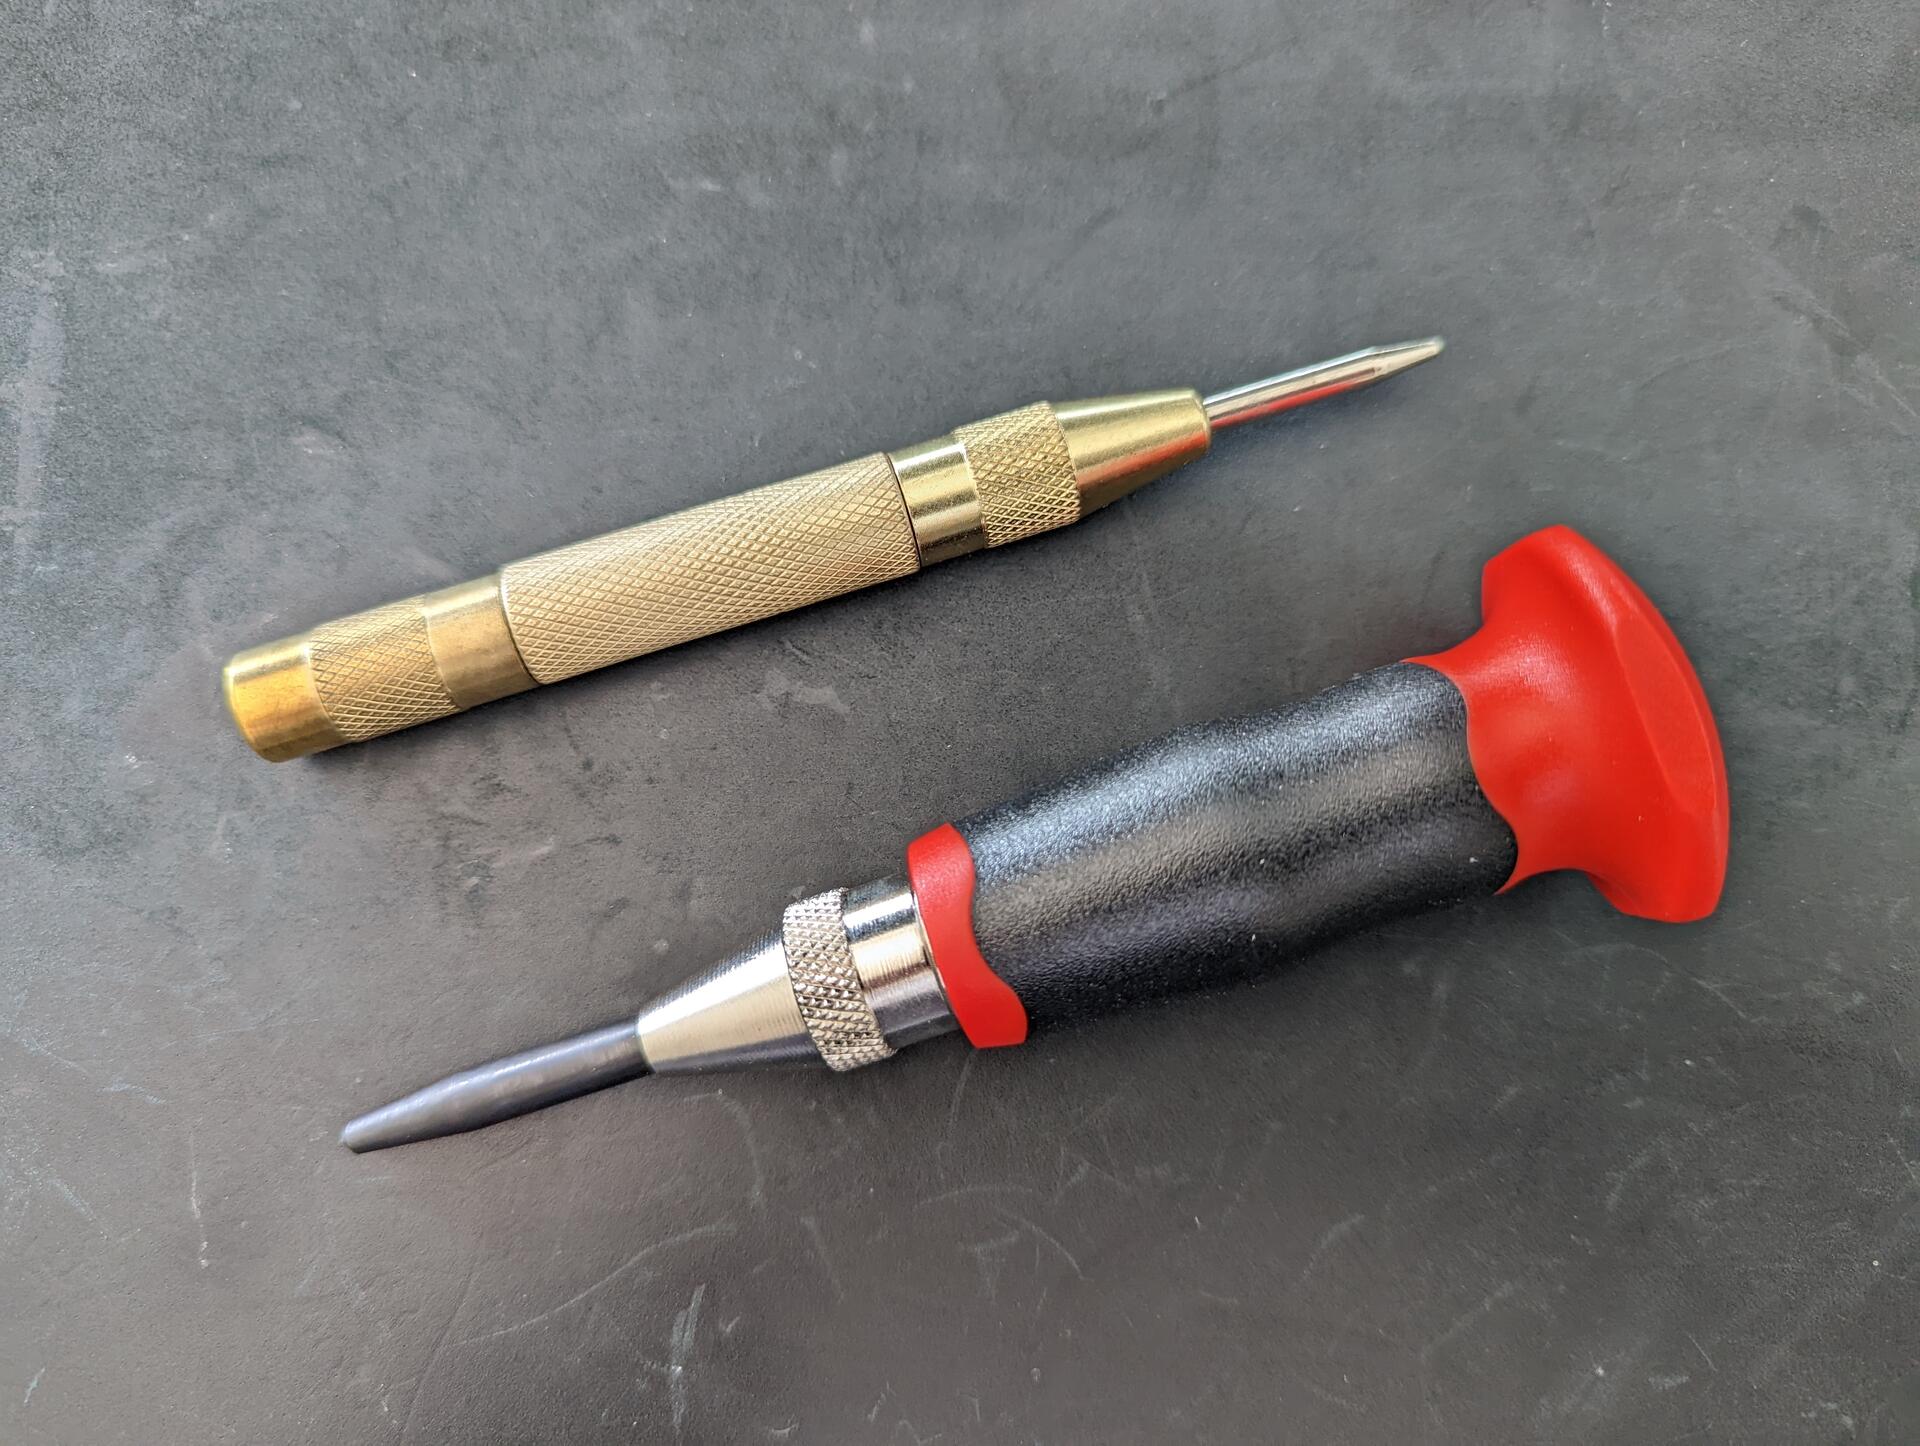
 While there are many types of storage methods, I recommend a single center punched, stamped, or etched metal plate per seed. Center punched is the easiest with an automatic center punch. If you are making several plates, an automatic center punch with a palm rest will help.
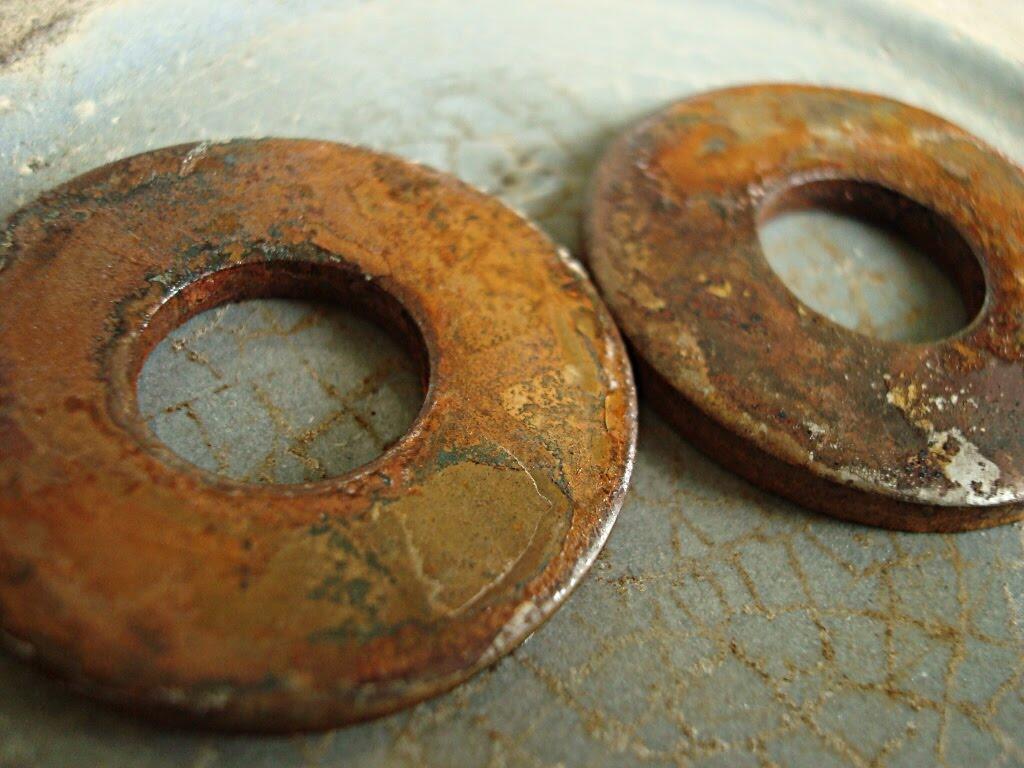
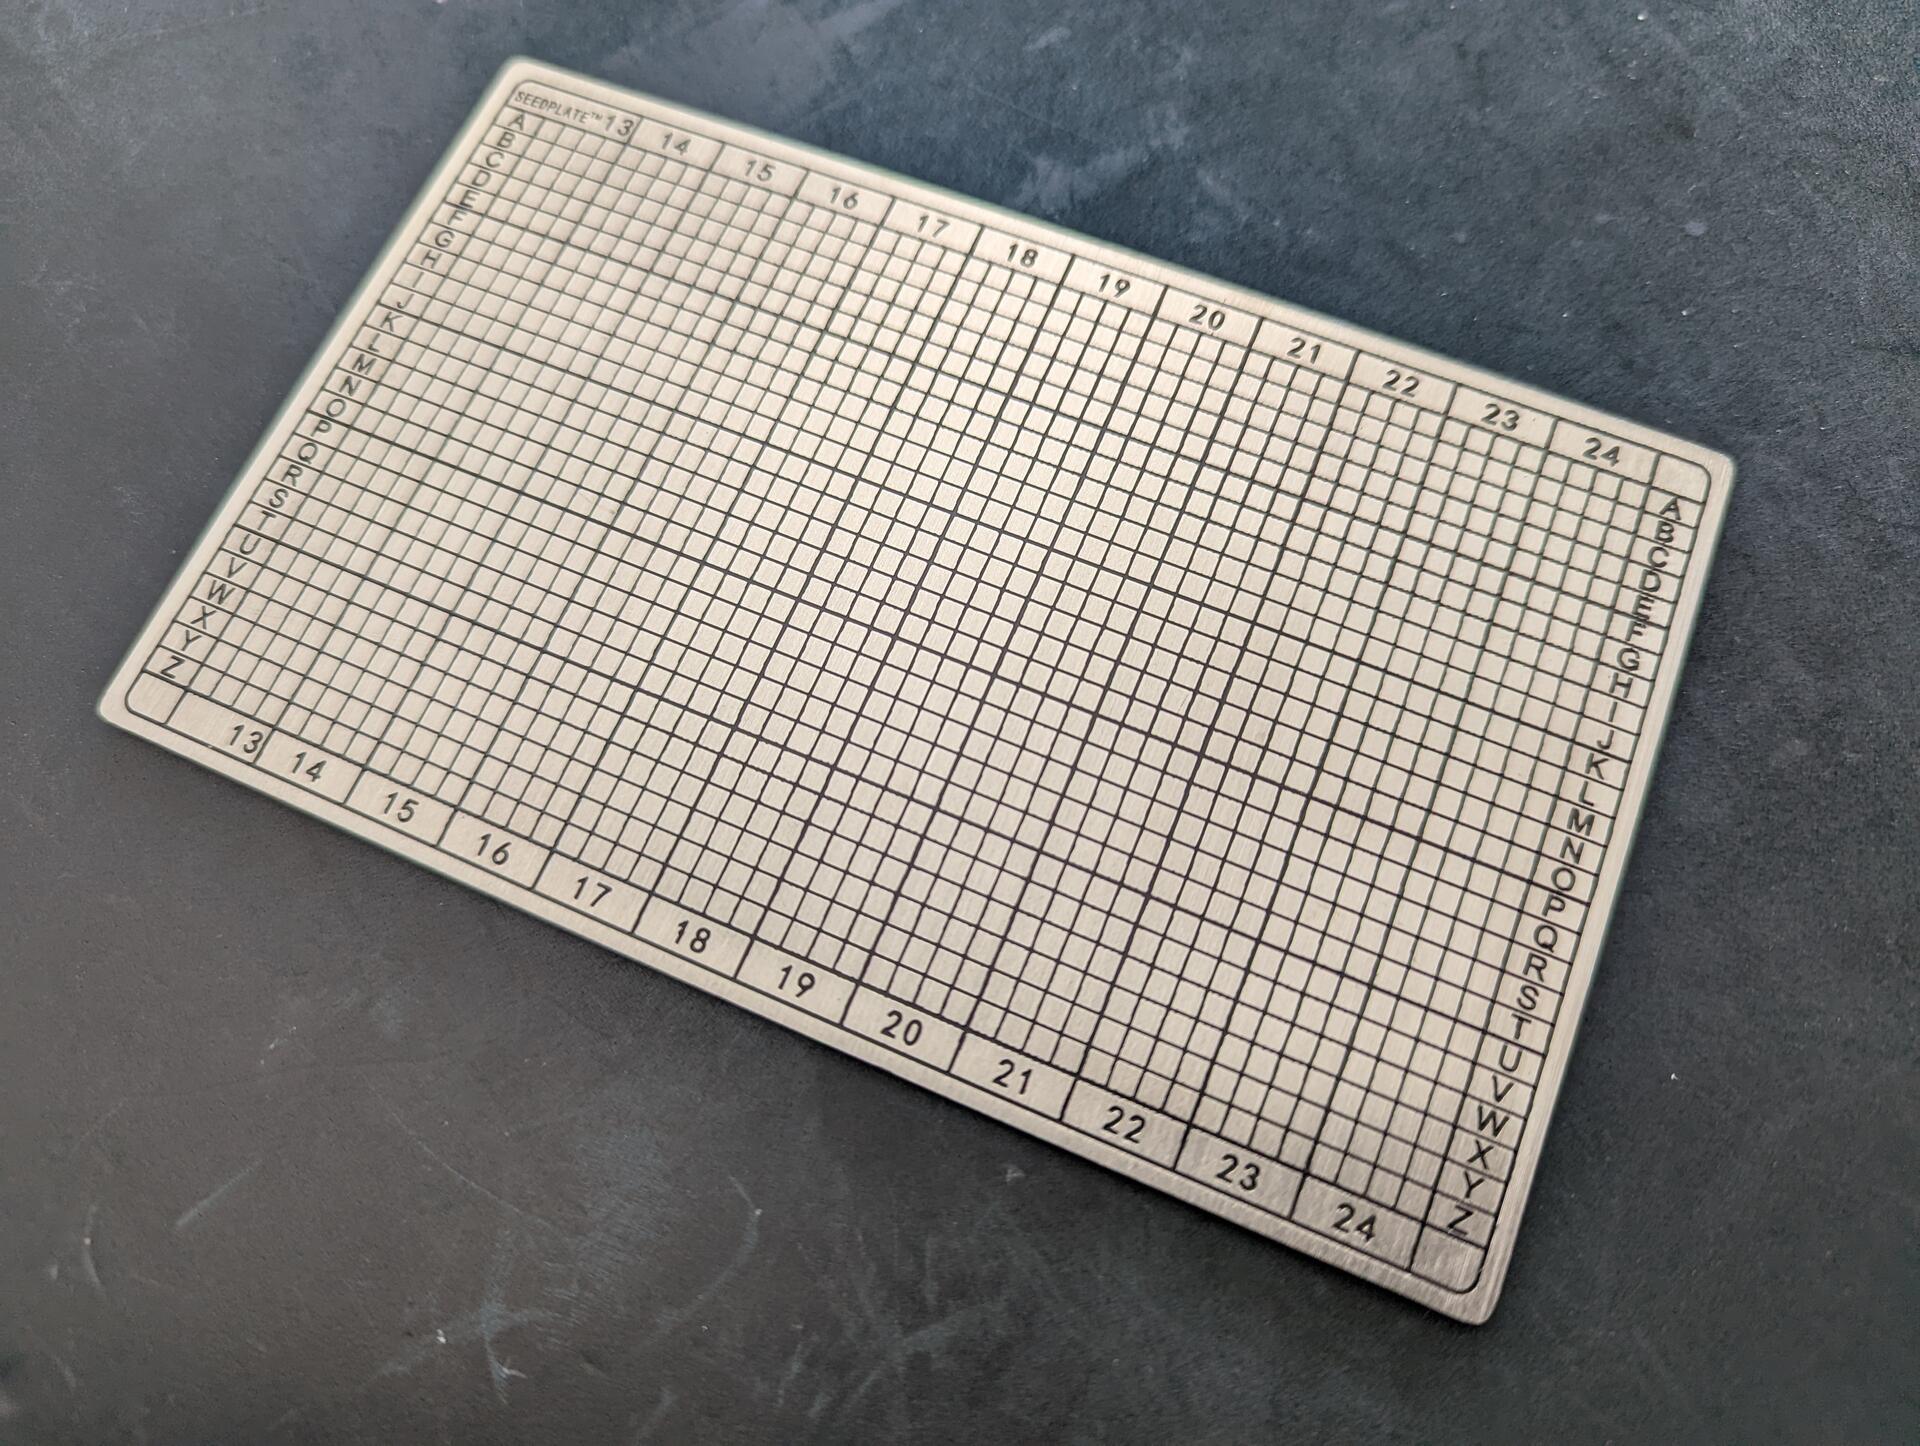 When selecting a seed plate, ensure it is a high quality metal, at a minimum 304 stainless steel or better marine-grade 316L stainless steel. Titanium is also good. Lower grade metals have a higher chance of corrosion or melting.
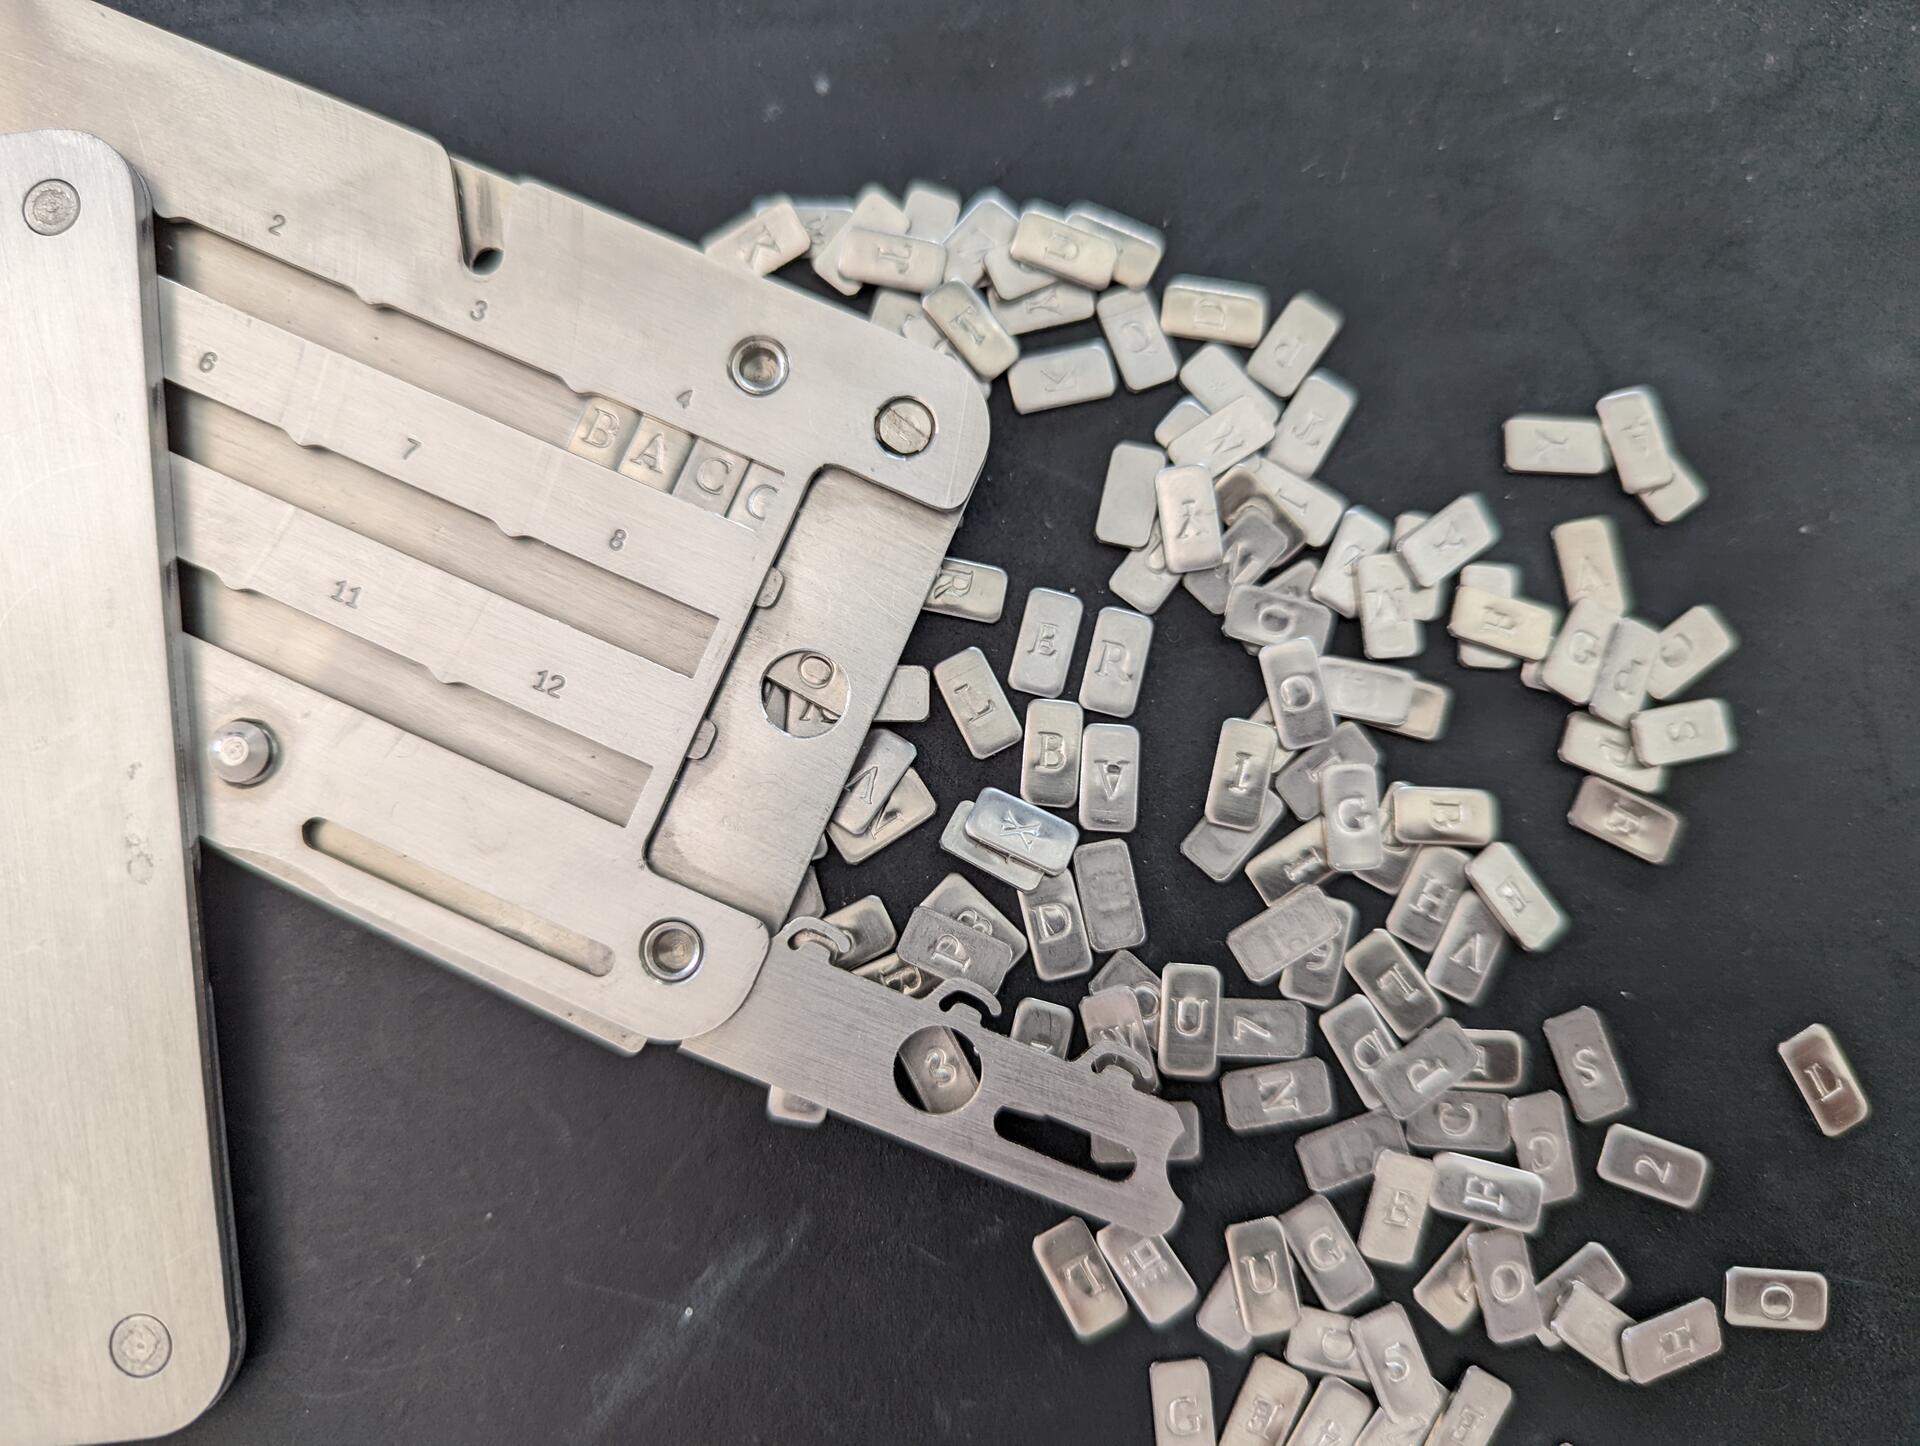
 Use one plate per seed. When multiple parts are involved, there is a higher chance of permanent loss of data if the parts are separated.
 Unless you have a particular threat model, avoid seed plates that are too small. Smaller ones become more difficult to read and mark, not just for you but also loved ones (think inheritance). They are also easier to lose. Stick to a standard size.
Before handling your seed, check your environment. Make sure cameras are turned off, phones are put away and covered, window shutters closed, etc. This may seem extreme, and chances may be low, but you are protecting your wealth. Last think you want is compromising your seed.
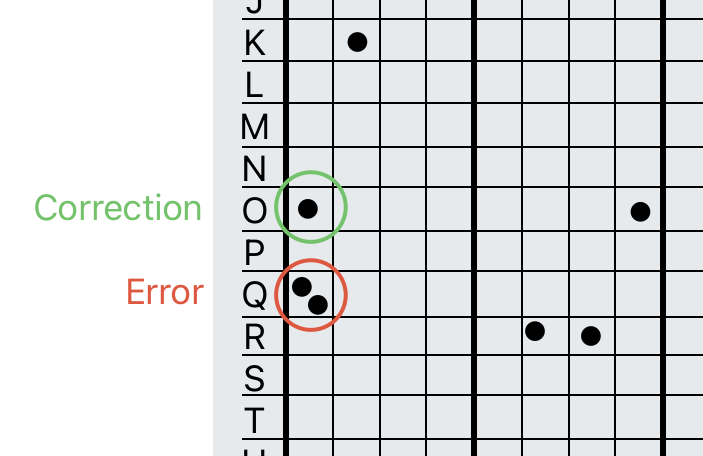
Use a permanent marker to mark the seed before using the center punch or etching. Verify you have not made mistakes before marking. When marking, it is easy to mark the wrong letters for example mixing O and Q or N and M.
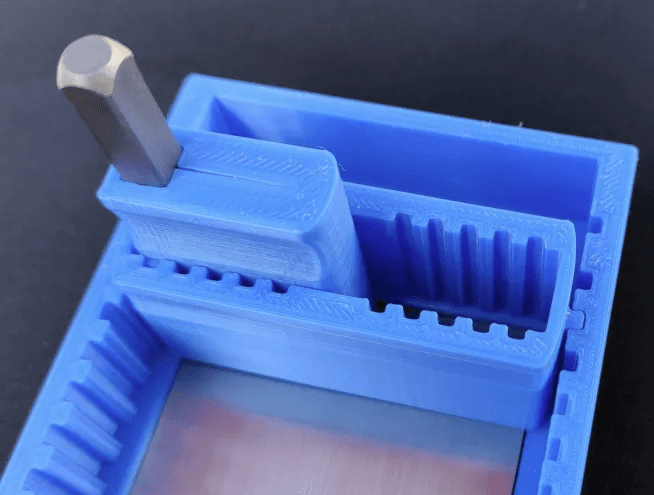
When you start the marking, stamping, etching, ensure marks do not remain on the surface, revealing data about your seed. Preferably, use an anvil. With the automatic center punch you don't need more than 2 punches per letter.
Unless you have a particular threat model, avoid seed plates that are too small. Smaller ones become more difficult to read and mark, not just for you but also loved ones (think inheritance). They are also easier to lose. Stick to a standard size.
Before handling your seed, check your environment. Make sure cameras are turned off, phones are put away and covered, window shutters closed, etc. This may seem extreme, and chances may be low, but you are protecting your wealth. Last think you want is compromising your seed.
Use a permanent marker to mark the seed before using the center punch or etching. Verify you have not made mistakes before marking. When marking, it is easy to mark the wrong letters for example mixing O and Q or N and M.
When you start the marking, stamping, etching, ensure marks do not remain on the surface, revealing data about your seed. Preferably, use an anvil. With the automatic center punch you don't need more than 2 punches per letter.
 If you use a center punch with a hammer, start easy, chances are you will hit too hard a warp/mark the other side of the plate too. Stamping or etching can be also trickier to mark and read, though e.g. a physical guide can help position the stamp.
 If you make an error, don't worry. Define a method and document it with your recovery process, e.g. add a second mark to the error square and then mark the correct square.
 Side note: you should have your recovery process documented. I would recommend having a copy in encrypted notes and a printed copy with your inheritance plan. (see privacyguides.org)
For a hardware device, if new, I would recommend deleting the seed from the device, re-importing it using the seed plate, and ensuring the fingerprint matches. This acts as an additional verification that the seed is correct. Never scan or type your seed into an online device.
Label your seed. Don't use the fingerprint, it can reveal the use of a passphrase. Don't use the device name, the device can change e.g. upgrading to latest model.
If the seed was initially on paper before putting it to metal, burn the paper, there should be no traces of the seed left.
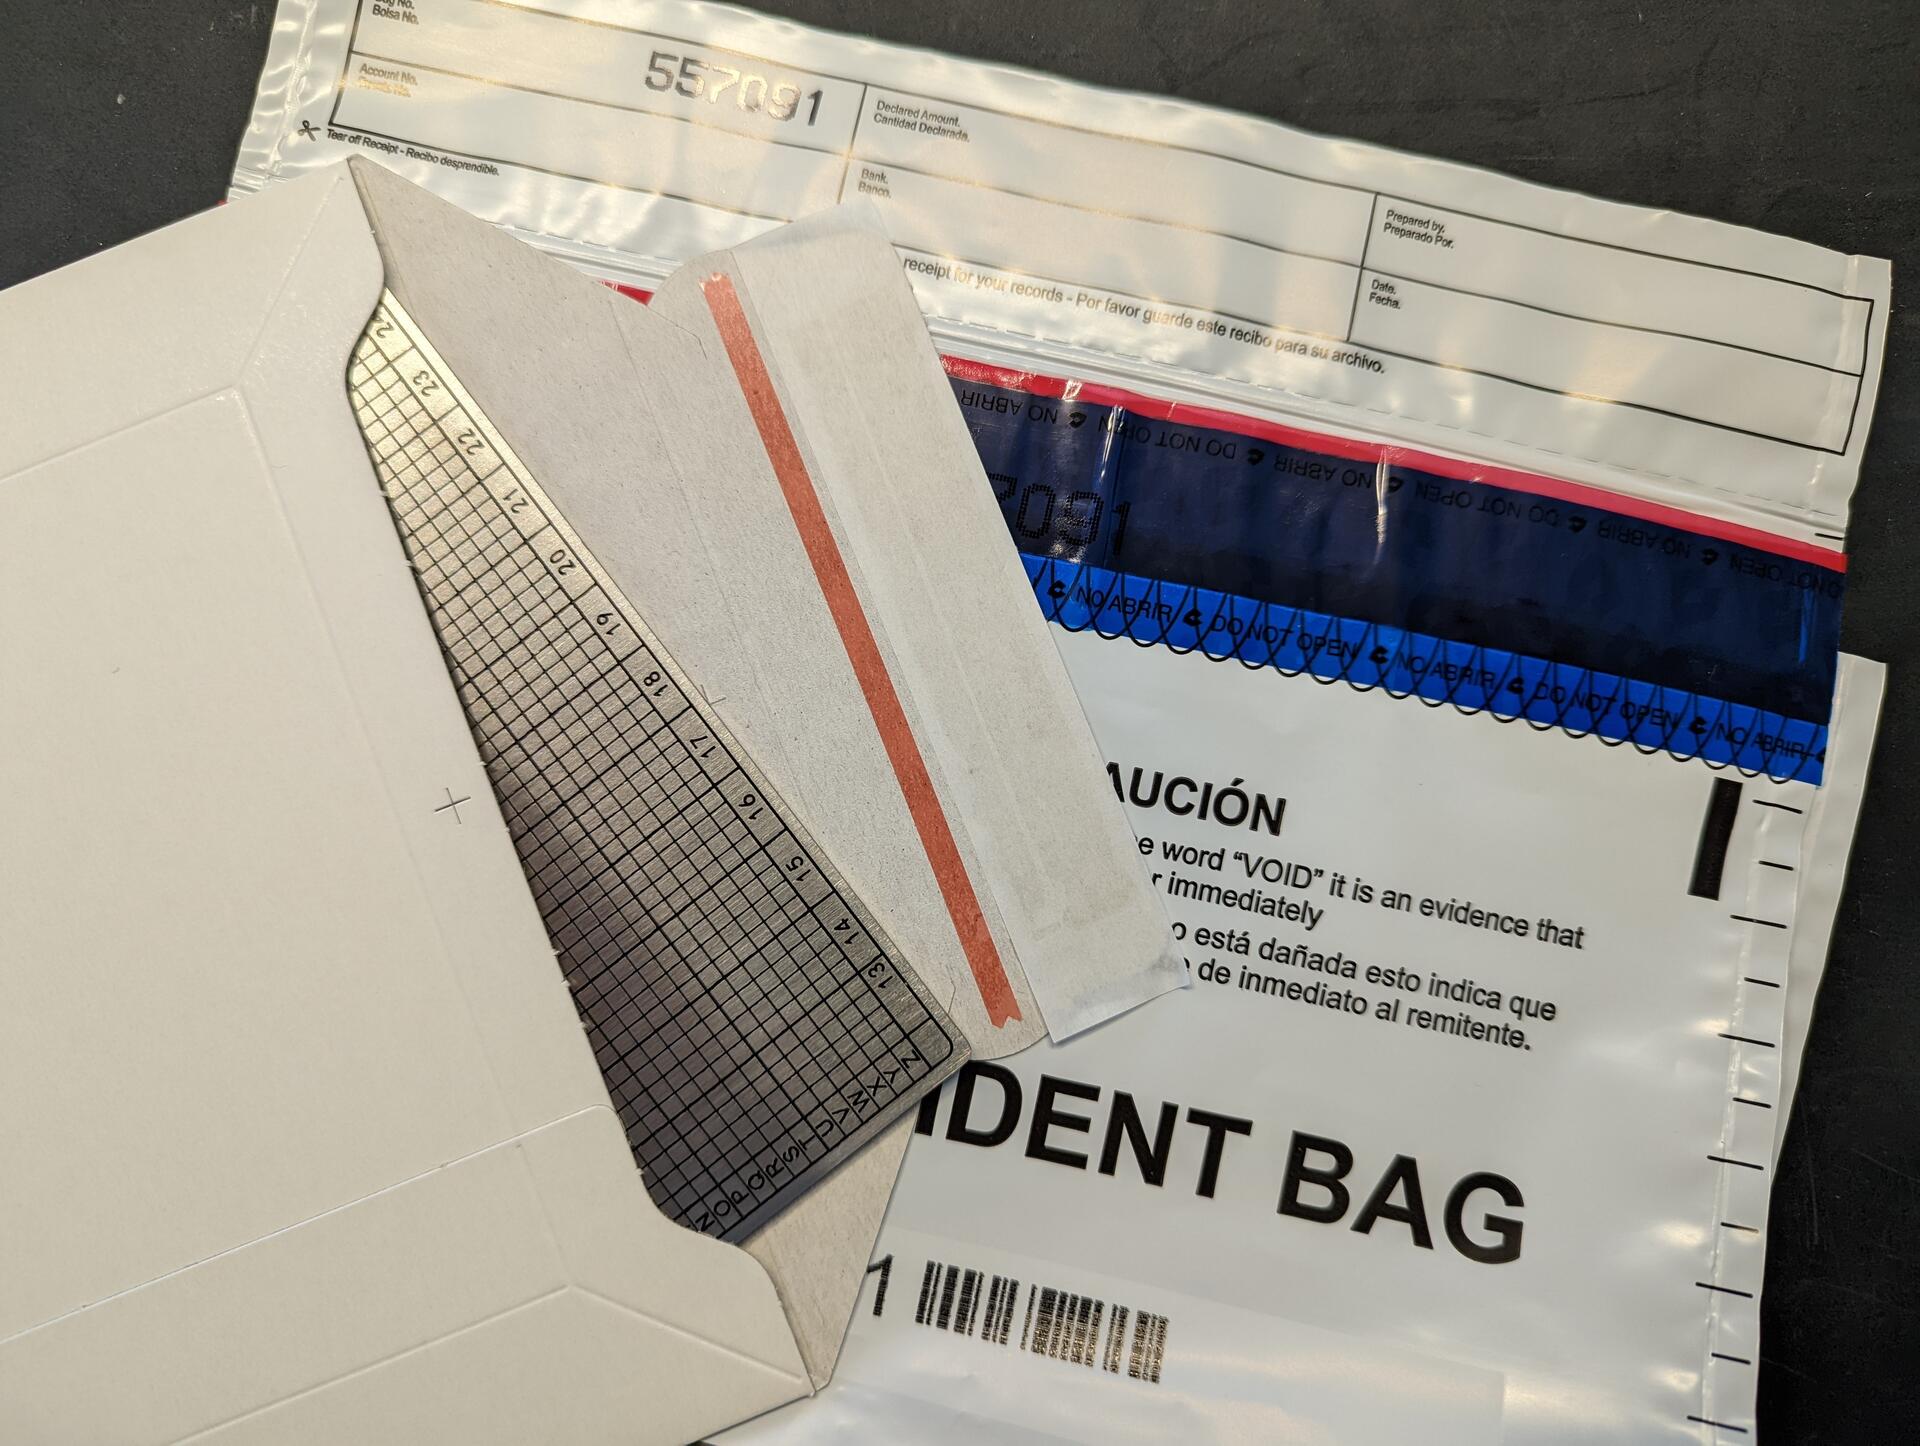
Place the seed in solid cardboard envelope. This so the surface and markings do not reveal any information. Then place it in a tamper evident bag.
Side note: you should have your recovery process documented. I would recommend having a copy in encrypted notes and a printed copy with your inheritance plan. (see privacyguides.org)
For a hardware device, if new, I would recommend deleting the seed from the device, re-importing it using the seed plate, and ensuring the fingerprint matches. This acts as an additional verification that the seed is correct. Never scan or type your seed into an online device.
Label your seed. Don't use the fingerprint, it can reveal the use of a passphrase. Don't use the device name, the device can change e.g. upgrading to latest model.
If the seed was initially on paper before putting it to metal, burn the paper, there should be no traces of the seed left.
Place the seed in solid cardboard envelope. This so the surface and markings do not reveal any information. Then place it in a tamper evident bag.
 Store the your seed plates in a secure location. This will get a post of it's own at some point 😅.
Conduct regular health checks. Every quarter inspect the tamper evident bag for signs of tampering, and every year unpack the plate and check it for signs of damage or corrosion, then repack (remember environment)
Any other best practices? Comment below 😀
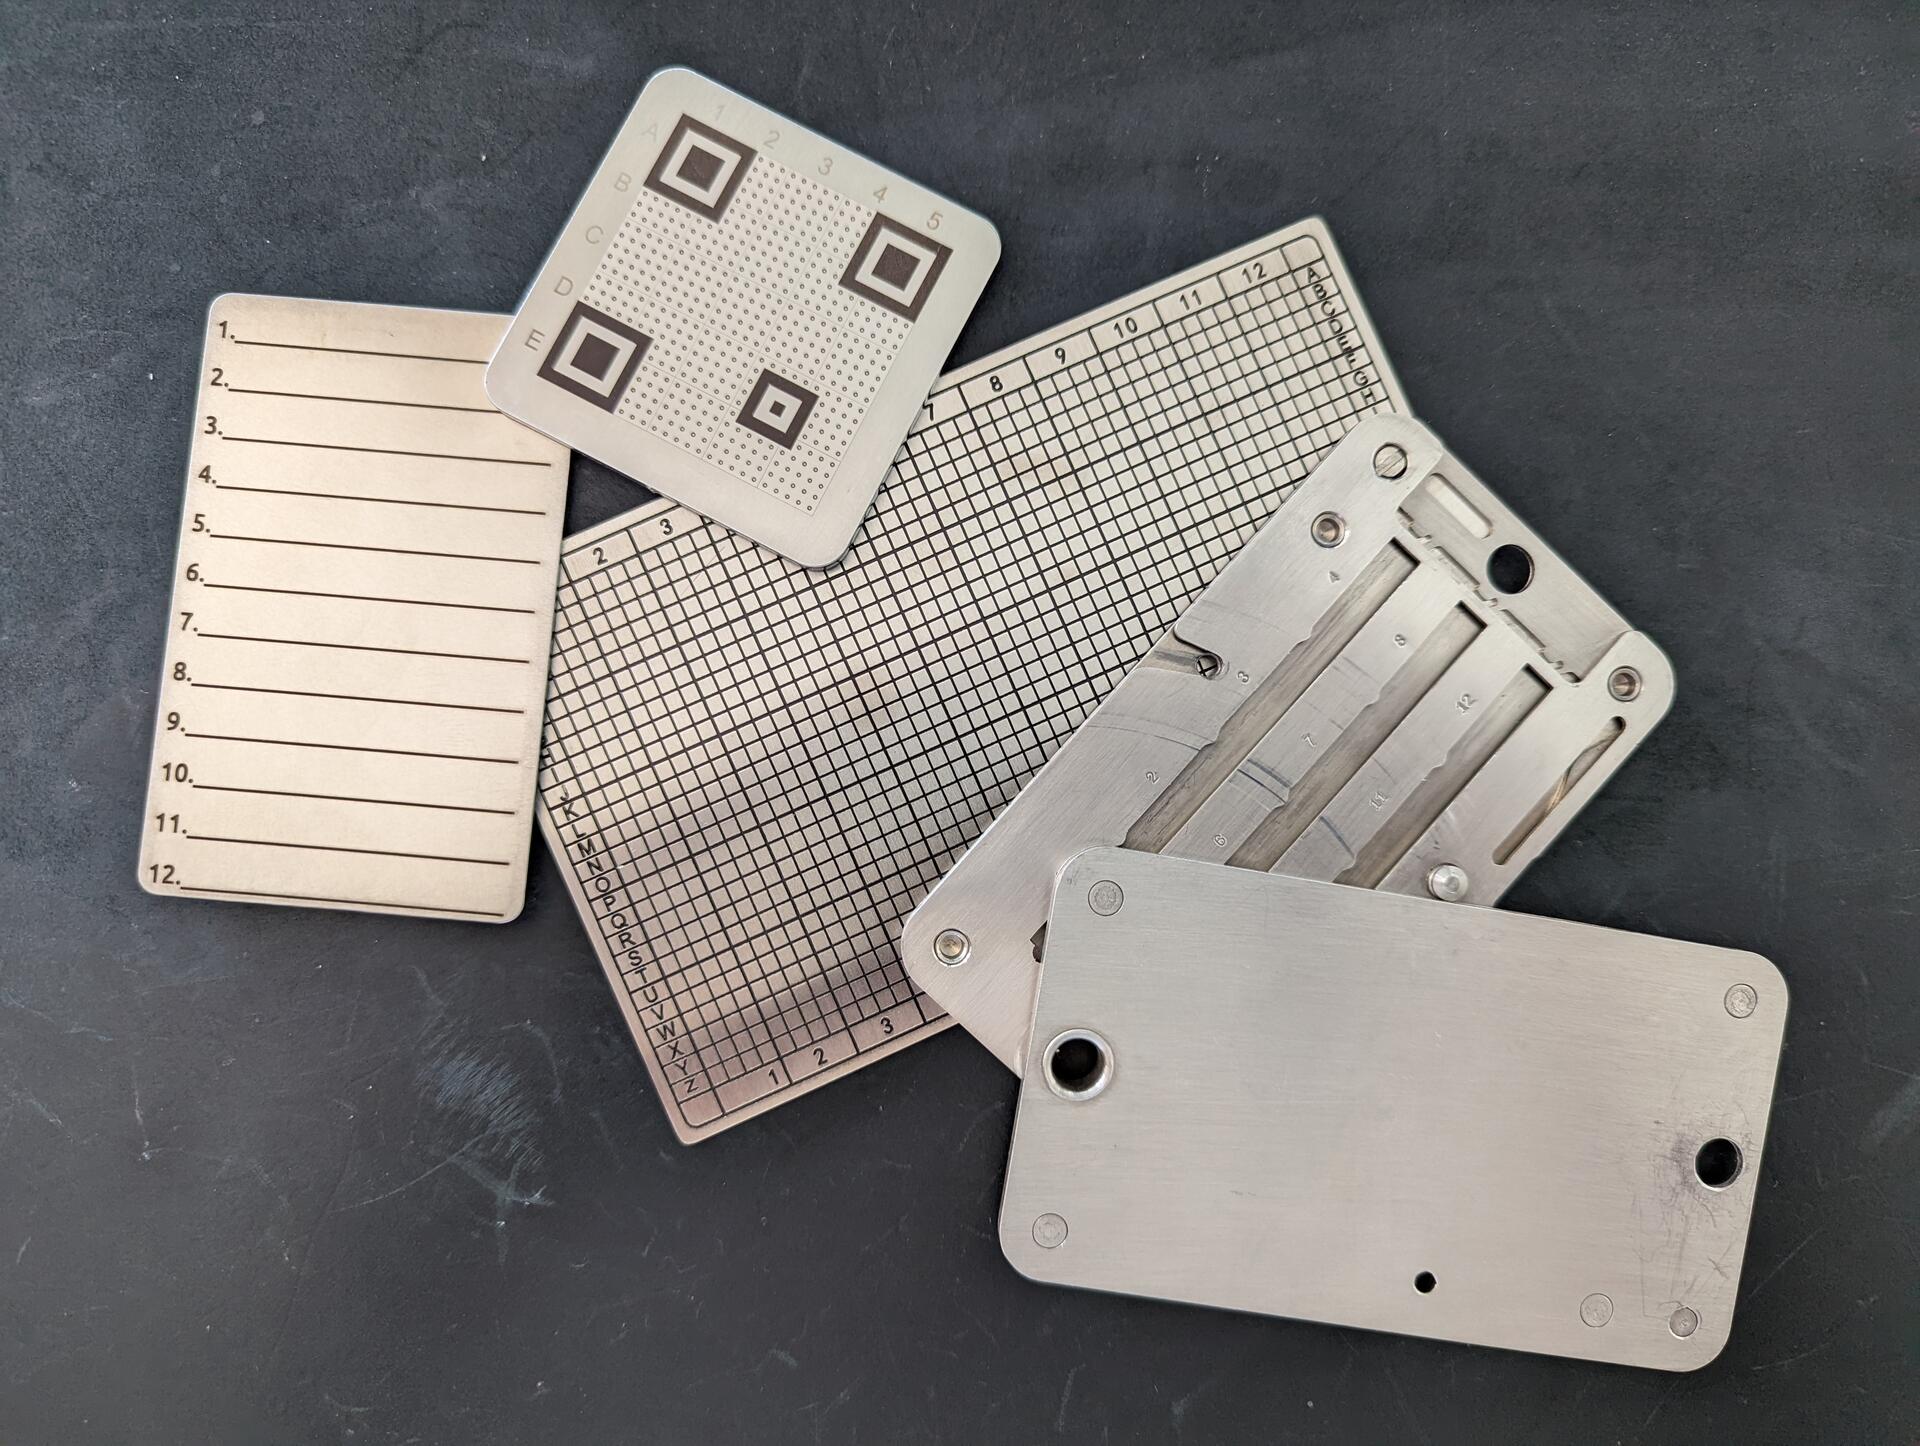
These are the seed plates I recommend
Store the your seed plates in a secure location. This will get a post of it's own at some point 😅.
Conduct regular health checks. Every quarter inspect the tamper evident bag for signs of tampering, and every year unpack the plate and check it for signs of damage or corrosion, then repack (remember environment)
Any other best practices? Comment below 😀
These are the seed plates I recommend
While there are many types of storage methods, I recommend a single center punched, stamped, or etched metal plate per seed. Center punched is the easiest with an automatic center punch. If you are making several plates, an automatic center punch with a palm rest will help.
Use one plate per seed. When multiple parts are involved, there is a higher chance of permanent loss of data if the parts are separated.
Unless you have a particular threat model, avoid seed plates that are too small. Smaller ones become more difficult to read and mark, not just for you but also loved ones (think inheritance). They are also easier to lose. Stick to a standard size.
Before handling your seed, check your environment. Make sure cameras are turned off, phones are put away and covered, window shutters closed, etc. This may seem extreme, and chances may be low, but you are protecting your wealth. Last think you want is compromising your seed.
Use a permanent marker to mark the seed before using the center punch or etching. Verify you have not made mistakes before marking. When marking, it is easy to mark the wrong letters for example mixing O and Q or N and M.
When you start the marking, stamping, etching, ensure marks do not remain on the surface, revealing data about your seed. Preferably, use an anvil. With the automatic center punch you don't need more than 2 punches per letter.
If you use a center punch with a hammer, start easy, chances are you will hit too hard a warp/mark the other side of the plate too. Stamping or etching can be also trickier to mark and read, though e.g. a physical guide can help position the stamp.
If you make an error, don't worry. Define a method and document it with your recovery process, e.g. add a second mark to the error square and then mark the correct square.
Side note: you should have your recovery process documented. I would recommend having a copy in encrypted notes and a printed copy with your inheritance plan. (see privacyguides.org)
For a hardware device, if new, I would recommend deleting the seed from the device, re-importing it using the seed plate, and ensuring the fingerprint matches. This acts as an additional verification that the seed is correct. Never scan or type your seed into an online device.
Label your seed. Don't use the fingerprint, it can reveal the use of a passphrase. Don't use the device name, the device can change e.g. upgrading to latest model.
If the seed was initially on paper before putting it to metal, burn the paper, there should be no traces of the seed left.
Place the seed in solid cardboard envelope. This so the surface and markings do not reveal any information. Then place it in a tamper evident bag.
Store the your seed plates in a secure location. This will get a post of it's own at some point 😅.
Conduct regular health checks. Every quarter inspect the tamper evident bag for signs of tampering, and every year unpack the plate and check it for signs of damage or corrosion, then repack (remember environment)
Any other best practices? Comment below 😀
These are the seed plates I recommend Storage & Backup | Everything Bitcoin | svrgnty.com
Secure your seeds and hardware wallets.
Is there an open source sats / btc / fiat calculator out there? I find myself using https://www.kraken.com/learn/satoshi-to-usd-converter more often than I would like, but would prefer something preferably self-hosted
Who else should be included? #bitcoin

8/ Conclusion
👍 @npub1wu4a...3vw0 Coldcard Q, @npub16s4c...4p24 3 Pro, Krux, @npub1wu4a...3vw0 Tapsigner, I like them all
🫳 Trezor Safe 3 is good
👎 Bitkey will have it's user base but I wouldn't recommend it to you
If you enjoyed, repost and like 🙏, and checkout for the best #bitcoin resource
Everything Bitcoin | svrgnty.com
Bitcoin for financial sovereignty
7/ Bitkey
For this one, no "good, bad, and neutral", as I was never able to complete the setup. I'm not writing-off bitkey, they delivered a high quality product, and I hope with future releases to see improvements, but this one is just too locked down.
To start you can only use it with their app. Not the main issue, but would be nice if it could be used with other wallets. Next, at least for android, it requires Google Drive. If you are a Bitcoiner, or on that journey, you will inevitably become more privacy conscious.
Depending how deep you go down that path you may not have Google, which is my case. Not having Google, I just abandoned it. Maybe with future software releases they will support other cloud providers, but for now nothing. I will wait and see.
I'm sure it will appeal to some user base, but if you are on bitcoin twitter/x, you are not one of them, all other hardware wallets mentioned above are better options for you.
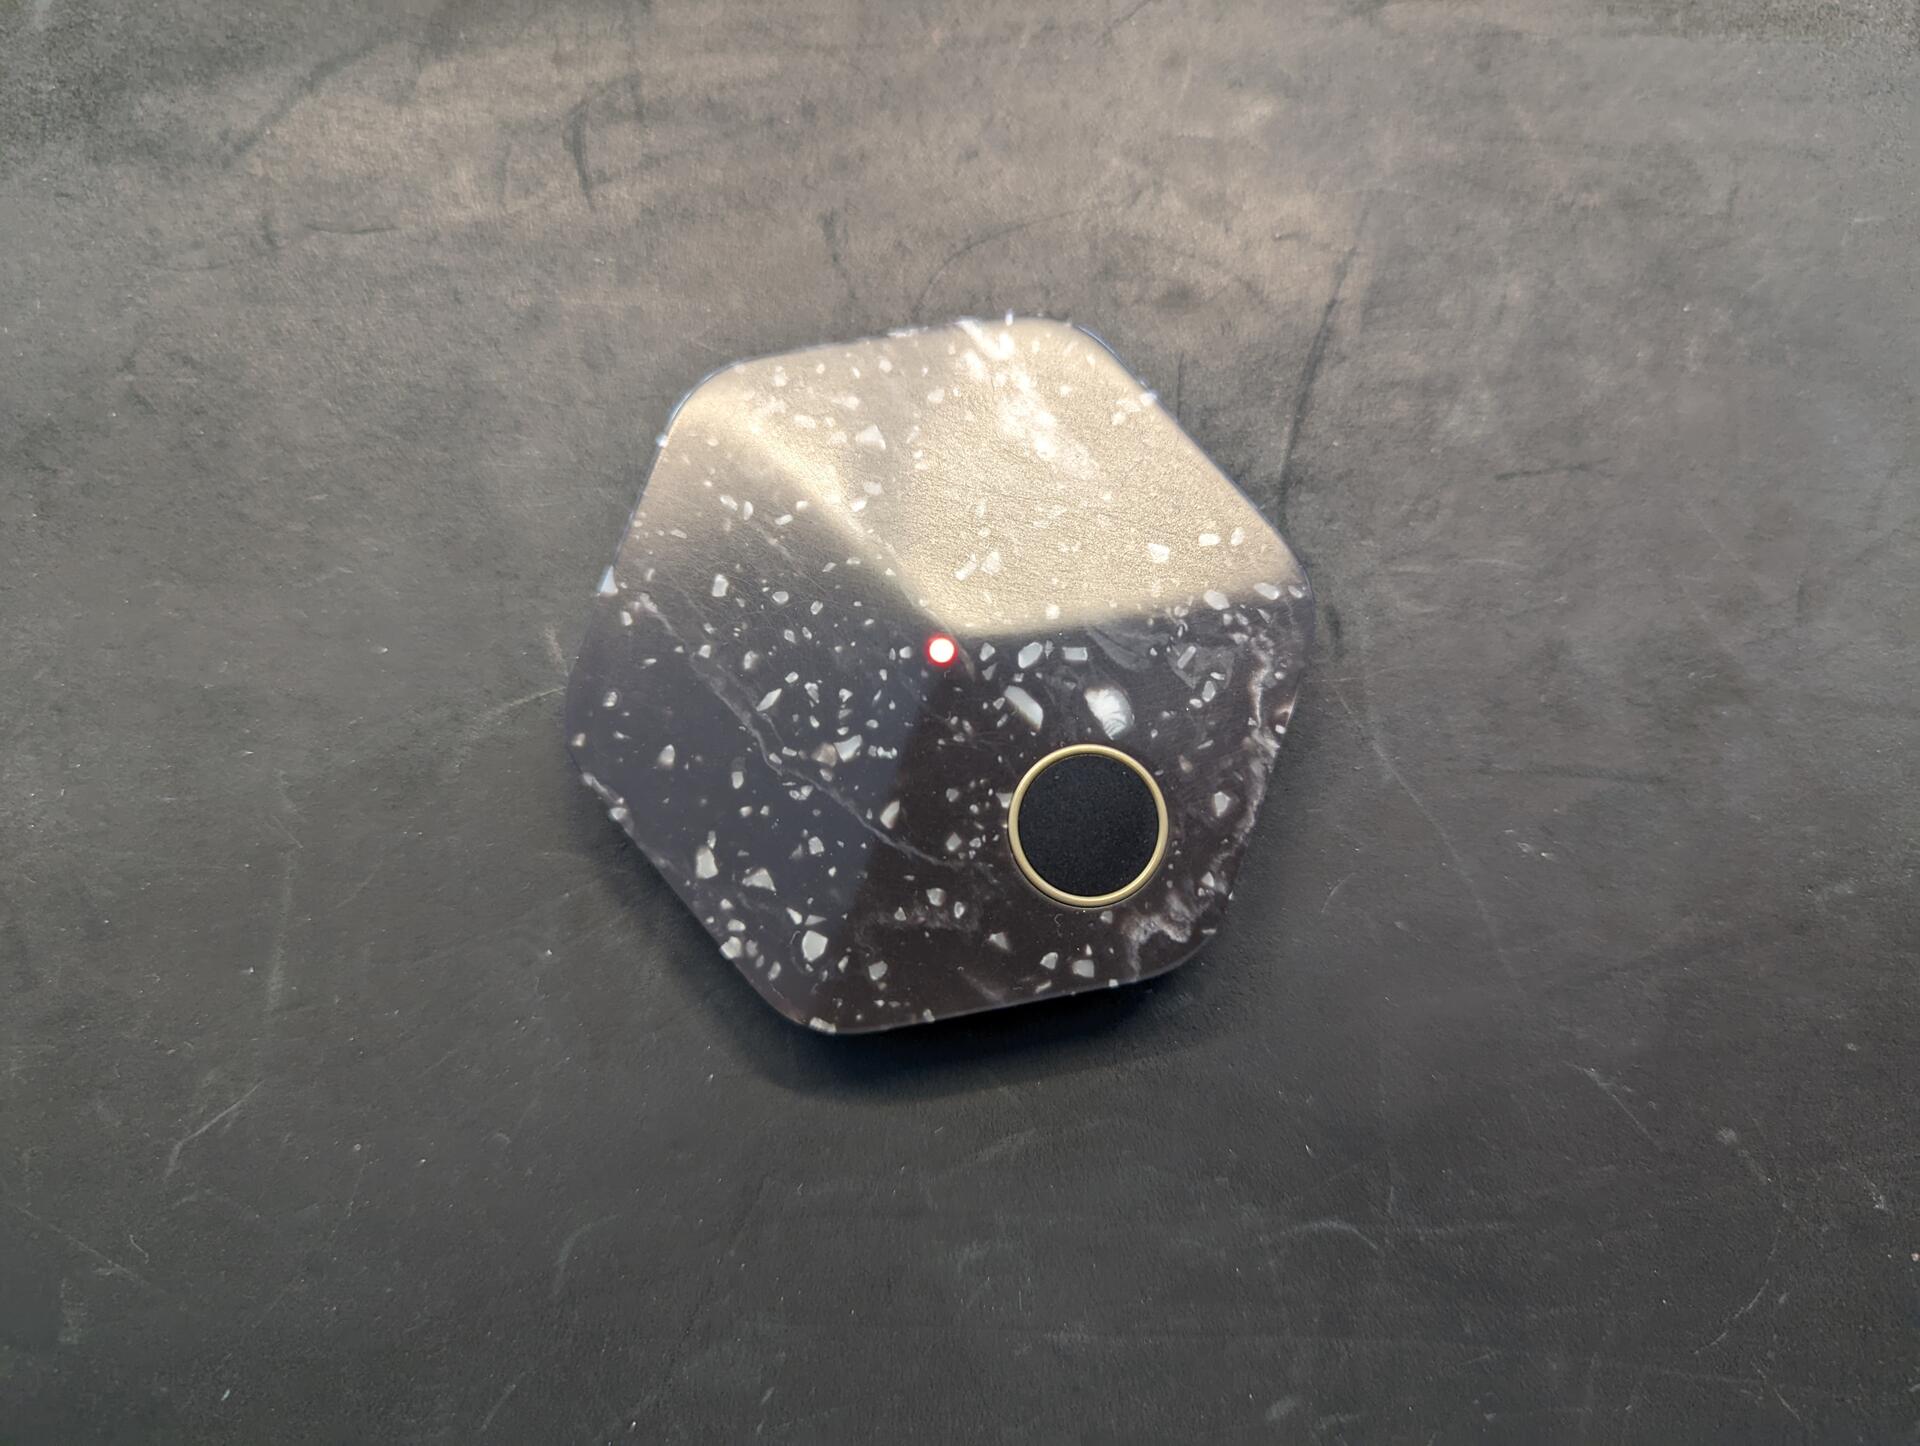
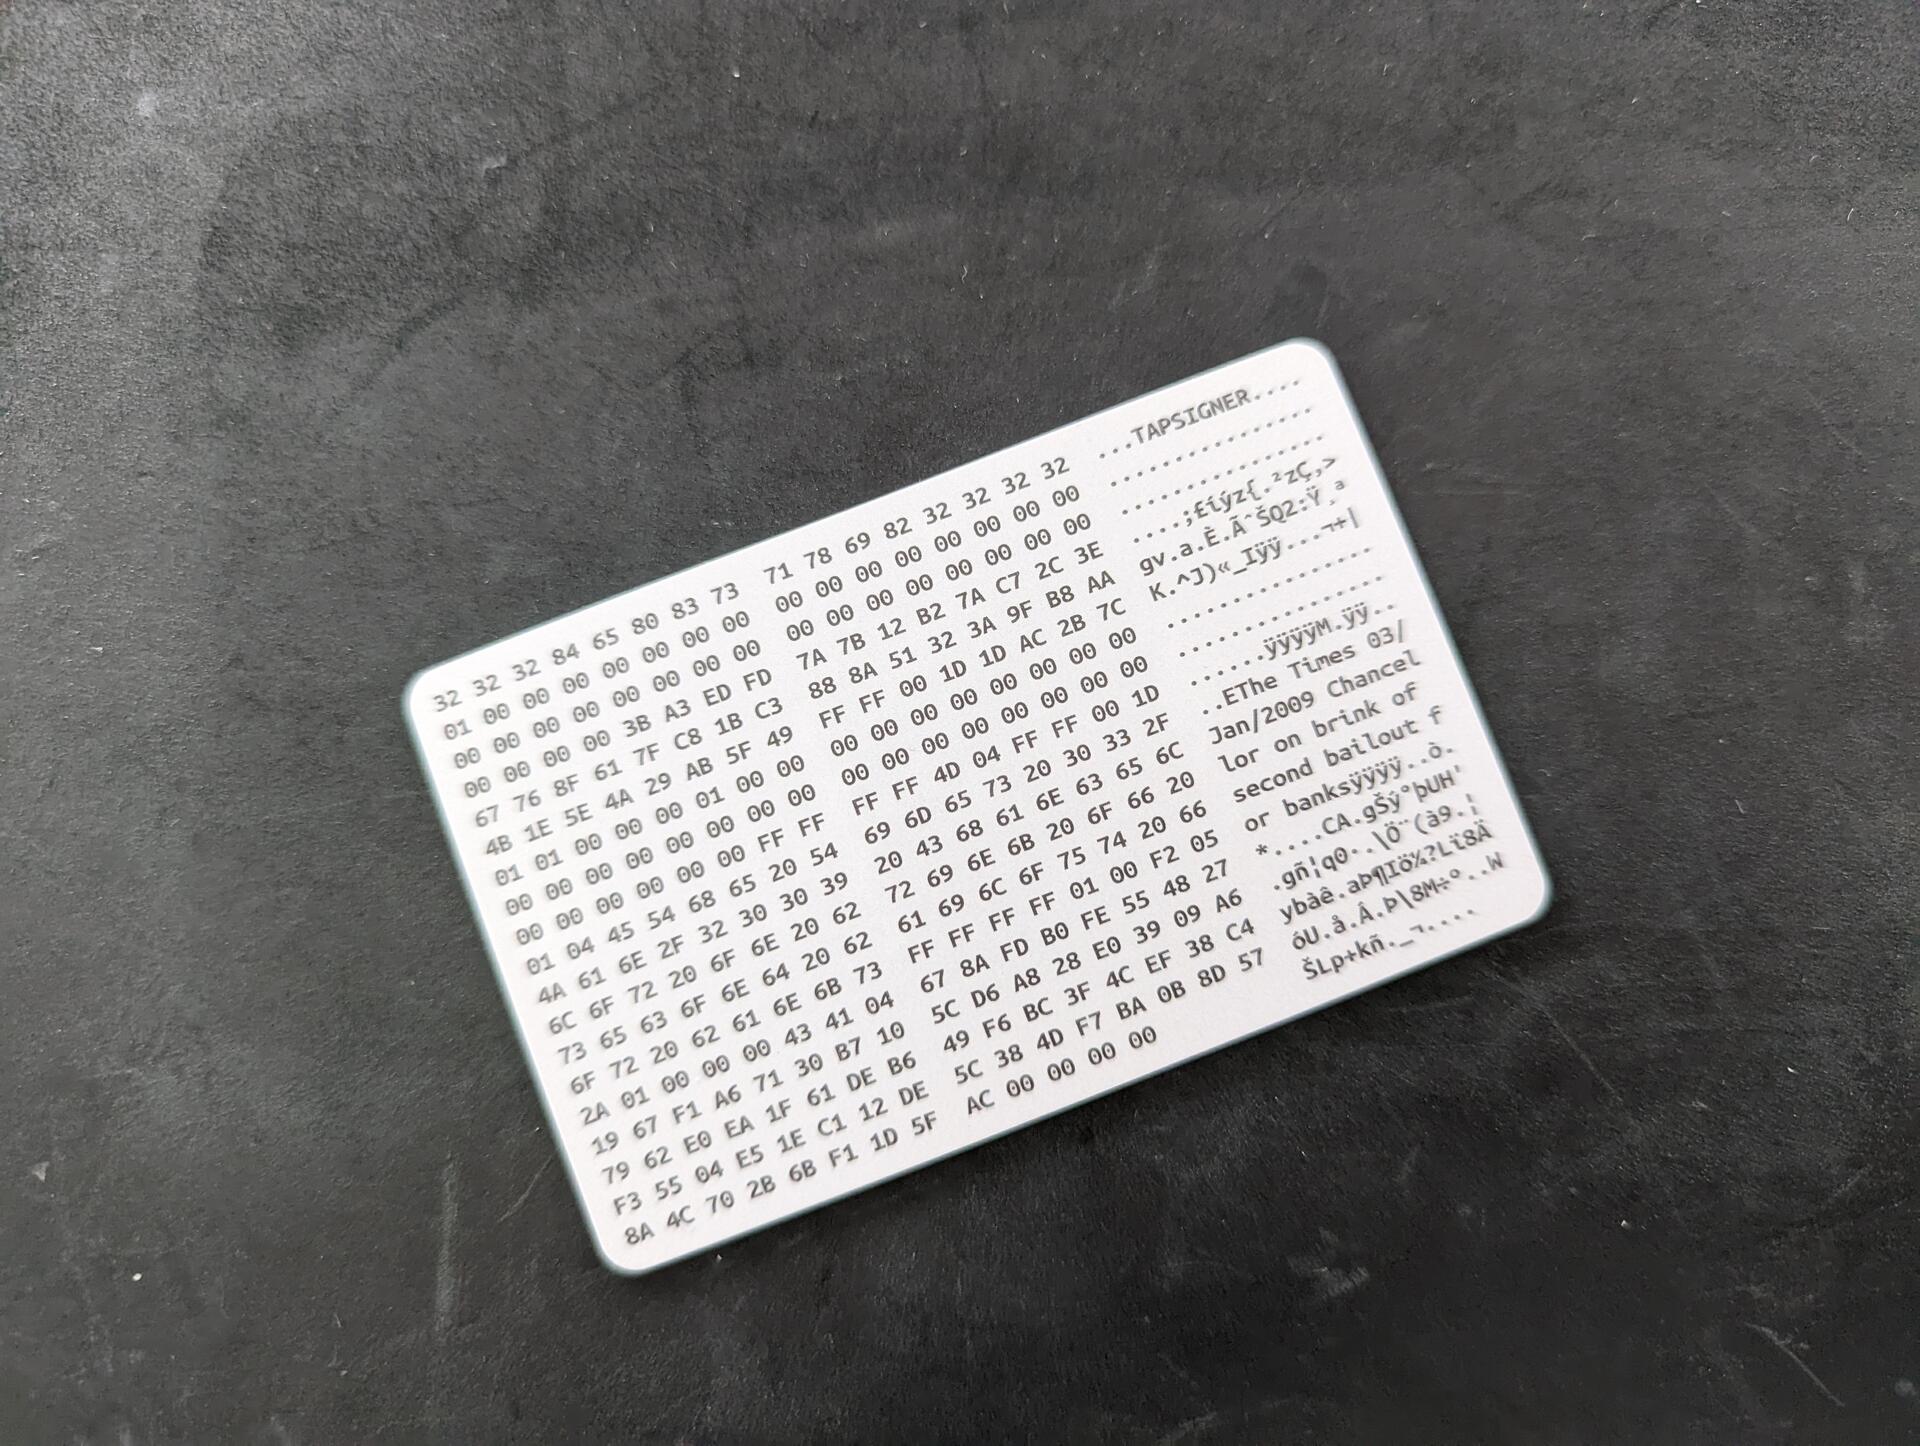
6/ Good @npub1wu4a...3vw0 Tapsigner
+ Convenience
+ Can carry in wallet
Neutral Coinkite Tapsigner
~ Backup password is printed on the back of the card and looks like it could rub off easily. Make a copy when you set it up!
~ Not a negative, but it has limited support. Some good wallets support it, but not all
Negative Coinkite Tapsigner
- Not a real hardware wallet, don't trust it's durability for cold storage
Overall
Great to use for e.g. signing on a mobile app, or as a signer in a multisig that is used regularly, for quick and easy signing
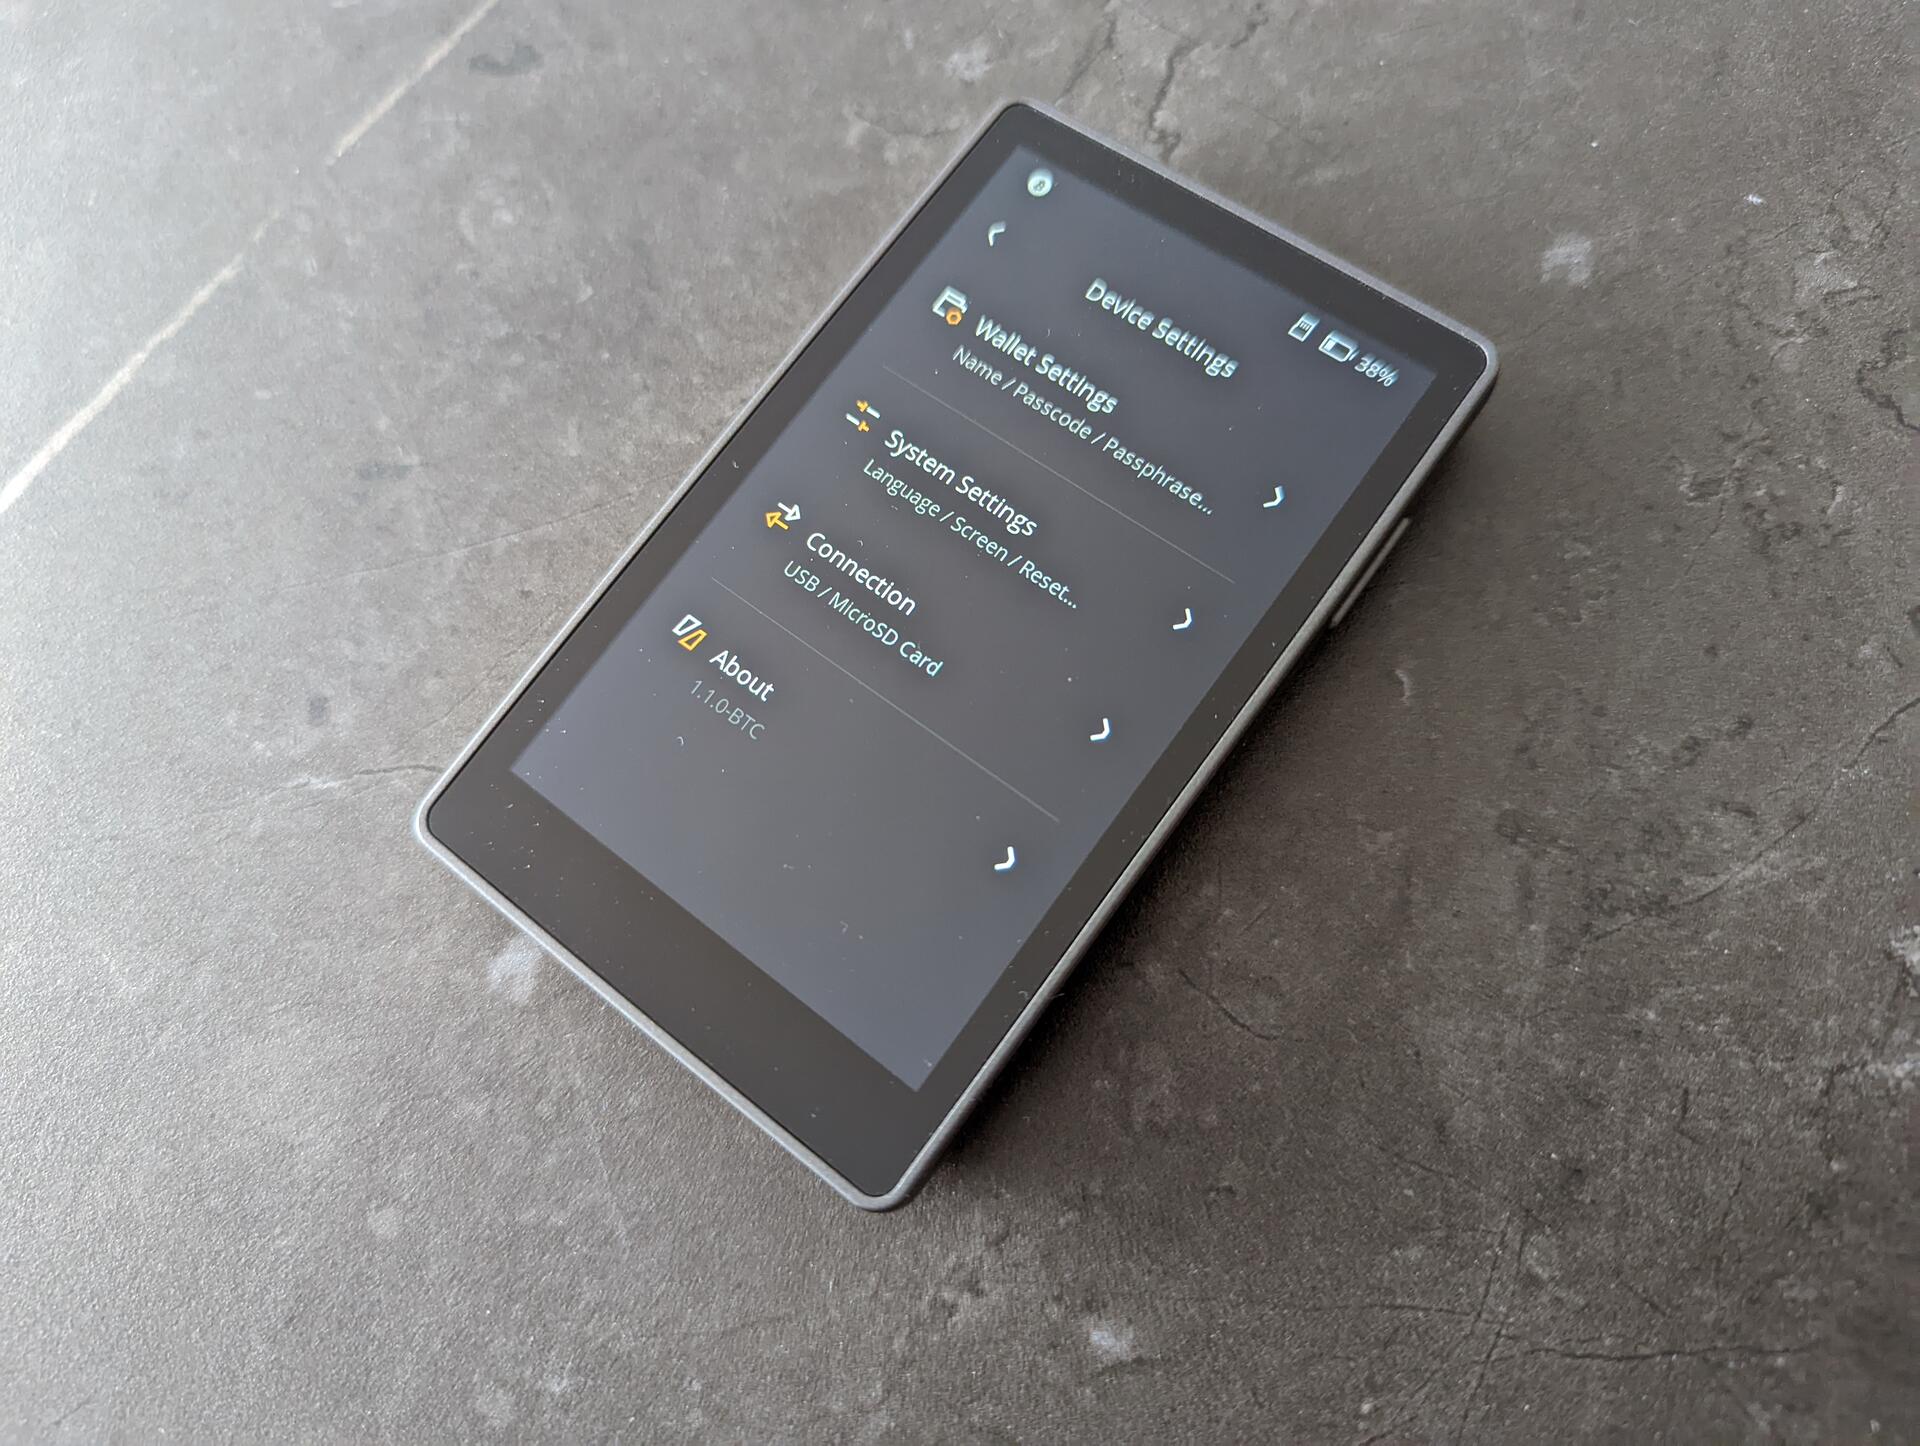
5/ Good @npub16s4c...4p24 3 Pro
+ High quality build, solid materials, feels almost like a smartphone
+ Open source
+ Good size, not too big not too small
+ Allows up to 3 wallets, could see this coming in handy for some use cases
Neutral Keystone 3 Pro
~ Good experience though I found the "..." menu on top a bit hidden, found myself navigating through menus searching to then find the options I was looking for where there. For the dice rolls I had to search online, initially didn't find it
~ I am a fan of dice rolls for entropy, but it is a heated topic, as not doing it correctly can end with lost funds. I would improve the experience here by requiring either 50 for 12 words or 99 for 24 words. Right now you can create 24 words with 50 rolls
~ Would love to see a keypad scramble option for the pin, especially due to the touchscreen and fingerprints remaining
~ The bitcoin-only firmware is in the early stages, but it has a lot of potential, and I believe we will see quick improvements
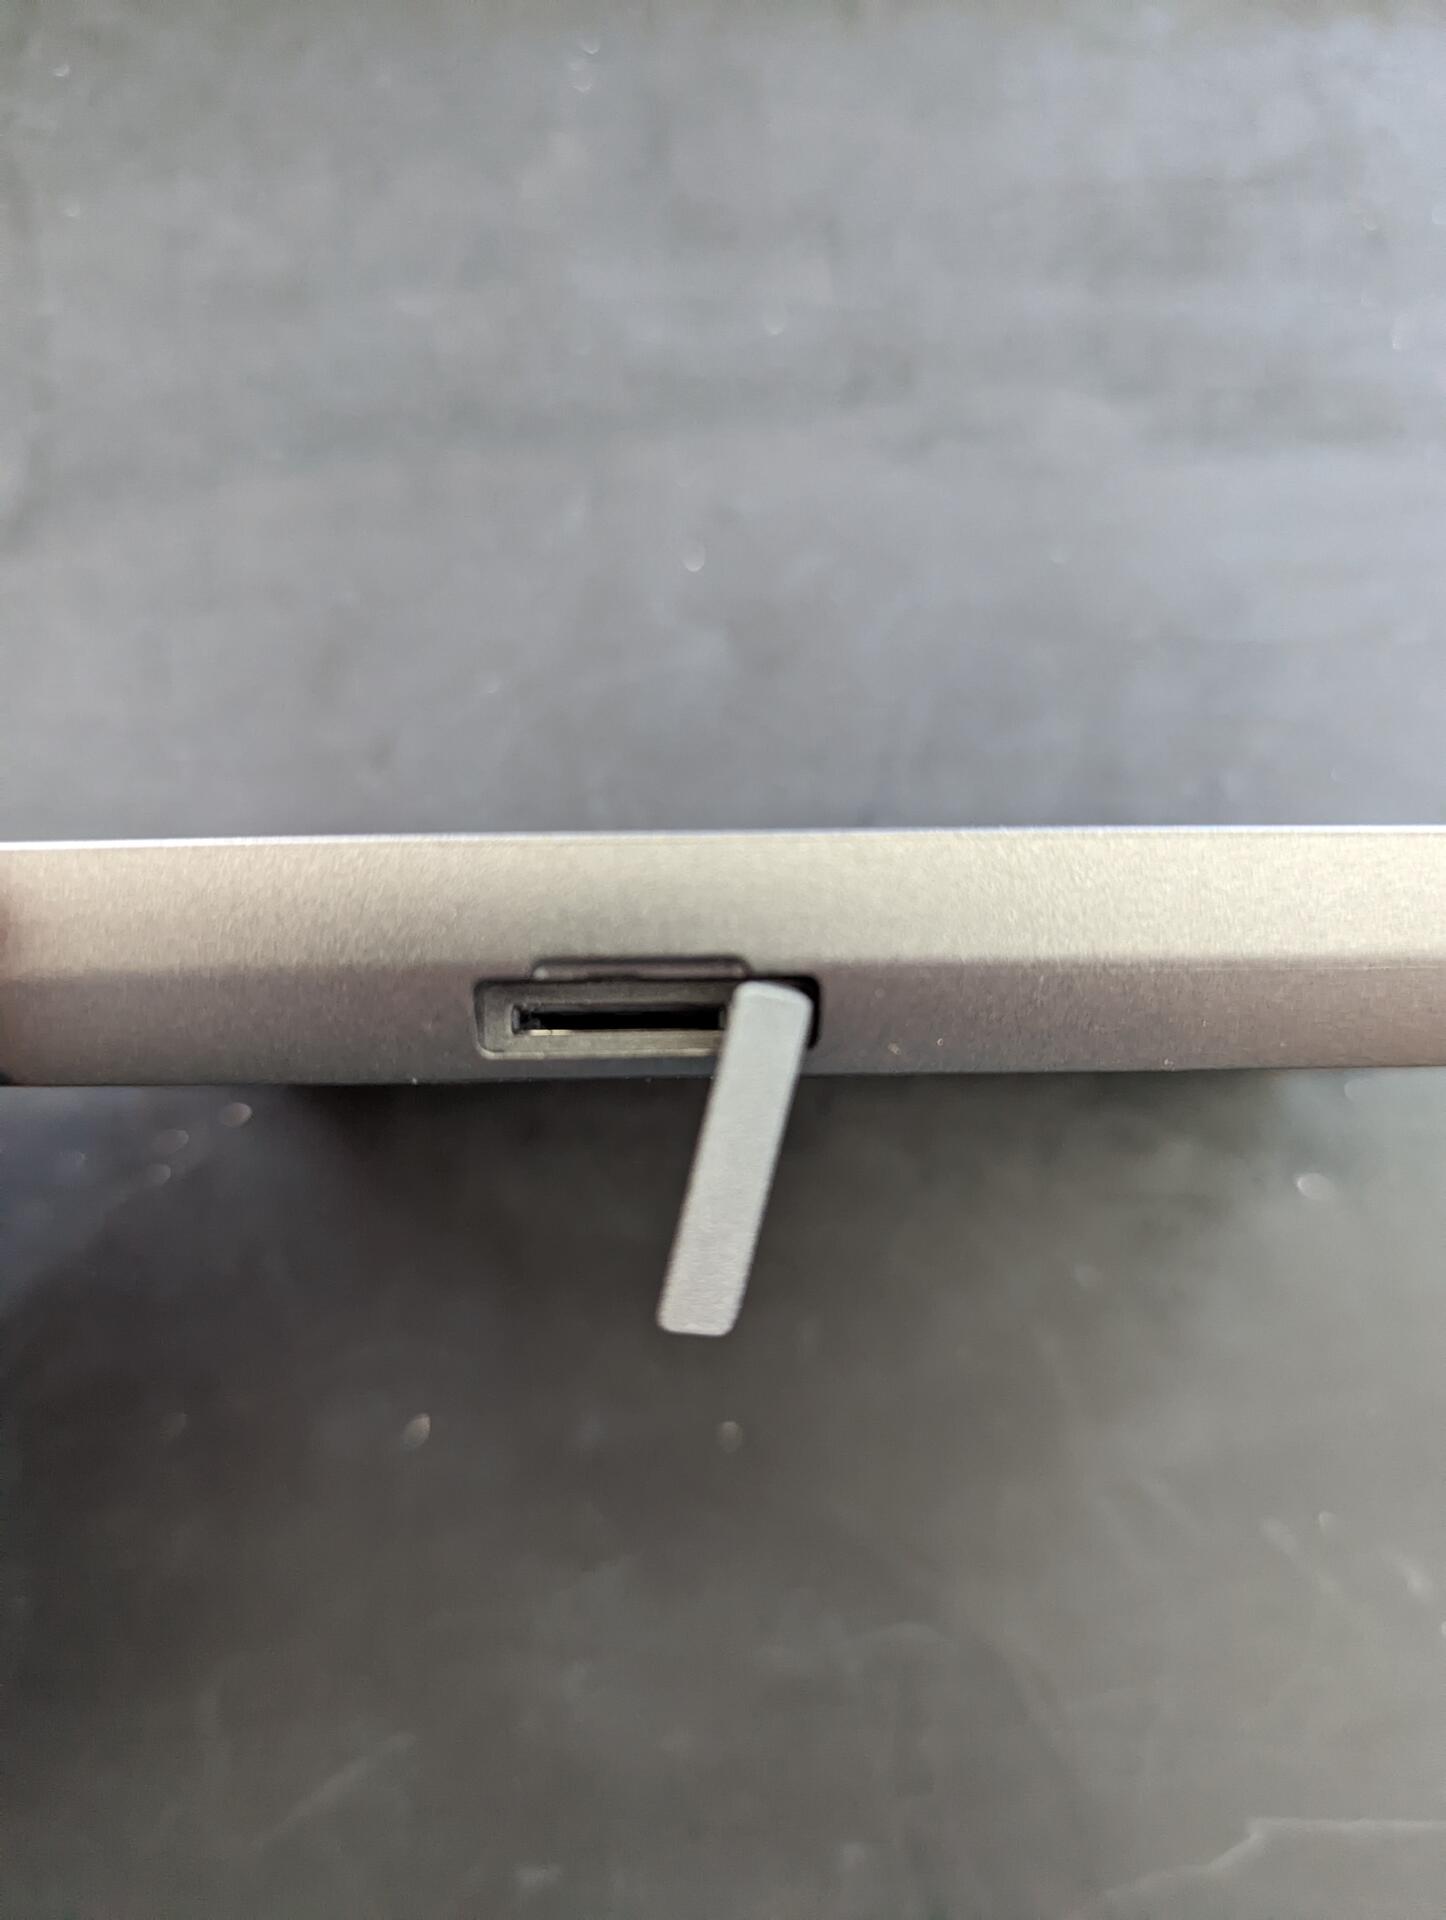
Bad Keystone 3 Pro
- Not a fan of the SD card slot positioning. Really had a hard time getting cards in. That said, its not something used regularly, only used it for firmware updates
- Built-in battery that cannot be removed. Not optimal for cold storage
Overall
Better than expected. It's easy to use and feels like using a software wallet. I would recommend this to someone starting self-custody, a friend/family member, who isn't going to go all the way down the rabbit-hole. Also perfect as a signer in a multisig setup
4/ Good Krux
+ Awesome open source project that works on off the self devices
+ Supported on many devices. Don't want a battery? Get a device without. Want a larger screen? Get a larger screen device
+ No assembly required, just flash it (also very easy)
Neutral Krux
~ Stateless, requires importing seed every time it is used
~ Though supported on multiple devices, some are hard to get. I tested the M5StickV but really wanted to try the Maix Amigo, which is sold out almost everywhere
Overall
Nothing negative to say on this project, it's great 💪 and a perfect addition e.g. to a stateless multisig setup with @SeedSigner and @Blockstream Jade for a multi-vendor setup, reducing the risk of both supply chain attacks and device-specific attacks.