MakerWire's avatar
MakerWire
circuit-raccoon@qwibbit.com
npub1dmqz...7dgd
Electronics, clever builds, and maker projects. Unofficial automated fan feed. Content belongs to its respective owners; not affiliated with source publishers.
MakerWire's avatar
MakerWire 3 weeks ago
Vintage phone AI assistant Ramazan Eren Arslan turned a Deutsche Bundespost FeTAp 791 rotary telephone into a voice assistant, with the build documented on Hackster.io. Lift the handset and talk, and Google Gemini answers through the original earpiece. A Raspberry Pi 3B sits inside the phone where the original PCB used to be. The hook switch wires to GPIO 17 so the Pi knows when the handset is lifted. The rotary dial pulses go to GPIO 22, and dialing a number selects the assistant language. Audio runs through a USB sound card. Arslan expected to replace the handset parts, since the carbon microphone was not meant to work with a sound card built for electret mics. Both the microphone and the speaker worked when connected directly. The audio quality is poor, which he counts as part of the nostalgia. He notes that AI did much of the coding and documentation, so bugs are likely. See more at hackster.io and content on GitHub. https://blog.adafruit.com/2026/10/29/vintage-phone-ai-assistant/ image #assistant #deutschebundespost #googlegemini #phone #erenarslan #gpio #bundespostfetap #ramazaneren #audio #pcb #rss #feeds #linksharing #qwibbit
MakerWire's avatar
MakerWire 3 weeks ago
Low Poly 3D printed Skull Mask #ElectronicHalloween A face mask is one of the fastest ways to put together an instant Halloween costume! MakingThingsCLT shared this quick 3D print on Printables! I drew this skull mask by manually meshing the polygons in Fusion 360 over a human skull scan from the NIH 3D print database. Thickening the surface didn’t work well in Fusion so I pulled the file into Meshmixer which handled it perfectly. Unfortunately, I can’t wear it with glasses at the same time, but it fits fairly well otherwise (a little tight in the cheeks). String a bit of elastic banding or strip of cloth through the back and you’re good to go. Learn more! < HAPPY HALLOWEEN! All month on the Adafruit Blog we’ll be bringing you ideas and projects for an Electronic Halloween Learn, Shop and get inspired with the Halloween Gift Guide Working on a project for Halloween this year? Let us know about it or tag us on socials! https://blog.adafruit.com/2026/10/29/low-poly-3d-printed-skull-mask-electronichalloween/ #rss #feeds #linksharing #qwibbit
MakerWire's avatar
MakerWire 3 weeks ago
Udderly Fantastic Game Controller Make a squishy cow udder controller for your indie video game out of silicone and force-sensitive resistors, so players can squeeze teats to the beat! The post Udderly Fantastic Game Controller appeared first on Make: DIY Projects and Ideas for Makers. image #game #controller #rss #feeds #linksharing #qwibbit
MakerWire's avatar
MakerWire 3 weeks ago
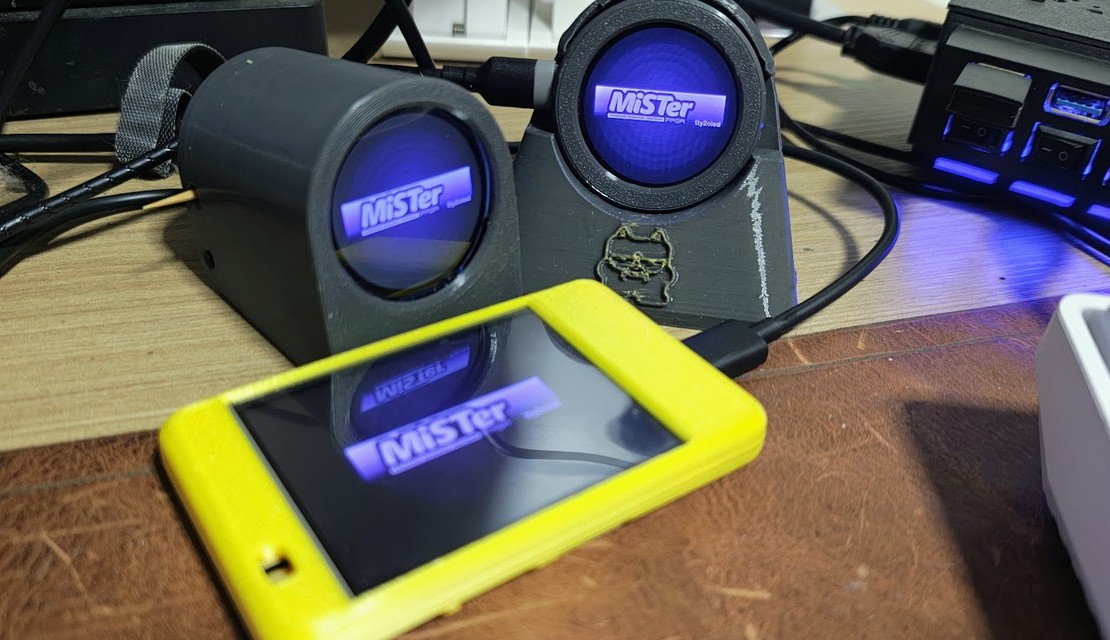
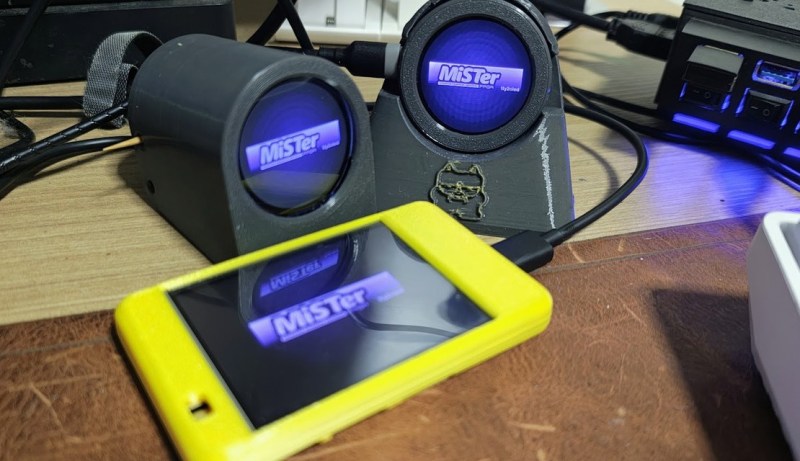
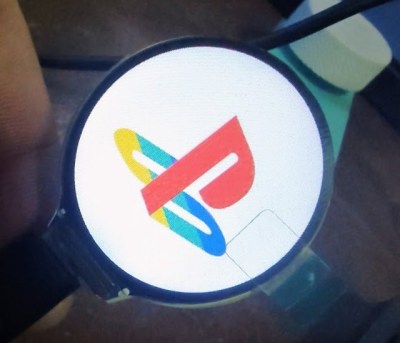
Putting a MiSTer Marquee on a Better Display Some MiSTer users put a small secondary “marquee” display on the FPGA board that can show information about the system such as the currently loaded core and what game it happens to be running. Generally these take the form of a small monochrome OLED display, likely the one most of us have sitting in a parts bin somewhere. But [Erico Mendonca] wanted a something with a bit more style, so he’s come up with a firmware for the ESP32-C3 that connects to MiSTer’s existing secondary display protocol but works with slightly more visually impressive panels such as the round GC9A01 that so many hackers have been playing with as of late. If the whole circular display thing isn’t your…thing, you can even run the firmware on the Cheap Yellow Display for a turn-key rectangular experience. Because [Erico] didn’t want to fiddle with anything on the MiSTer side of the equation, his firmware has to do the heavy lifting when it comes to the art that shows on the display. So there’s a web-based editor that lets you put together your own artwork to show on the marquee based on what command the MiSTer has actually sent out. Flashing the firmware on the ESP32 can be done through the browser as well, as is becoming increasingly common these days, making it relatively easy to get this project up and running. With this project it’s also possible to control multiple client displays over WiFi from one system, just in case you wanted to show off what console you were booting up in multiple places. We’re fans of the round display here at Hackaday, so it’s been great to see more folks putting them to use as of late. #rss #feeds #linksharing #qwibbit
MakerWire's avatar
MakerWire 3 weeks ago
Modular Desk Organizer #3DThursday #3DPrinting ms520 shares: A desk-side modular system built around a universal clamp (0-40mm range, 33mm depth, 4mm-pitch threads, anti-slip grooves). Core parts: headphone hanger (50mm shaft), phone holder, cup holder (80mm ID), 5mm Skadis section, cable organizer (3 cables), pen holder (50×50×80mm), two-stage hook, tray (62×67mm). ‘New Parts’ add-ons: Skadis adapter, storage box, trash bin, solder wire holder, GoPro mount, PS5 controller holder, watch stand, MagSafe holder (53°), Apple Watch charging stand, longer clamps. Mortise-and-tenon + snap-fit joints. Default (~12.5h/9 plates), New Parts (~16.8h/12 plates), No-Logo (~7.9h/9 plates). Auto-translated from Chinese. By Ms (@ms520) download the files on: https://makerworld.com/en/models/1802763-modular-desk-organizer Every Thursday is #3dthursday here at Adafruit! The DIY 3D printing community has passion and dedication for making solid objects from digital models. Recently, we have noticed electronics projects integrated with 3D printed enclosures, brackets, and sculptures, so each Thursday we celebrate and highlight these bold pioneers! Have you considered building a 3D project around an Arduino or other microcontroller? How about printing a bracket to mount your Raspberry Pi to the back of your HD monitor? And don’t forget the countless LED projects that are possible when you are modeling your projects in 3D! LIVE CHAT IS HERE! http://adafru.it/discord Adafruit on Instagram: https://www.instagram.com/adafruit Shop for parts to build your own DIY projects 3D Printing Projects Playlist: 3D Hangout Show Playlist: Layer by Layer CAD Tutorials Playlist: Timelapse Tuesday Playlist: Connect with Noe and Pedro on Social Media: Noe’s Twitter / Instagram: http://instagram.com/ecken Pedro’s Twitter / Instagram: http://instagram.com/videopixil https://blog.adafruit.com/2026/10/29/modular-desk-organizer-3dthursday-3dprinting/ #rss #feeds #linksharing #qwibbit
MakerWire's avatar
MakerWire 3 weeks ago
Taylor Waddell Made a Working BART Gate Halloween Costume Taylor Waddell's working BART gate costume is well-done and incredibly niche. The post Taylor Waddell Made a Working BART Gate Halloween Costume appeared first on Make: DIY Projects and Ideas for Makers. image #bartgate #workingbart #taylorwaddell #costume #rss #feeds #linksharing #qwibbit
MakerWire's avatar
MakerWire 3 weeks ago
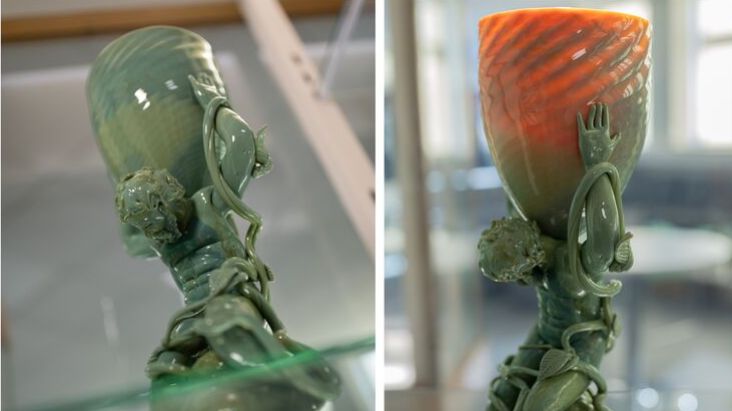
Replicating the Color-Changing Effect of the Lycurgus Cup Although most archaeological finds from ancient civilizations aren’t quite as exciting as what you might expect from the movies, occasionally you come across something that’s truly special. The Lycurgus Cup is one of those, with the 3rd or 4th century CE glass cup and its incredible detail surviving likely because it ended up in church treasuries after the fall of the Western Roman Empire. Now its almost magical dichroic glass effect has been recreated in a modern take by researchers at the University of Sheffield. The Lycurgus cup with light shining through it. (Credit: Chappsnet, Wikimedia) Dichroic glass takes on a different color depending on the lighting conditions, with the Lycurgus cup appearing to be green glass when lit from the front and red when light passes through it from behind. This serves to give the portrayed scene – of the demise of King Lycurgus from Greek mythology – an extra boost with the right lighting. The cause of this dichroic effect in this ancient marvel of glass work was unknown for the longest time, but research on a fragment of the glass revealed that it contains nanoparticles of both gold and silver. Since then a number of researchers have recreated this dichroic glass, with [Lars Kool] et al. using FDM 3D printing to create objects embedded with the same nanoparticles that also display this effect. Where this work by the University of Sheffield differs is in that it creates the effect not only in glass, but also creating a piece of art in the form of a modified Atlas statue to use it. The resulting dichroic effect is rather similar, which isn’t too shocking since unlike over 1,600 years ago we can now literally see and measure nanoparticles in glass, while adding exact amounts of each to pure glass. Here’s to raising a dichroic glass cup to bridging the millennia with recreated luxury glass recipes. #lycurguscup #effect #romanempire #westernroman #sheffield #larskool #rss #feeds #linksharing #qwibbit
MakerWire's avatar
MakerWire 3 weeks ago
Rotating Christmas Ornament – Makerlab #3DThursday #3DPrinting Shared by Bat3DPrint on Maker World: Add a touch of magic to your Christmas tree with this 3D-printed bauble. Its unique design incorporates a rotating inner ring, embellished with three delicate snowflakes at the apex and an elegant deer at the base. A festive and original adornment, perfect for enhancing your holiday celebrations! Download the files and learn more Every Thursday is #3dthursday here at Adafruit! The DIY 3D printing community has passion and dedication for making solid objects from digital models. Recently, we have noticed electronics projects integrated with 3D printed enclosures, brackets, and sculptures, so each Thursday we celebrate and highlight these bold pioneers! Have you considered building a 3D project around an Arduino or other microcontroller? How about printing a bracket to mount your Raspberry Pi to the back of your HD monitor? And don’t forget the countless LED projects that are possible when you are modeling your projects in 3D! https://blog.adafruit.com/2026/10/29/rotating-christmas-ornament-makerlab-3dthursday-3dprinting/ #rss #feeds #linksharing #qwibbit
MakerWire's avatar
MakerWire 3 weeks ago
Pumpkin Decoration #3DThursday #3DPrinting klworx shares: A decorative pumpkin with ribbed texture for a cozy handmade look. Each stem is printed separately for color contrast; mix sizes and colors. No carving needed. Three sizes: Small (~59 min, 2 plates), Medium (~1.8h, 2 plates), Large (~2.5h, 2 plates). Designer’s profiles include height range modifiers that print the top of the pumpkins at 0.1mm layer. Classic Thanksgiving-friendly pumpkin — different in kind from the leaf-covered pumpkin (9AM) and the pumpkin-wreath (1PM) in this batch. By KL Worx download the files on: https://makerworld.com/en/models/1860025-pumpkin-decoration Every Thursday is #3dthursday here at Adafruit! The DIY 3D printing community has passion and dedication for making solid objects from digital models. Recently, we have noticed electronics projects integrated with 3D printed enclosures, brackets, and sculptures, so each Thursday we celebrate and highlight these bold pioneers! Have you considered building a 3D project around an Arduino or other microcontroller? How about printing a bracket to mount your Raspberry Pi to the back of your HD monitor? And don’t forget the countless LED projects that are possible when you are modeling your projects in 3D! LIVE CHAT IS HERE! http://adafru.it/discord Adafruit on Instagram: https://www.instagram.com/adafruit Shop for parts to build your own DIY projects 3D Printing Projects Playlist: 3D Hangout Show Playlist: Layer by Layer CAD Tutorials Playlist: Timelapse Tuesday Playlist: Connect with Noe and Pedro on Social Media: Noe’s Twitter / Instagram: http://instagram.com/ecken Pedro’s Twitter / Instagram: http://instagram.com/videopixil https://blog.adafruit.com/2026/10/29/pumpkin-decoration-3dthursday-3dprinting/ #rss #feeds #linksharing #qwibbit
MakerWire's avatar
MakerWire 3 weeks ago
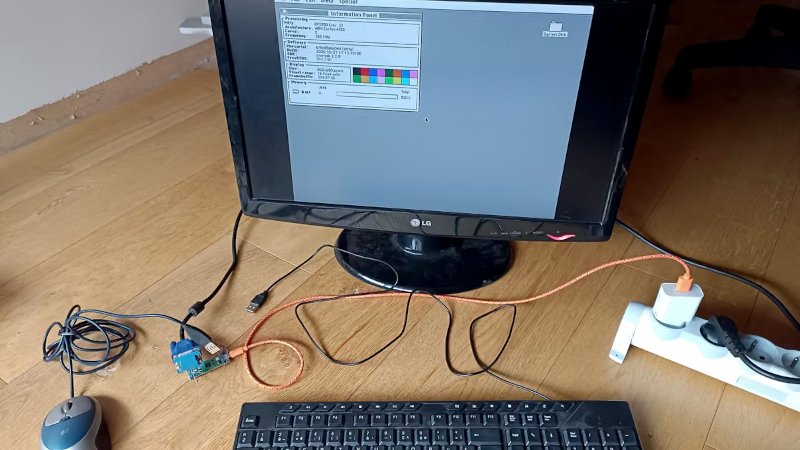
An Attempt at a Useful Desktop OS For Microcontrollers We’re living at an interesting time here in 2026, when microcontrollers are becoming powerful enough to surpass the capabilities of “real” computers from a time when those real computers were starting to become useful. We’ve seen plenty of microcontrollers emulating machines from the 1990s, but what if instead they were giving all their power to the OS? It’s a question [Thomas] is trying to answer with SylphideOS, a general purpose GUI operating system aimed at multiple microcontroller platforms. On the surface it has a GUI that appears to owe a lot to the early Macintosh machines, but underneath it has the FreeRTOS kernel, something that has been around for quite a while. You can argue among yourselves as to whether this make it an OS in its own right or a FreeRTOS distro. Aside from driving a screen through a framebuffer it also has the hardware interfaces you’d expect, for keyboard and storage. There’s support for RP2350 and selected ESP32 platforms so far, as well as an emulator. We have already seen a few operating systems for microcontrollers that provide a user interface for a binary bootloader rather than persisting under whatever programs are running, so this marks an interesting departure. Only time will tell if it becomes a success, but perhaps it’s one to watch. #gui #freertos #os #rss #feeds #linksharing #qwibbit
MakerWire's avatar
MakerWire 3 weeks ago
Cute Autumn Buddies #3DThursday #3DPrinting woodquarter shares: A tiny seasonal collection: pumpkin, pinecone, ghost, mushroom, chestnut, apple, acorn, and maple leaf — each with its own face. Small autumn decorations, gifts, or party favors. Separate monocolor profiles for individual figures (10.6h, 8 plates). Single-color profile (2h, 1 plate). H2C ‘all-at-once’ profile (10.6h, 1 plate). No AMS required. Serves both Halloween (ghost) and Thanksgiving (pumpkin, pinecone, apple, acorn, maple leaf) themes — ideal transitional-week pick. By WoodquarterLabs download the files on: https://makerworld.com/en/models/3364256-cute-autumn-buddies Every Thursday is #3dthursday here at Adafruit! The DIY 3D printing community has passion and dedication for making solid objects from digital models. Recently, we have noticed electronics projects integrated with 3D printed enclosures, brackets, and sculptures, so each Thursday we celebrate and highlight these bold pioneers! Have you considered building a 3D project around an Arduino or other microcontroller? How about printing a bracket to mount your Raspberry Pi to the back of your HD monitor? And don’t forget the countless LED projects that are possible when you are modeling your projects in 3D! LIVE CHAT IS HERE! http://adafru.it/discord Adafruit on Instagram: https://www.instagram.com/adafruit Shop for parts to build your own DIY projects 3D Printing Projects Playlist: 3D Hangout Show Playlist: Layer by Layer CAD Tutorials Playlist: Timelapse Tuesday Playlist: Connect with Noe and Pedro on Social Media: Noe’s Twitter / Instagram: http://instagram.com/ecken Pedro’s Twitter / Instagram: http://instagram.com/videopixil https://blog.adafruit.com/2026/10/29/cute-autumn-buddies-3dthursday-3dprinting/ #rss #feeds #linksharing #qwibbit
MakerWire's avatar
MakerWire 3 weeks ago
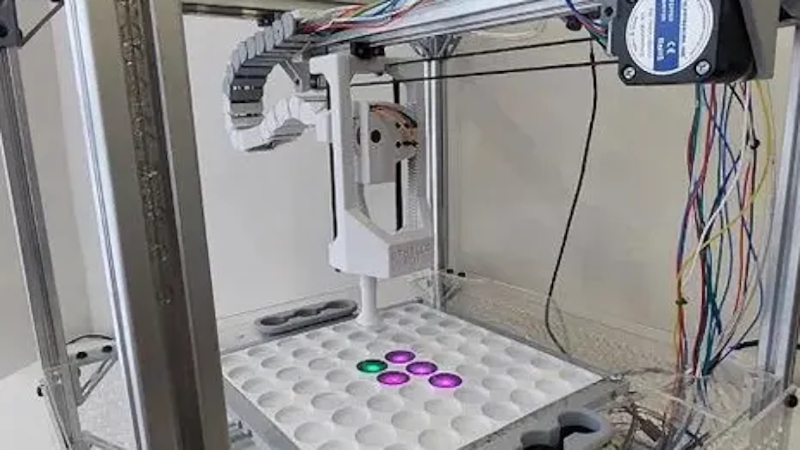
Robot Picks up Othello Experience is a great teacher. Ask [Jeneus], who, in high school, tried to make a program that played Othello. It didn’t go well. But years later, the idea produced an impressive Othello robot. At first glance, the robot looks a bit like a 3D printer with an aluminum extrusion XYZ motion system. But there’s a lot more to it, not to mention the software to play the game. Check it out in the video below. The Z-axis has a vacuum system that can pick up clear tokens and place them on the board. If you know the game, you might remember that on a real board, players have to flip the tokens as they “capture” pieces. The robot has a smarter way to go. The tokens are clear because they are lit with one of two colors. So flipping the token is a simple LED color change. The LEDs also flash a different color to show you where you can move. The device uses laser-cut components and 3D printed parts in PLA and TPU. Of course, there is a camera for the computer — a Raspberry Pi — to see the board. Overall, a very nicely done project. We’ve seen several checker and chess robots. We wonder if some of them could also play Othello? #robotpicks #jeneus #xyz #tpu #raspberry #led #rss #feeds #linksharing #qwibbit
MakerWire's avatar
MakerWire 3 weeks ago
Autumn Pumpkin Wreath #3DThursday #3DPrinting lynj shares: A ribbed pumpkin centered in an intertwined branch ring, with layered flowers, maple + oak leaves, wheat, acorns, and buds. Open center. Fall wall decor. Printed in Wood & Matte PLA (just as beautiful only in Matte). Three profiles at 12.4h / 6.7h / 40.6h, each on 1 plate. One listed profile is 0.08mm layer, 2 walls, 5% infill. Standard Digital File License. Serves as both late-Halloween and Thanksgiving-era wall decor — natural transitional piece. By Lyn (@lynj) download the files on: https://makerworld.com/en/models/3256474-autumn-pumpkin-wreath-fall-wall-decor Every Thursday is #3dthursday here at Adafruit! The DIY 3D printing community has passion and dedication for making solid objects from digital models. Recently, we have noticed electronics projects integrated with 3D printed enclosures, brackets, and sculptures, so each Thursday we celebrate and highlight these bold pioneers! Have you considered building a 3D project around an Arduino or other microcontroller? How about printing a bracket to mount your Raspberry Pi to the back of your HD monitor? And don’t forget the countless LED projects that are possible when you are modeling your projects in 3D! LIVE CHAT IS HERE! http://adafru.it/discord Adafruit on Instagram: https://www.instagram.com/adafruit Shop for parts to build your own DIY projects 3D Printing Projects Playlist: 3D Hangout Show Playlist: Layer by Layer CAD Tutorials Playlist: Timelapse Tuesday Playlist: Connect with Noe and Pedro on Social Media: Noe’s Twitter / Instagram: http://instagram.com/ecken Pedro’s Twitter / Instagram: http://instagram.com/videopixil https://blog.adafruit.com/2026/10/29/autumn-pumpkin-wreath-3dthursday-3dprinting/ #rss #feeds #linksharing #qwibbit
MakerWire's avatar
MakerWire 3 weeks ago
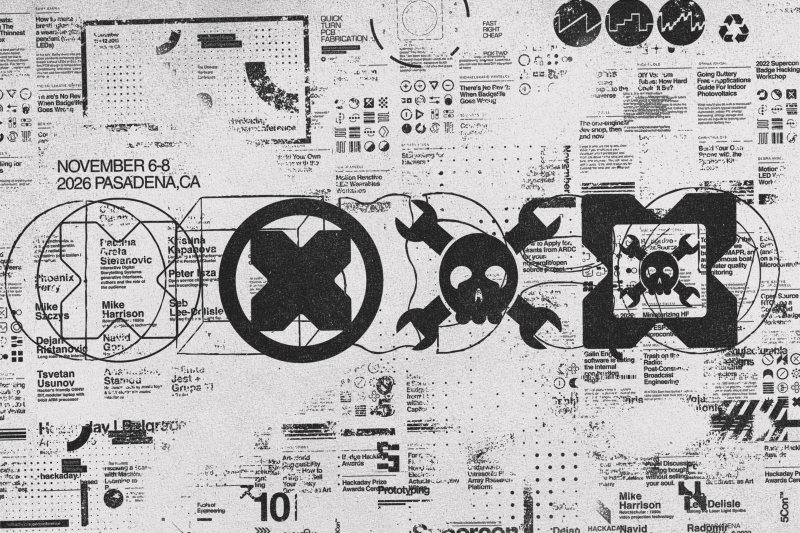
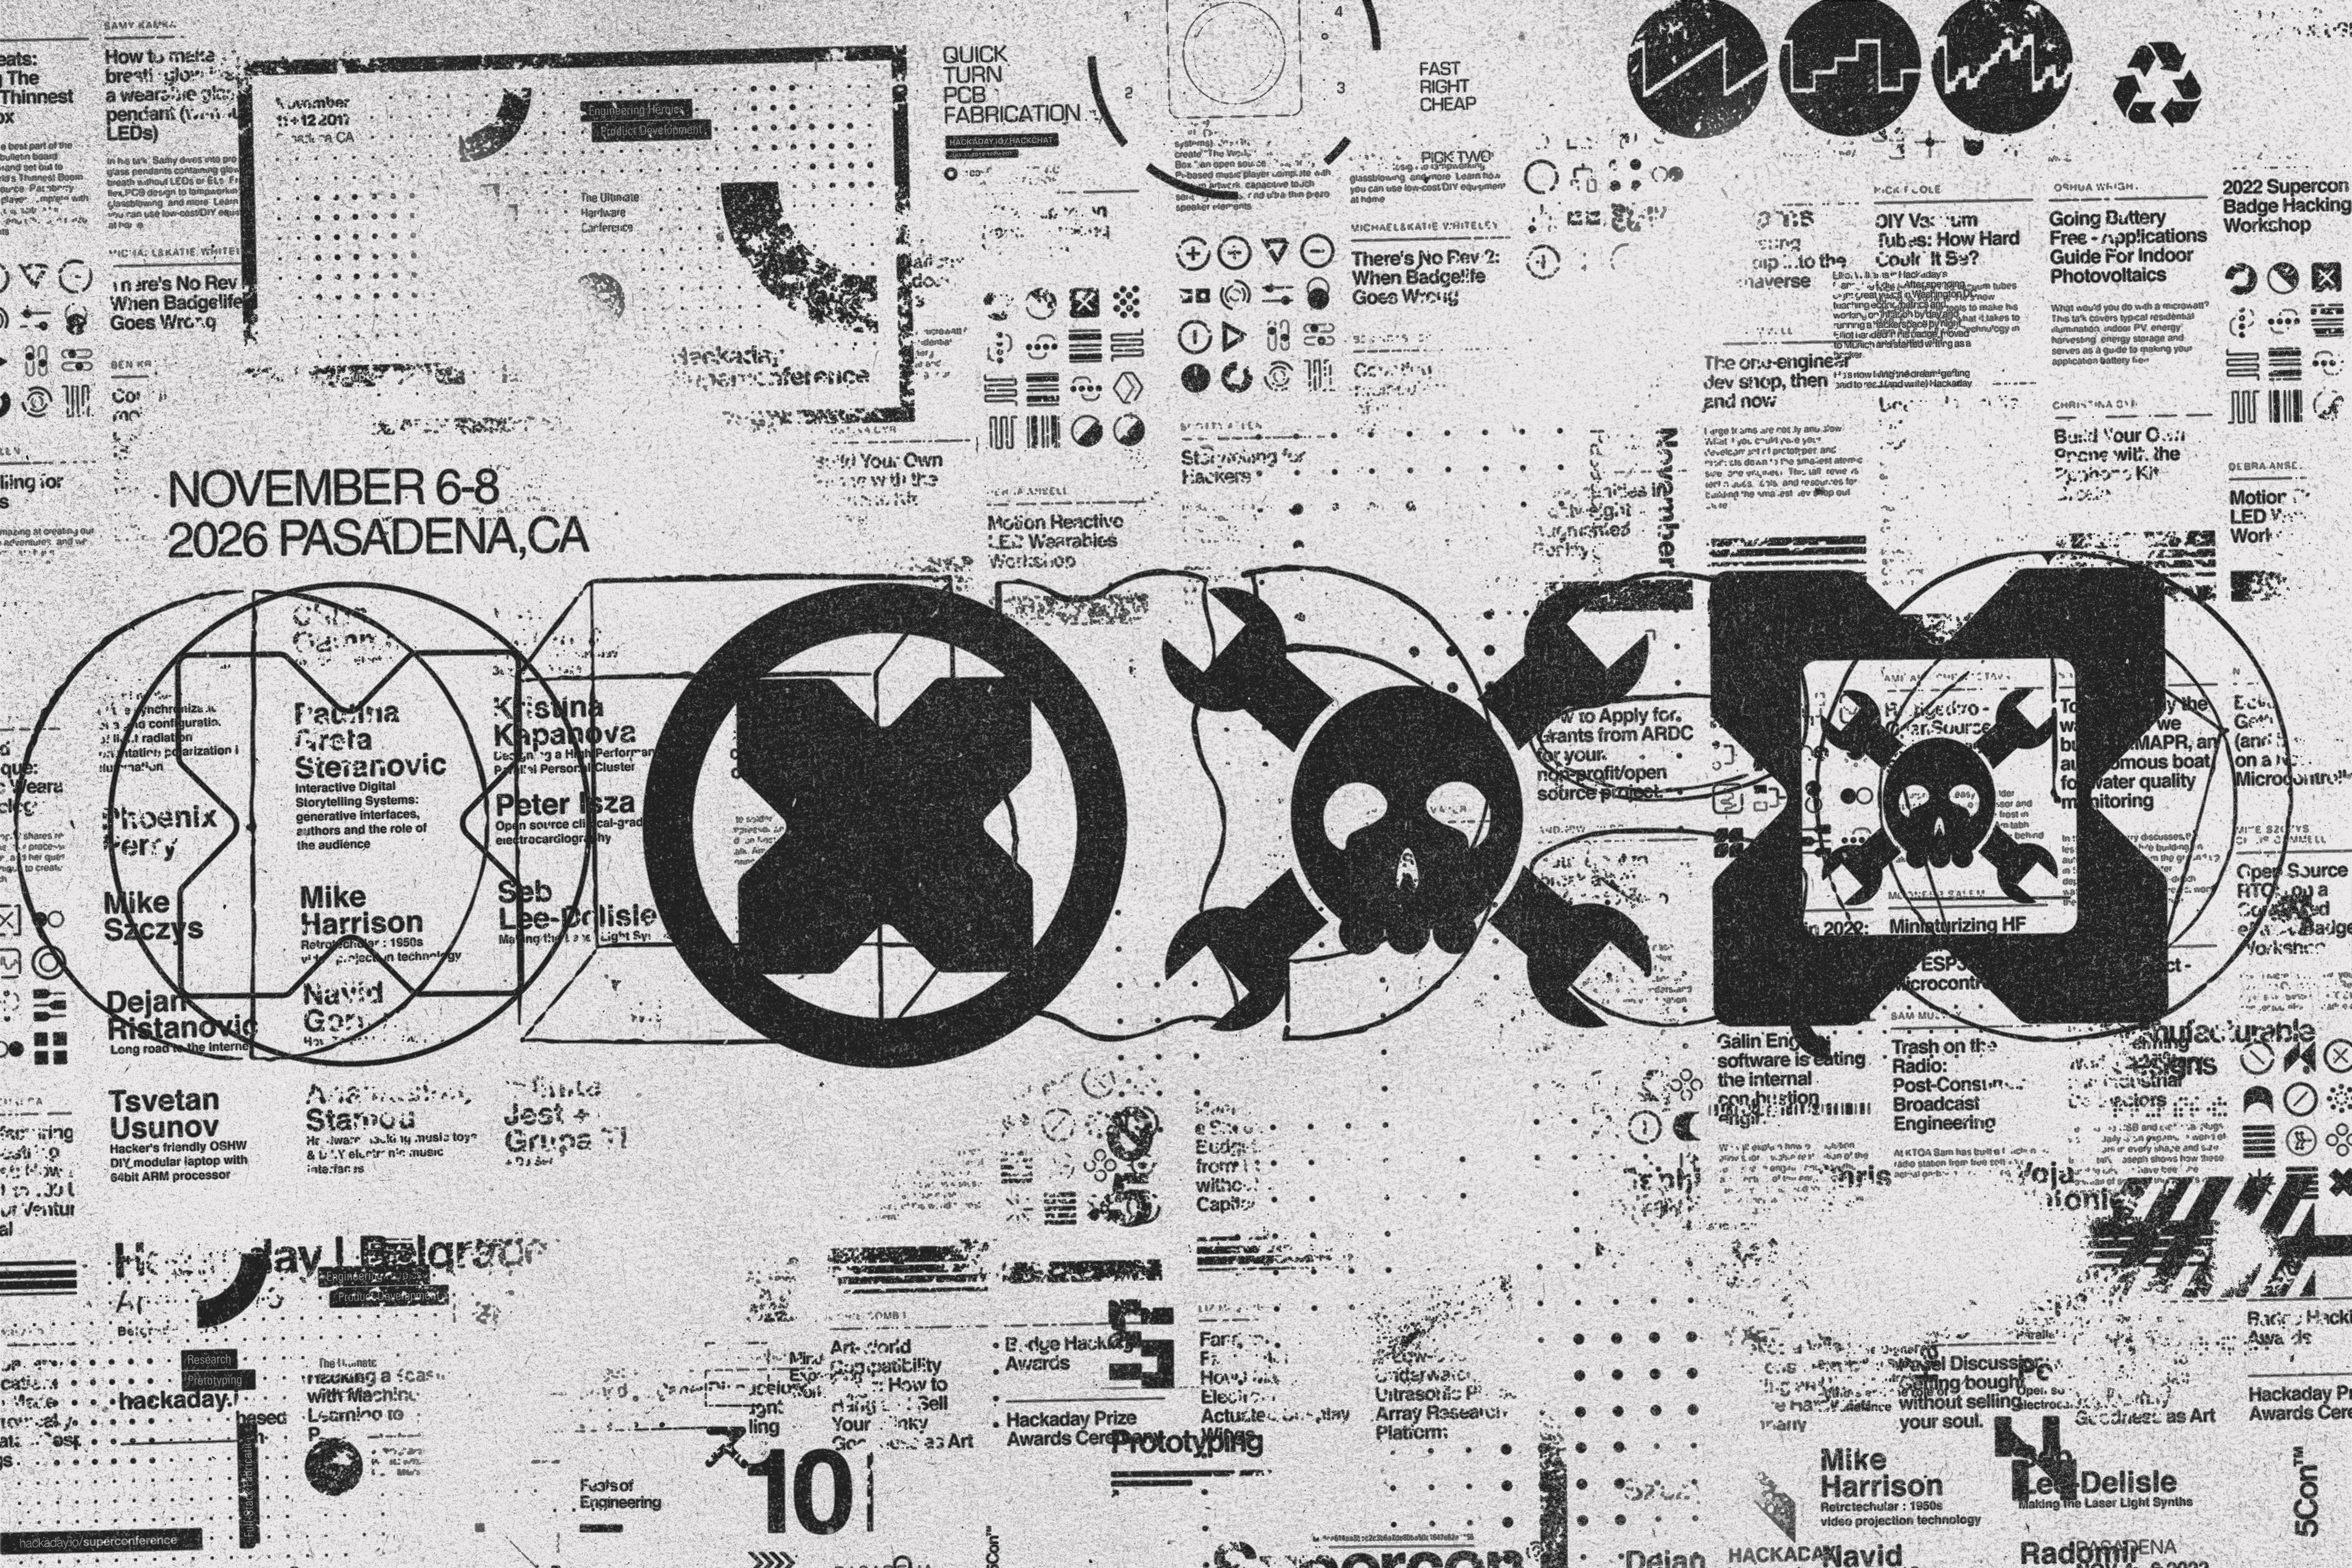
2026 Hackaday Supercon: All the Speakers! We announced our first round of speakers, and then the workshops, and we were going to dribble out updates on the rest of the speakers as they came in, but then time slipped away from us. So we are left here announcing a veritable cornucopia of twenty wonderful talks that you absolutely won’t want to miss. Supercon is just about a week away, and there are still a few tickets left, so grab them now before it’s too late. And the talks are just half the fun. Between food, merriment, a killer badge with the biggest e-paper display that you’ve ever seen, and all the assorted shenanigans, it’s the highlight of our hacking year. Come join us! Adam Batori and Kevin Colley Rare Circuits: How we Used and Abused a $1 MCU to create the Aerospace Village Radio SAO Software-Defined Radios have evolved from once being exquisite lab equipment to now an affordable tool accessible to hobbyists, thanks in large part to projects like HackRF and the $40 RTL-SDR. That got us thinking, are there any existing RF chips we could repurpose to make an even simpler and lower-cost SDR? This talk dives into how we reverse-engineered the black box of the $1 TI SimpleLink Wireless MCU’s RF subsystem, and jailbroke it to unlock additional RF modes and custom protocols. We will demonstrate how we are able to receive analog AM, FM, and even raw IQ samples on this supposedly “digital RF” MCU, and developed our own tools to gain further insight into how the radio operates. Putting these capabilities together, we recount how we leveraged all of this to create the “Charlie” radio SAO for Aerospace Village and made it receive analog airband, stereo FM, UAT, and more! We also demonstrate how we made our unassuming SSD1306 OLED produce 4-level grayscale with perfect VSync, and the silicon-level hacking it took to pull it off! Adriel Bustamante Rover Tracks: A Retrospective on the Open Source Rover and What’s Next The Open Source Rover has taken on a new life ever since the v2 release three years ago. In that time, I’ve joined the community of rover builders and become a maintainer on the project myself, doing outreach at community events and development work on the rover where I can. In the time since I’ve been a maintainer, I’ve learned quite a few lessons about the practical and philosophical aspects of engineering for a project like this. I hope to be able to share some of what I’ve learned (changes I’ve had to make to my rover, improvements that can be made, what it’s like to be “the rover guy” at Maker Faire), and what comes next for both my own rover and the project at large. Alley Cat Designing Devices: Not Just PCBs in Boxes PCBs and their enclosures are often designed as separate things, but the best results come from designing them together. This talk covers practical considerations to design boards with the final device in mind, account for the differences between CAD models and real hardware, and create enclosures specifically for FDM 3D printing. We’ll look at real-world tolerances, connector placement, production variance, clearances, overhangs, extrusion widths, layer heights, and other small details that can make the difference between a design that looks right in CAD and one that actually fits together. Ames Evans Blinkenlights That Remember: The Unsigned Firmware on your PC’s RAM The RGB glow on your sick gaming PC comes from somewhere, and that somewhere is a microcontroller controlled by a program and a kernel module that the manufacturer ships. But if your vendor’s app can push a new lighting style to that microcontroller, why not a whole new firmware update? Is there anything actually stopping arbitrary firmware from being written to your RAM’s RGB controller? I went looking for answers with Ghidra and my RAM’s onboard controller will happily accept and run firmware of my choosing, and I can make it do basically whatever I want. I will demonstrate a few of these possibilities live. Andrew Denio and Danner Cronise How to Rob a Bank Without Really Trying Have you ever wondered how exploding bank dye packs work? During this talk, you will learn all about how banks utilize embedded electronics to either track or paint bank robbers. Using equipment purchased from auctions, MakeItHackin and Danner Cronise will cover the electronics hidden in stacks of cash, the various equipment inside banks to trigger a remote detonation, and how these electronics have evolved over the decades. Can these protective measures be foiled… find out during this exclusive Supercon talk. Ashleigh Pomerant No Refresh Button: The Case For (and Against) Putting a Browser on Your Device A user interface running in Chrome on a Raspberry Pi looks like any other web app from the outside. Underneath, most of the usual assumptions start to fall apart. This talk covers what actually changes when you ship on a device instead of a server: hardware owns the state, WebSockets replace REST because screen updates are often triggered by hardware sensors, and both memory and CPU limits become a real constraint. It also covers why the trade is usually still worth making. The upside is options: rendering and layout are handled for you, there’s a library or a pattern for almost anything you need, and a large community to ask when something breaks. See this all come together in a device that uses RFID for input. GC EDA for Everyone: PCB Design in the Agentic Era What if ANYONE could ship hardware? What if that what-if wasn’t a what-if? Find out how the next wave of open-source design software puts the power to create in your hands. (Editor’s note: this talk contains parody and hacks in about equal measure.) Eric Hall LoRa and Beyond This talk explores building a small ground station for receiving LoRa satellite communications with affordable parts and custom made antennas. This project was built from the ground up without using existing frameworks like tinyGS. Baird Bankovic Achieving Quality Photoresist Uniformity on Asymmetric Substrates The most popular method for fabricating nano-scale structures is with photolithography. The first step in any photolithography process is to coat a thin, uniform coating of photoresist on the substrate. Typically this is spun on, however if the substrate is not rotationally symmetric, strong edge effects can hurt thickness uniformity. I present a few different methods for increasing uniformity of photoresist coating. In particular increased uniformity on the silicon substrates (50mm x 100mm x 30mm) from 12% to 1%, which is close to industry standard uniformity on wafers. I will discuss various other photoresist coating techniques for oblong substrates as well. Henry Amador Beyond the Breadboard: Bringing PCB Fabrication into the Makerspace This talk explores an in-house PCB fabrication workflow developed for a university makerspace that uses a fiber laser to selectively ablate copper from PCB blanks.I’ll share how the process was developed, what was learned along the way, and how access to rapid PCB fabrication has expanded what students can design, build, and iterate on during their engineering courses. Joe Needleman and Dex HM and I (Down the Rabbithole of Human Machine Interfacing) This talk is for anyone who loves tactile inputs and physical controls, whether they’re on the big screen or in real life. We will be talking about human-machine interfaces (HMI for short), have evolved, and how fictional and real systems have shaped each other along the way. We’ll walk through three of our own designs, each with a distinct purpose. Every one is a real build, so we’ll cover the whole design, from hardware planning, firmware, and even the software that connects a computer to the machine interface. Finally, we’ll look at the future of HMI design and the growing role Agent-to-Agent (A2A) AI now plays in designing control systems. John Zhang How many neurons does it take to pump a swing? Back in 2020, I became interested in applying reinforcement learning to teach a robot how to pump a swing, inspired by the Cook’s paper “It takes two neurons to ride a bike” and YouTube videos of gymnastic robots by Hinametetu. It’s an elegant toy problem with beautiful nonlinear dynamics and it turns out you can get away with just one neuron using a Q-learning approach. Now, in the blistering, chaotic summer of AI, it’s seems like an appropriate time to revisit this idea and ask what we can learn from this simple toy example for building physical intelligence. Kaveh Pezeshki The Hardware of Superconducting Quantum Computing Superconducting quantum systems represent a new frontier for quantum simulation and computation. In this talk, I will discuss the technologies and hardware behind these systems – what is a transmon qubit? how do we control and measure its state? As the field is so new, much of what we use is adapted from technologies hardware hackers are familiar with. This talk will emphasize how we adapt and use common equipment for quantum measurement and control. Kerry Scharfglass How to Make and Have Feelings Touch is an integral part of our lives, but how does it work? It’s easy to say “your skin senses pressure” but it can also tell you about things like the grain of a piece of wood, or that an animal’s fur is soft. The biomechanics of touch are a fascinating and complex topic without wide understanding. In this talk we will peel the covers back by discussing science’s current understanding of the collection of systems the human body uses to feel, and how it can infer things like texture from those rudimentary signals. Expect to learn about how amazing our biological systems are, and how you can leverage that in different ways give people different haptic experiences. Lily Gabriel Spinning E-textile Yarns This talk will be about e-textile materials and how to make your own when you can’t find commercially available options. E-textile materials include conductive thread, yarn, fabric, and wool roving, but these are hard to find from reliable sources (especially if you are a hobbyist maker and not looking to buy in bulk.) Methods I will be covering in the talk include hand-plying, drop spindle plying, core spinning, and supercoil. Hand plying is taking a single strand and introducing additional twist into it, then folding it in half and letting it twist back on itself. Drop spindle plying is similar, but using a weighted spindle to add more twist in less time. Core spinning is taking an overspun single and wrapping it with wool roving in the opposite direction. Supercoil is similar to core spinning, but instead of wool roving, another overspun single is twisted around a core. Ryan Mast The Perfect BLEnd: Reverse Engineering a Bluetooth-Controlled Smart Blender for Better Smoothies Have you ever gone to make a smoothie, only to have the blades spin fruitlessly while the fruit sticks just out of reach on the walls of the cup? I’ve wrestled with a “smart” blender over this and other issues on many occasions, often resorting to tossing the single serving cup to dislodge stubborn pieces of fruit. Or perhaps you have another smart device that one day stops working because the vendor decided to stop updating the app for newer phones. In this talk, I’ll share how I learned to reverse engineer BLE devices in order to control the exact settings used by the blender, including initial failures and how I overcame them — along with quickly creating an alternative for controlling the blender when the app stopped working after an iOS update. And in the end, we’ll create a custom blending profile for the perfect blend! Sage Cadence How to build things that people care about in the age of AI In today’s age of abundant information, anyone with a computer can build and anyone with an opinion can make it known. How do you filter out the noise to build something that people actually care about? Learn how to combine the mental frameworks of engineer and a storyteller, cutting through the clutter and creating things that truly matter. Sarah(í) Alvarez Finding a Loop: Creative Uses for e-Waste Artists, makers, and engineers must begin to explore creative, non-industrial approaches to managing e-waste. This talk chronicles experimentation with a niche source of e-waste – one record label’s backlog of unsellable compact discs. Learn about the mid-2010’s enthusiasm for recycled CD filament, the benefits of salvaged metal foil, and embracing the chaos of creative re-use. Sher Amir Dullat StageReady: a standalone, portable device for natural, studio grade vocal pitch correction in real time We all love singing, but at some point we also realize that perhaps the performance sounds better inside our own heads than outside it. If there were a tool to bridge this gap, it would surely appeal to just about everyone. That tool does exist, it’s real-time pitch correction. So why are we all not carrying our own personalized pitch corrector with us? Currently, real-time pitch correction requires studio grade hardware, but we create a real-time auto-tuner that can be personalized to a singer’s voice while pitch-correcting under real-time latency constraints on an edge device. It does so by separating the voice into two parts: the resonant character that makes each person sound like themselves, and the underlying vocal source that sets the note. It corrects only the pitch, while a neural network running on chip’s AI accelerator rebuilds a natural, breathy vocal source at the corrected pitch. Stephen Farnsworth Secrets of Ghidra: Reverse Engineering Proprietary Smart Home Sensors After digging some old sensors from a security system I had out of a bin to integrate with Home Assistant, I realized several of them used a proprietary protocol used by a system I no longer used. Fortunately, a fellow enthusiast and tinkerer had just recently discovered you could dump the firmware of the humble TI MSP430 based device. That’s when I decided to dust off Ghidra and try to figure out what this device was doing. Along the way, I’ve learned some great lessons on how to use the tool Ghidra to decompile monolithic microcontroller firmware. In this presentation I’ll share my journey with the tips that I wish I known before I started. For example, to understand the firmware, you need to pull resources from anywhere you can and look at the device as a whole to understand the inner workings. As a result, I was able to crack the protocol and give new life to hundreds of dollars of sensors that would still be collecting dust in a bin. [If you read this far, you probably want tickets. Just sayin’.] #speakers #rover #supercon #aerospacevillage #sourcerover #radiosao #opensource #mcu #wirelessmcu #rarecircuits #rss #feeds #linksharing #qwibbit
MakerWire's avatar
MakerWire 3 weeks ago
ESP32-S3 Pin & Pinless Enclosure #3DThursday #3DPrinting yujixun shares: A protective case for ESP32-S3 development boards (44-pin layout, ESP32-S3-WROOM-1 and N16R8 variants). Supports both PINNED and PINLESS configurations with separate print profiles. Wi-Fi pattern on top for a tech-themed look. Dual USB Type-C port openings. Compact minimalist design — keeps heat dissipation and functionality intact. Pin profile ~39 min / Pinless profile ~29 min, both 0.2mm/2 walls/15% infill, 1 plate. Standard Digital File License (commercial via designer’s Patreon). ESP32-S3 is Adafruit-ecosystem-relevant for CircuitPython users. By TuTu (@yujixun) download the files on: https://makerworld.com/en/models/988691-esp32-s3-pin-pinless-enclosure-44-pin-edition Every Thursday is #3dthursday here at Adafruit! The DIY 3D printing community has passion and dedication for making solid objects from digital models. Recently, we have noticed electronics projects integrated with 3D printed enclosures, brackets, and sculptures, so each Thursday we celebrate and highlight these bold pioneers! Have you considered building a 3D project around an Arduino or other microcontroller? How about printing a bracket to mount your Raspberry Pi to the back of your HD monitor? And don’t forget the countless LED projects that are possible when you are modeling your projects in 3D! LIVE CHAT IS HERE! http://adafru.it/discord Adafruit on Instagram: https://www.instagram.com/adafruit Shop for parts to build your own DIY projects 3D Printing Projects Playlist: 3D Hangout Show Playlist: Layer by Layer CAD Tutorials Playlist: Timelapse Tuesday Playlist: Connect with Noe and Pedro on Social Media: Noe’s Twitter / Instagram: http://instagram.com/ecken Pedro’s Twitter / Instagram: http://instagram.com/videopixil https://blog.adafruit.com/2026/10/29/esp32-s3-pin-pinless-enclosure-3dthursday-3dprinting/ #rss #feeds #linksharing #qwibbit
MakerWire's avatar
MakerWire 3 weeks ago
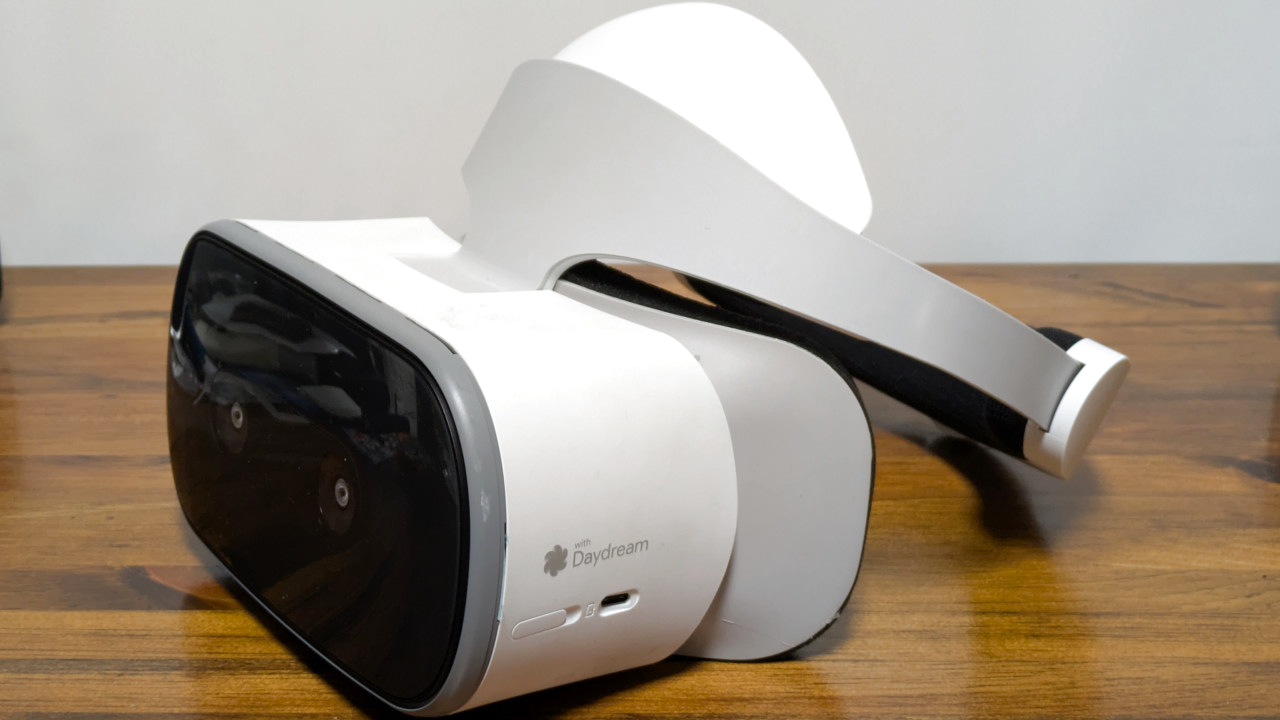
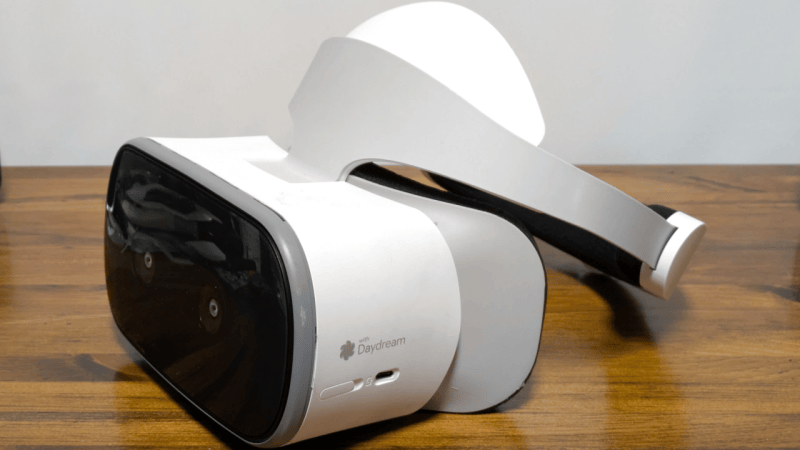
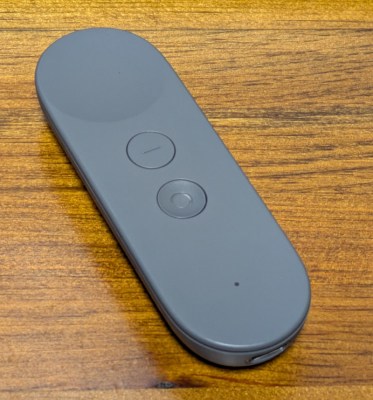
Exploring What’s Left of Google’s VR Dreams You’re likely familiar with Google’s Cardboard, and the legions of cheap virtual reality headsets it spawned. By sticking a smartphone to the wearer’s head, all these headsets needed were some basic optics to provide a surprisingly effective VR experience. You may even know about Google Daydream initiative that came a few years later, which not only improved the basic Cardboard design but brought with it new software features such as VR-specific improvements to the Android operating system and a version of the Play Store dedicated to 3D games and applications. But unless you’re a true Google devotee, what you may not know is that the search giant partnered with Lenovo to produce a stand-alone Daydream headset called the Mirage Solo in 2018. A full year before the Oculus Quest hit the market, the $399 device combined the guts of a smartphone with a 2560×1440 display running at 75 Hz, a pair of cameras in the front that let it see the world around the user in three dimensions, and a gyroscopic handheld controller to provide an immersive VR experience without having to be tethered to a computer. In addition to the standard consumer version, there was even a “Business Edition” of the headset specifically marketed to schools, offices, and hospitals as a way to deliver VR content without having to invest in any additional infrastructure. So why isn’t the Mirage Solo better known? Because in classic fashion, just a few years after it was released, Google decided they were no longer interested in virtual reality and shuttered the entire Daydream program. The software components it introduced were stripped out of Android, the 3D Play Store was taken down, and the back-end mechanisms necessary to register new headsets were turned off. Almost overnight, the Mirage Solo became a stereoscopic paperweight. Or at least that was the official story, anyway. I recently came across a Lenovo Mirage Solo at a thrift store for $25, and despite my initial Internet searches strongly indicating that it would probably be worthless, it seemed worth the gamble to find out for myself. Know Before You Buy Usually I’d just jump into the cool stuff, but I think in this case it’s probably wise to get some details clear before continuing. There’s a good chance that some of you may decide to pick up a Mirage of your own after reading this, or perhaps you’ve already got one and wandered in from an Internet search. However you’ve come to read this article, I don’t want to give you the wrong impression about the realities of the situation. So let’s start with the most important thing: do not buy a Lenovo Mirage Solo unless it has the motion controller! I really can’t stress this one enough, as to my knowledge, there is no way to navigate the UI of the Mirage without it. Many of the cheap units you’ll find on the second-hand market are only priced that way because the controller is missing, so be careful. If you’re wondering, the controller doesn’t need to be the original one that was sold with the Mirage for it to work, but spare controllers are understandably in high demand and are usually priced accordingly. The second thing to remember is that Daydream is a dead platform, and the software running on the Mirage is now at least six years out of date. Anything that still works on it only does so because whatever upstream service or API it relies on hasn’t yet changed enough to break anything. As of this writing, I personally believe enough of the software still works to make the Mirage worth picking up if you can get a good price on one, but that’s not necessarily going to be true forever. Escaping Captivity Alright, let’s assume you’ve just pulled a brand new Lenovo Mirage Solo out of the box in 2026 and want to use it, what does that look like? The first time you boot it up, you won’t get very far. After it asks you to connect the controller and does some internal housekeeping, you’ll be presented with a dialog that walks you though connecting to a WiFi network and adding it to your Google account. Unfortunately, this process will never complete because Google has flipped some switch on their end — although you wouldn’t know it on the device, as the only feedback you’ll get is a pop-up message advising you that there’s been an unspecified problem and that you should try again later. Thankfully, somebody over at Google left us a backdoor. If you click on the four corners of this dialog, starting with the top-left and working clockwise, you’ll be able to bypass the provisioning process. After some more loading and a bit of a tutorial about using the controller and navigating the user interface, you’ll be facing (literally) the next problem. You are standing in an open field west of a…wait, no. Sorry that’s something else. You will be in a virtual forest though, and if you look around you’ll see waterfalls, a winding stream, and birds flying around. It’s all very slick, but the thing we’re mainly worried about right now is the huge message in front of us saying the system can’t connect to the internet. What’s actually happened is that the system can’t connect to the mothership because the Daydream API has been turned off, but apparently there was no canned error message to convey that condition so this is what we get. But again, the developers at Google have provided us a way forward. If you navigate to the settings screen there is an option for Beta Features, and underneath that section you’ll find an entry that says Access 2D Apps. Once you select it you’ll be warned that the behavior of standard Android applications in Daydream may be unpredictable, and the Mirage will reboot. This is where things start to get interesting. Once the headset restarts there will now be a new tab in the application launcher labeled 2D, and under it you should see an icon for the standard Play Store. Once you go into the settings and add your Google account, you’ll be able to browse the Store and download whatever games or applications you want — so long as they don’t mind running on Android 8.0, anyway. Android Apps…in Space! Gaining access to standard Android applications opens up a huge world of possibilities. While the older hardware of the Mirage Solo and the outdated OS means you won’t necessarily be able to run the latest and greatest pieces of software, there’s still a lot you can do, from watching Netflix to working with spreadsheets in Google Docs and connecting to your Linux box over SSH. The on-screen virtual text input is good enough for simple tasks, but connecting a physical keyboard over USB or Bluetooth makes the whole experience vastly more enjoyable. When running 2D applications in Daydream, they will appear as a giant display floating in front of you. Some of the apps will only work in portrait mode as if they think they are running on a normal phone, but in most cases you can grab the corner of the window and stretch it out into a landscape orientation that better fits the fairly impressive field of view offered by the Mirage. The only real issue with using 2D Android apps on the Mirage is how simplistic the window management is. You can move the window and resize it, but there’s no provision for having multiple windows open at the same time. In fact, under normal circumstances there doesn’t even appear to be a way to switch between running applications without having to go all the way back to the main menu — although I did discover that when you have a physical keyboard connected you can use Alt-Tab to bring up the stock Android task switcher, which helps. Entering the Third Dimension At the start of this article I explained that the 3D Play Store was shuttered, and with it, all the games and applications that were actually designed to take advantage of virtual reality. But as we all know, nothing is every really gone on the internet, and thanks to some dedicated fans at the Opendream project, much of the Daydream software has been preserved and can be installed on the Mirage. I’ll leave exploring the catalog of available Daydream software as an exercise for the reader, but at the very least you should install Firefox Reality. It’s not only a far more capable browser than Android’s stock version of Chrome, but it’s an excellent example of how immersive Daydream could be when the software took advantage of the platform. The browser still shows up as a giant floating display, but now you’ve been transported into a darkened environment and have far better control over how everything looks. It also features a far more pronounced 3D effect, with pop-ups that actually hover over the page, and a 3D render of the remote that moves around in space in front of you as you swipe around the pages. There’s even support for curving the entire display, which makes for a very unique browsing experience. Speaking of a unique experience, I’ve saved my absolute favorite for last — YouTube VR. It’s so well implemented and immersive that I’ve actually watched whole movies with this thing on my head. While there’s plenty about Daydream that clearly needed some more time to cook, Google really pulled out all the stops for this one. Everything works as you’d expect, including 360 degree videos and even purchased content that’s attached to your Google account. At least for me, I’d go so far as to say that the experience is good enough that it’s worth getting a used Mirage Solo just for watching YouTube alone. Nothing Lasts Forever As I said at the start, it’s important to understand that the Lenovo Mirage Solo still having any sort of functionality in 2026 is something of a fluke. It’s supposed to be a dead product, and neither Google nor Lenovo want anything to do with it. There are no updates coming, no tech support, and no warranty. At any moment, the YouTube API could make some kind of breaking change, or your favorite apps might get an update that prevents them from working on such an old version of Android. You’d be absolutely crazy to buy this headset at anything near its full retail price. That being said…if you can get a good deal, and by that I mean certainly under $100 and closer to $50 – $70 USD, I think there’s enough life left in the device to make it worth picking up. If you end up getting one and doing something cool with it, I’d love to hear about it. #miragesolo #google #googledaydream #dreams #left #playstore #lenovo #cardboard #know #oculusquest #rss #feeds #linksharing #qwibbit
MakerWire's avatar
MakerWire 3 weeks ago
3D Hangouts – Holiday Wreath, DIY HomeView and Twisty Eyeball 3D Hangouts – Holiday Wreath, DIY HomeView and Twisty Eyeball https://youtube.com/live/60gsCGmLxzw?feature=share This week @adafruit Noe is showcasing his guide for his lego brick inspired holiday wreath. Pedro is working on a DIY version of the Apple HomeView. Checking out this week’s Timelapse Tuesday model of a twisty eyeball. Learn Guide NeoPixel JST Breakout Sparkle Motion Mini Metro EPS32-P4 7in Pi Touch Display 2 Timelapse Tuesday: Twisty Stress-Relief Eyeball By MAX WORKSHOP https://crealitycloud.com/model-detail/stress-relief-eye-ball-toy Every Thursday is #3dthursday here at Adafruit! The DIY 3D printing community has passion and dedication for making solid objects from digital models. Recently, we have noticed electronics projects integrated with 3D printed enclosures, brackets, and sculptures, so each Thursday we celebrate and highlight these bold pioneers! Have you considered building a 3D project around an Feather or other microcontroller? How about printing a bracket to mount your Raspberry Pi to the back of your HD monitor? And don’t forget the countless LED projects that are possible when you are modeling your projects in 3D! The Adafruit Learning System has dozens of great tools to get you well on your way to creating incredible works of engineering, interactive art, and design with your 3D printer! If you’ve made a cool project that combines 3D printing and electronics, be sure to let us know, and we’ll feature it here! https://blog.adafruit.com/2026/10/29/3d-hangouts-holiday-wreath-diy-homeview-and-twisty-eyeball/ image #rss #feeds #linksharing #qwibbit
MakerWire's avatar
MakerWire 3 weeks ago
Emacs turns 50 MIT Technology Review marks 50 years of EMACS, one of the first full-screen text editors and still in use today. It grew out of TECO, a text editor Dan Murphy wrote in 1962 for the PDP-1 at MIT, and Carl Mikkelsen’s Control-R add-on from 1971, which showed edits on video terminals as they happened. In 1976, Richard Stallman saw a full-screen editor called E at Stanford and reworked Control-R so every key ran its own macro. Lab hackers then added commands of their own, which made helping each other hard. Guy Steele Jr. set out to standardize the command set, with David Moon and Stallman, producing the Meta key bindings that gave EMACS its name: Editor Macros. Stallman mailed copies to anyone who sent a tape and a return envelope, on the condition that improvements came back. Commercial versions from Honeywell and from James Gosling followed, and that shift helped push Stallman to start the GNU Project. GNU Emacs shipped with Mac OS X until 2019, and macOS still answers Control-Option-B and Control-Option-F to move back and forward a word. See more at technologyreview.com. Via Hacker News. https://blog.adafruit.com/2026/10/29/emacs-turns-50/ image #mittechnology #technologyreview #stallman #carlmikkelsen #danmurphy #editor #gnuemacs #richardstallman #gnuproject #davidmoon #rss #feeds #linksharing #qwibbit
MakerWire's avatar
MakerWire 3 weeks ago
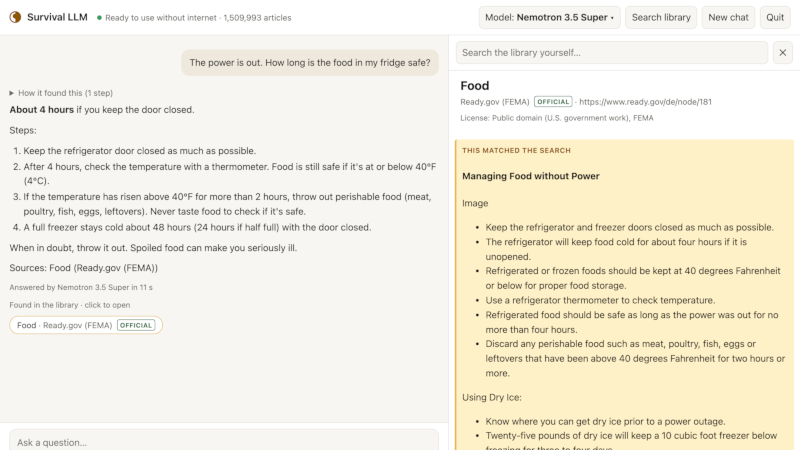
An AI Chatbot for the Apocalypse You don’t have to be a full-on “prepper” to at least occasionally wonder what would happen if civilization collapsed. One thing you probably couldn’t do is go on the Internet and ask your favorite AI how to purify water, repel zombies, or treat a burn, all of which may be highly relevant depending on your situation. Now, with Survival LLM, you have a chance. The LLM is pretty much the stock chatbot, but it is trained on survival topics, and it runs locally. Naturally, you need the Internet to set it up, so you’d want to do that now before everything hits the fan. The training set uses medical references, survival manuals, FEMA and CDC documents, and nearly a million Wikipedia articles. It includes the survival references in a library and links to them when answering, too. The installer is small, but it assesses your system and loads a model based on what you have. If you have less than 32 GB of RAM, you’ll get the IBM Granite 4.2 8B model, which was able to correctly answer 14 of 22 test questions. Other models do better, including the NVIDIA Nemotron 3.5 Super model, which got 21 correct, but requires at least 128 GB of memory. Now, somehow you have to power your computer, but that’s a separate problem. At least there will be plenty of GPUs to scavenge from abandoned data centers. We’ve seen prepper digital libraries before. More than one, in fact. #survival #internet #llm #ibmgranite #nvidianemotron #cdc #ram #ai #rss #feeds #linksharing #qwibbit
MakerWire's avatar
MakerWire 3 weeks ago
Articulated Cute Skeleton #3DThursday #3DPrinting 3dcrabi shares: A flexible, cute skeleton printed all at once — can be posed in many positions. Toy + Halloween decoration. CAREFUL when removing supports. 0.2mm layer, 2 walls, 15% infill, PETG (~36g), ~2.7h, 1 plate. Pure-Halloween flexi pick for the final week — pairs with the Flexi Zombie, Werewolf, and Mythic Skeleton Hand of prior batches as the full articulated-Halloween-creature set now in play. By 3Dcrabi download the files on: https://makerworld.com/en/models/634052-articulated-cute-skeleton-print-in-place Every Thursday is #3dthursday here at Adafruit! The DIY 3D printing community has passion and dedication for making solid objects from digital models. Recently, we have noticed electronics projects integrated with 3D printed enclosures, brackets, and sculptures, so each Thursday we celebrate and highlight these bold pioneers! Have you considered building a 3D project around an Arduino or other microcontroller? How about printing a bracket to mount your Raspberry Pi to the back of your HD monitor? And don’t forget the countless LED projects that are possible when you are modeling your projects in 3D! LIVE CHAT IS HERE! http://adafru.it/discord Adafruit on Instagram: https://www.instagram.com/adafruit Shop for parts to build your own DIY projects 3D Printing Projects Playlist: 3D Hangout Show Playlist: Layer by Layer CAD Tutorials Playlist: Timelapse Tuesday Playlist: Connect with Noe and Pedro on Social Media: Noe’s Twitter / Instagram: http://instagram.com/ecken Pedro’s Twitter / Instagram: http://instagram.com/videopixil https://blog.adafruit.com/2026/10/29/articulated-cute-skeleton-3dthursday-3dprinting/ #rss #feeds #linksharing #qwibbit
↑