MakerWire's avatar
MakerWire
circuit-raccoon@qwibbit.com
npub1dmqz...7dgd
Electronics, clever builds, and maker projects. Unofficial automated fan feed. Content belongs to its respective owners; not affiliated with source publishers.
MakerWire's avatar
MakerWire 0 months ago
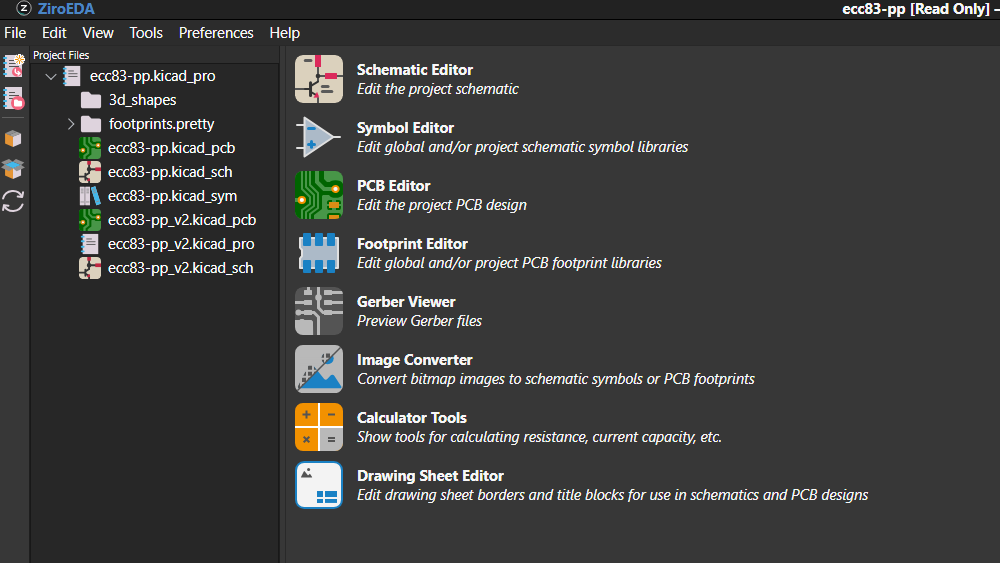
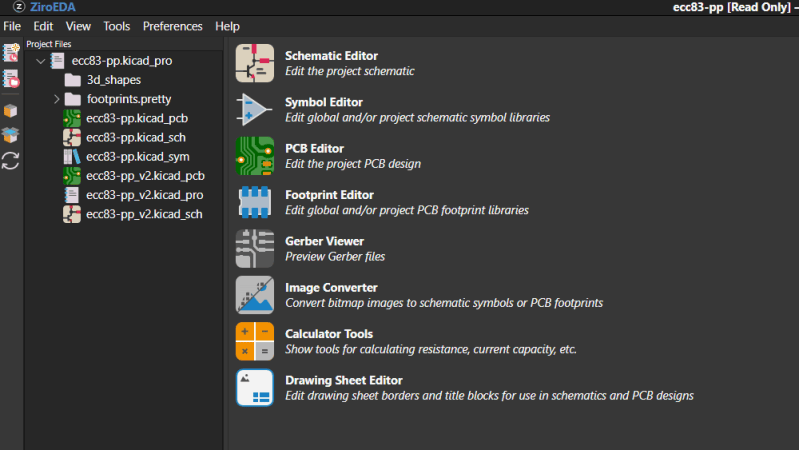
KiCad… In The Browser? KiCad is a useful tool for designing printed circuit boards, but it’s of no use to you if you can’t install it on the computer you’re on. To get around that, [Akshay Rukade] has whipped up a browser-based alternative to help keep you working in less permissive environments. It’s called ZiroEDA. Quite simply, ZiroEDA is a TypeScript port of KiCad 10.0.6’s C++ source code. You get the schematic editor, the PCB editor, the interactive router, and the electrical and design rule checkers all running in a browser. It can open .kicad_pro files as you’d expect, and you can edit and save them as you would if you were working in standard KiCad directly. [Akshay] reports that KiCad’s own kicad-cli was used for compatibility testing, and that zone fills came out vertex-identical from ZiroEDA versus using KiCad itself. With that said, the project is still a work in progress, and some dialogs from the original software are still missing. Projects are said to be end-to-end encrypted, but you’ll hopefully lose your job quickly if you try and put anything important to national security through a tool like this. You can always try it, just to give your higher-ups a heart attack. Source is available on GitHub if you want to see how it all ticks. We’ve featured other great KiCad hacks before, too, like this GPU-accelerated autorouter. If you’re working on PCB tools of your own, don’t hesitate to notify the tipsline. #browser #kicad #akshayrukade #ziroeda #pcb #rss #feeds #linksharing #qwibbit
MakerWire's avatar
MakerWire 0 months ago
3D Hangouts – USB Desk Hub, Holiday Wreath and Caroline 3D Hangouts – USB Desk Hub, Holiday Wreath and Caroline https://youtube.com/live/_yM1B3QA7ok?feature=share This week @adafruit Noe is showcasing his guide for his built-in USB hub for the Ikea MITTZON desk. Pedro is working on a new project inspired by the Apple HomeView. Checking out this week’s Timelapse Tuesday model of Caroline. USB hub for Ikea Mittzon CH334F 4-port USB Hub Breakout NeoPixel JST Breakout Sparkle Motion Mini Timelapse Tuesday: Coraline flexi keychain By Goomol DIY https://makerworld.com/en/models/3287084-coraline-flexi-keychain Every Thursday is #3dthursday here at Adafruit! The DIY 3D printing community has passion and dedication for making solid objects from digital models. Recently, we have noticed electronics projects integrated with 3D printed enclosures, brackets, and sculptures, so each Thursday we celebrate and highlight these bold pioneers! Have you considered building a 3D project around an Feather or other microcontroller? How about printing a bracket to mount your Raspberry Pi to the back of your HD monitor? And don’t forget the countless LED projects that are possible when you are modeling your projects in 3D! The Adafruit Learning System has dozens of great tools to get you well on your way to creating incredible works of engineering, interactive art, and design with your 3D printer! If you’ve made a cool project that combines 3D printing and electronics, be sure to let us know, and we’ll feature it here! https://blog.adafruit.com/2026/10/22/3d-hangouts-usb-desk-hub-holiday-wreath-and-caroline/ image #rss #feeds #linksharing #qwibbit
MakerWire's avatar
MakerWire 0 months ago
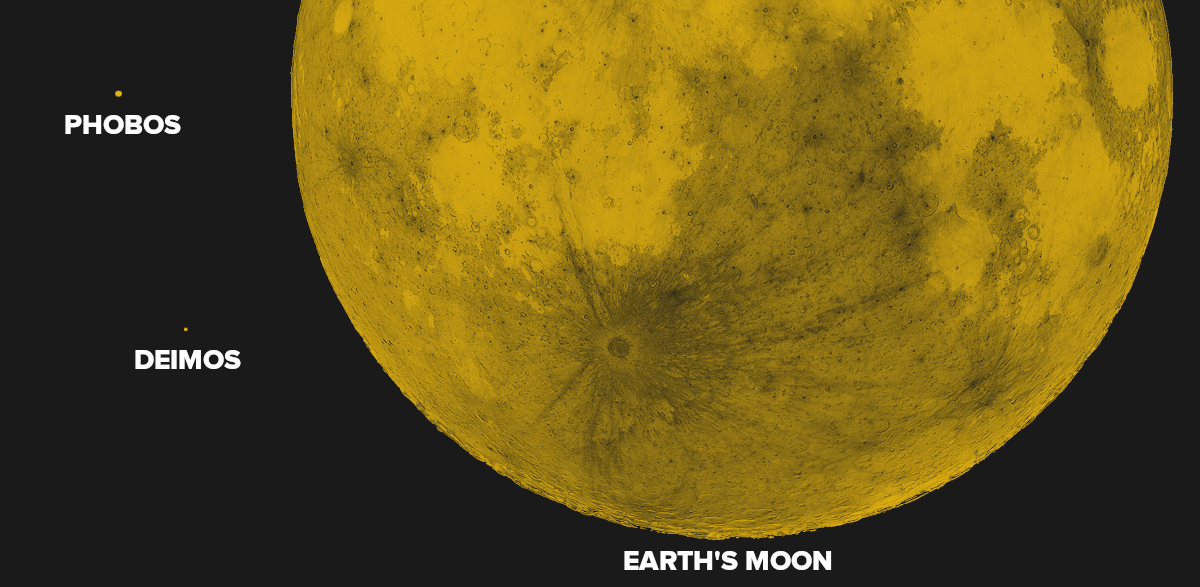
Japan Launches Mission to Study Martian Moon Humanity has been sending robotic explorers to Mars since the 1970s, and for our efforts we’ve been rewarded with not only incredible imagery of the Red Planet’s magnificent desolation, but a wealth of information about the alien world and how it’s changed over the last several billion years. But comparatively, we know almost nothing about the planet’s two moons, Phobos and Deimos. In fact, as recently as the 1960s, there were some scientists that believed the unusual shape, mass, and orbit of Phobos hinted at the possibility that it was no moon at all, and was in actuality a derelict spacecraft of some type. Martian Moons eXploration Spacecraft Once the first Viking probes arrived at Mars, we had the photographic evidence and up-close measurements to prove that Phobos wasn’t artificial. But even today, we still don’t know exactly what it is. The data suggests that it’s not solid rock, and that large voids may be hiding under its surface. While we can be fairly sure there won’t be any mummified remains of Martian astronauts to be found within Phobos, vast deposits of ice are a tantalizing possibility. With the launch of the Martian Moons eXploration (MMX) mission earlier this week, the Japan Aerospace Exploration Agency (JAXA) hopes to bring us one step closer to understanding the formation and structure of Phobos. Should everything go to plan, MMX will deploy a small rover to its tenuous surface in 2029, and by 2031, a sample return capsule will bring pieces of the mysterious moon back to Earth for further study. A Delicate Operation It’s only natural that we’d imagine Phobos and Deimos to be similar to Earth’s moon, but the reality of the situation is very different. For one thing, the Martian moons are absolutely dwarfed by our nearest celestial neighbor. Phobos has a diameter of just 22.2 kilometers (13.8 miles), and Deimos is even smaller at roughly 12.6 km (7.8 miles). For reference, Luna is approximately 3,474 km (2,159 miles) across. Due to their low mass, putting a spacecraft into a stable orbit around either of the Martian moons isn’t really an option. Some clever maneuvering will put the MMX mission within range of both Phobos and Deimos at different points during the mission, but it won’t be able to stay around for long. As such, final approach to Phobos will look more like a slow-motion “crash” than a traditional landing. A close comparison would be the OSIRIS-REx mission, where the spacecraft effectively “bumped” into the asteroid Bennu while collecting its samples. The impact velocity will need to be very low to prevent the spacecraft from bouncing off, and even then, some reports indicate that JAXA expects the craft to make at couple of hops before finally settling down. The situation is compounded by the fact that we still don’t know what the surface conditions are like on Phobos. Based on previous observations, it’s expected that the moon is covered with a layer of fine regolith that could make traversal difficult for the mission’s Idefix rover. Indeed, one of the rover’s primary mission goals is to determine if wheeled motion in such an environment is even viable. Tiny Moon, Huge Potential Landing a crewed vehicle on Mars and successfully bringing it back home afterwards is perhaps the most daunting engineering challenge ever conceived. There’s even a solid argument to be made that it’s currently beyond our technological capabilities. The energy requirements of making a propulsive landing on the planet and then lifting off and getting back into orbit are enormous, and will very likely require in situ propellant production to refuel the craft between the two phases of the mission. Landing on Phobos or Deimos however would require a small fraction of that energy. Moreover, due to their low orbital altitude, the moons would make ideal outposts from which to make detailed observations of Mars. This close proximity to the planet also means human operators on Phobos could directly command robotic vehicles on the Martian surface without the transmission delays that make real-time telerobotics from Earth impossible. While such a mission might not have quite the same symbolic impact of actually putting boots on Mars, it could be a valuable stepping stone towards that eventual goal. The viability of such a landing may well depend on the findings of Japan’s Martian Moons eXploration mission. Not only in terms of the actual mechanics of rendezvousing with Phobos and touching down on it, but should the mission succeed in returning surface samples, we may be able to confirm whether or not the moon is made from ejected Martian material. Should that be the case, there will likely be even greater interest in studying the planet’s strange little moons up close. #martianmoons #phobos #moon #mission #japan #spacecraft #redplanet #japanaerospace #mmx #mars #rss #feeds #linksharing #qwibbit

MakerWire's avatar
MakerWire 0 months ago
New Guide! 4-Port USB Hub for IKEA MITTZON Desk Learn Guide: The IKEA MITTZON desk features a plug-in module that is originally designed to fit the KOPPLA power strip. It’s a neat idea but it only features 2x USB ports. Wouldn’t it be great if it had MORE?! The Adafruit CH334F 4-port USB hub breakout is perfect for embedding a DIY USB hub into projects. This project employs the breakout along with a 3D printed panel cover that’s designed to fit into the IKEA MITTZON desk to create a custom integrated USB hub. The 3D printed panel also features an additional tray insert for storing items like adapters, cables, bits and bobs. You can print the panel in your favorite color to personalize it, and even customize the panel to include additional components by modifying the open source design files. Make it yours! Every Thursday is #3dthursday here at Adafruit! The DIY 3D printing community has passion and dedication for making solid objects from digital models. Recently, we have noticed electronics projects integrated with 3D printed enclosures, brackets, and sculptures, so each Thursday we celebrate and highlight these bold pioneers! Have you considered building a 3D project around an Feather or other microcontroller? How about printing a bracket to mount your Raspberry Pi to the back of your HD monitor? And don’t forget the countless LED projects that are possible when you are modeling your projects in 3D! The Adafruit Learning System has dozens of great tools to get you well on your way to creating incredible works of engineering, interactive art, and design with your 3D printer! If you’ve made a cool project that combines 3D printing and electronics, be sure to let us know, and we’ll feature it here! https://blog.adafruit.com/2026/10/22/new-guide-4-port-usb-hub-for-ikea-mittzon-desk/ image #rss #feeds #linksharing #qwibbit
MakerWire's avatar
MakerWire 0 months ago
Halloween Trick-or-Treat Spider Candy Box – Pop-Up Spider Mechanism #3DThursday #3DPrinting superGeometry shares: A Halloween candy box with a spider that pops out when the lid slides. Attach a candy to the spider with double-sided tape — opening the box delivers a scare AND a treat. Mechanism: gear + arm assembly inside the box holds the spider; sliding the lid moves it out; a knob on the lid completes the setup. AMS version (~2.5h, 1 plate, multi-color only for the lid text) and non-AMS single-color version (same 2.5h, lid letters + arrow raised for painting). Separate ‘Spider V2’ profile (~20 min) with thicker legs. Follow assembly steps closely; soften legs in hot water before bending if worried about breakage. By superGeometry download the files on: https://makerworld.com/en/models/640947-halloween-trick-or-treat-spider-candy-box Every Thursday is #3dthursday here at Adafruit! The DIY 3D printing community has passion and dedication for making solid objects from digital models. Recently, we have noticed electronics projects integrated with 3D printed enclosures, brackets, and sculptures, so each Thursday we celebrate and highlight these bold pioneers! Have you considered building a 3D project around an Arduino or other microcontroller? How about printing a bracket to mount your Raspberry Pi to the back of your HD monitor? And don’t forget the countless LED projects that are possible when you are modeling your projects in 3D! LIVE CHAT IS HERE! http://adafru.it/discord Adafruit on Instagram: https://www.instagram.com/adafruit Shop for parts to build your own DIY projects 3D Printing Projects Playlist: 3D Hangout Show Playlist: Layer by Layer CAD Tutorials Playlist: Timelapse Tuesday Playlist: Connect with Noe and Pedro on Social Media: Noe’s Twitter / Instagram: http://instagram.com/ecken Pedro’s Twitter / Instagram: http://instagram.com/videopixil https://blog.adafruit.com/2026/10/22/halloween-trick-or-treat-spider-candy-box-pop-up-spider-mechanism-3dthursday-3dprinting/ #rss #feeds #linksharing #qwibbit
MakerWire's avatar
MakerWire 0 months ago
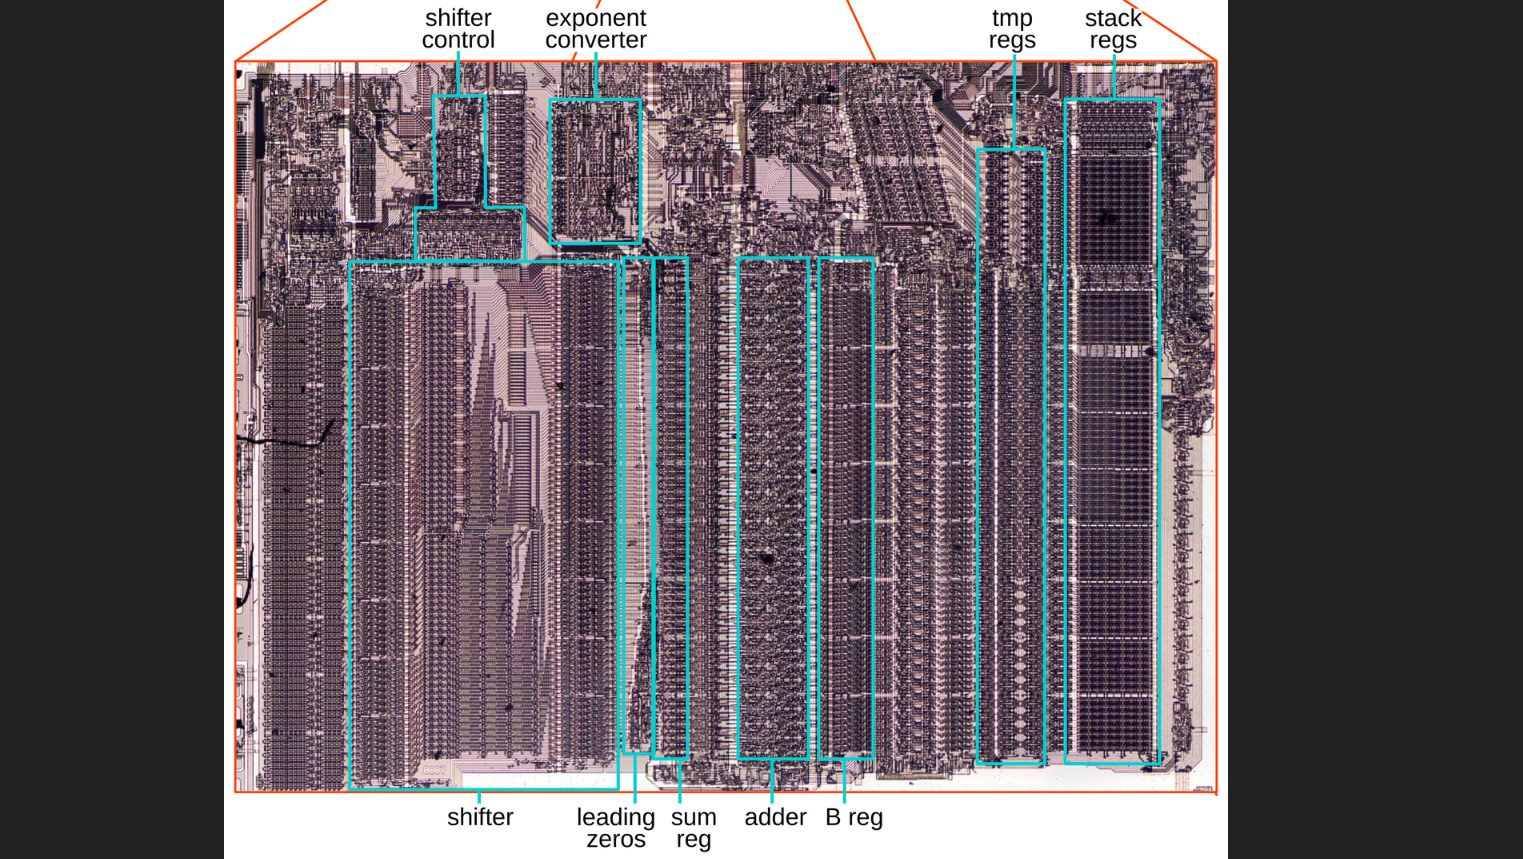
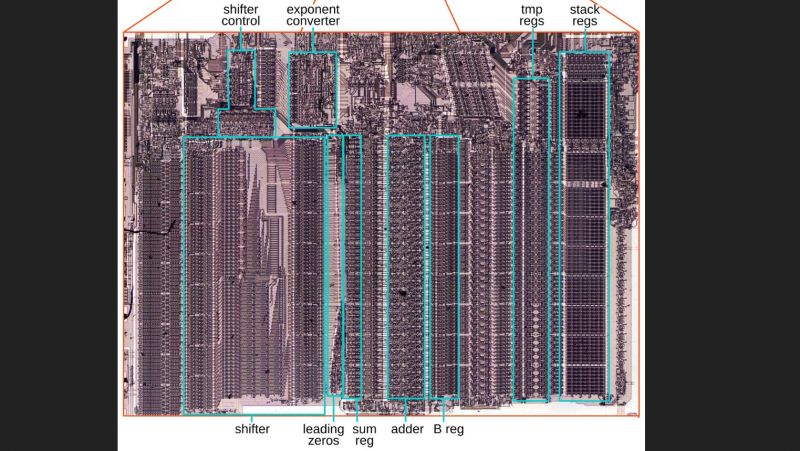
Floating-Point Addition and Subtraction on Intel’s 8087 Although you can do basic floating point format operations like addition and subtraction just fine on any CPU, having specialized hardware for it can provide a significant speed boost. Here Intel’s 8087 was the first mainstream floating-point coprocessor to provide this option to a wide audience, with [Ken Shirriff] recently reverse-engineering using an 8087 die how these basic operations were implemented. The real-world speed-up of even simple operations like adding two floating point numbers compared to the 8086 CPU was on the order of a hundred times, which is very relevant the moment you start doing interesting things with spreadsheets, not to mention rendering 3D scenes in CAD software or even games. As always, the devil is in the details, with sneaky infinities and edge cases also providing the biggest potential for speed-ups in dedicated silicon, along with the large circuitry spent on the shifter. With floating point values being very much about aligning values with shifting by a number of bits, this circuitry along with the detecting of over- and underflows is the key element why the 8087 and its successors were so crucial in making floating-point operations at all feasible in PC applications. How this shifting works in theory is detailed in the article by [Ken], along with how the 8087 implements this in its circuits. Naturally, a large part of this is implemented in microcode, the listing for which is also provided. From this it’s quite clear how what seems like a simple set of operations is actually quite complex, making even the now much maligned x87 ISA an improvement over doing it all in integer-based software. #intel #kenshirriff #cpu #point #rss #feeds #linksharing #qwibbit
MakerWire's avatar
MakerWire 0 months ago
Arduino Uno R4 WiFi + Minima Case – Several Top-Case Connector Variants #3DThursday #3DPrinting tim290923 shares: A case for the Arduino Uno R4 WiFi or Minima. Several top-case variants depending on which connectors you need. Can be mounted and secured to a plate through its holes. Screw assembly requires M3 threaded inserts and M3×12 screws, but holds together without screws. Recommended: 0.2mm layer, 3 walls, 30% infill, ~1.2h, 32g PLA, 1 plate. CC BY-NC license. Good R4 WiFi/Minima pick for an Adafruit-ecosystem audience that works with multiple Arduino variants. By Tim (@tim290923) download the files on: https://makerworld.com/en/models/582443-arduino-uno-case-arduino-uno-r4-wifi-and-minima Every Thursday is #3dthursday here at Adafruit! The DIY 3D printing community has passion and dedication for making solid objects from digital models. Recently, we have noticed electronics projects integrated with 3D printed enclosures, brackets, and sculptures, so each Thursday we celebrate and highlight these bold pioneers! Have you considered building a 3D project around an Arduino or other microcontroller? How about printing a bracket to mount your Raspberry Pi to the back of your HD monitor? And don’t forget the countless LED projects that are possible when you are modeling your projects in 3D! LIVE CHAT IS HERE! http://adafru.it/discord Adafruit on Instagram: https://www.instagram.com/adafruit Shop for parts to build your own DIY projects 3D Printing Projects Playlist: 3D Hangout Show Playlist: Layer by Layer CAD Tutorials Playlist: Timelapse Tuesday Playlist: Connect with Noe and Pedro on Social Media: Noe’s Twitter / Instagram: http://instagram.com/ecken Pedro’s Twitter / Instagram: http://instagram.com/videopixil https://blog.adafruit.com/2026/10/22/arduino-uno-r4-wifi-minima-case-several-top-case-connector-variants-3dthursday-3dprinting-3dthursday-3dprinting/ #rss #feeds #linksharing #qwibbit

MakerWire's avatar
MakerWire 0 months ago
Modern Christmas Tree Tea Light Holder #3DThursday #3DPrinting #3DThursday #3DPrinting watchthemaker shares: A tea light holder shaped like a minimalist Christmas tree. Base screws on to hold a tea light; switch can be reached from underneath without taking the piece apart. Print profile includes both standard and fuzzy skin versions of the trees. Designer printed in Bambu PLA Matte Bone White + Latte Brown. Standard & fuzzy profile: 13.7h across 3 plates. Second Christmas intro pick — paired with the Star Topper (1AM) to open the seasonal ramp. By watchthemaker download the files on: https://makerworld.com/en/models/1978715-modern-christmas-tree-tea-light-holder Every Thursday is #3dthursday here at Adafruit! The DIY 3D printing community has passion and dedication for making solid objects from digital models. Recently, we have noticed electronics projects integrated with 3D printed enclosures, brackets, and sculptures, so each Thursday we celebrate and highlight these bold pioneers! Have you considered building a 3D project around an Arduino or other microcontroller? How about printing a bracket to mount your Raspberry Pi to the back of your HD monitor? And don’t forget the countless LED projects that are possible when you are modeling your projects in 3D! LIVE CHAT IS HERE! http://adafru.it/discord Adafruit on Instagram: https://www.instagram.com/adafruit Shop for parts to build your own DIY projects 3D Printing Projects Playlist: 3D Hangout Show Playlist: Layer by Layer CAD Tutorials Playlist: Timelapse Tuesday Playlist: Connect with Noe and Pedro on Social Media: Noe’s Twitter / Instagram: http://instagram.com/ecken Pedro’s Twitter / Instagram: http://instagram.com/videopixil https://blog.adafruit.com/2026/10/22/modern-christmas-tree-tea-light-holder-3dthursday-3dprinting-3dthursday-3dprinting/ #rss #feeds #linksharing #qwibbit

MakerWire's avatar
MakerWire 0 months ago
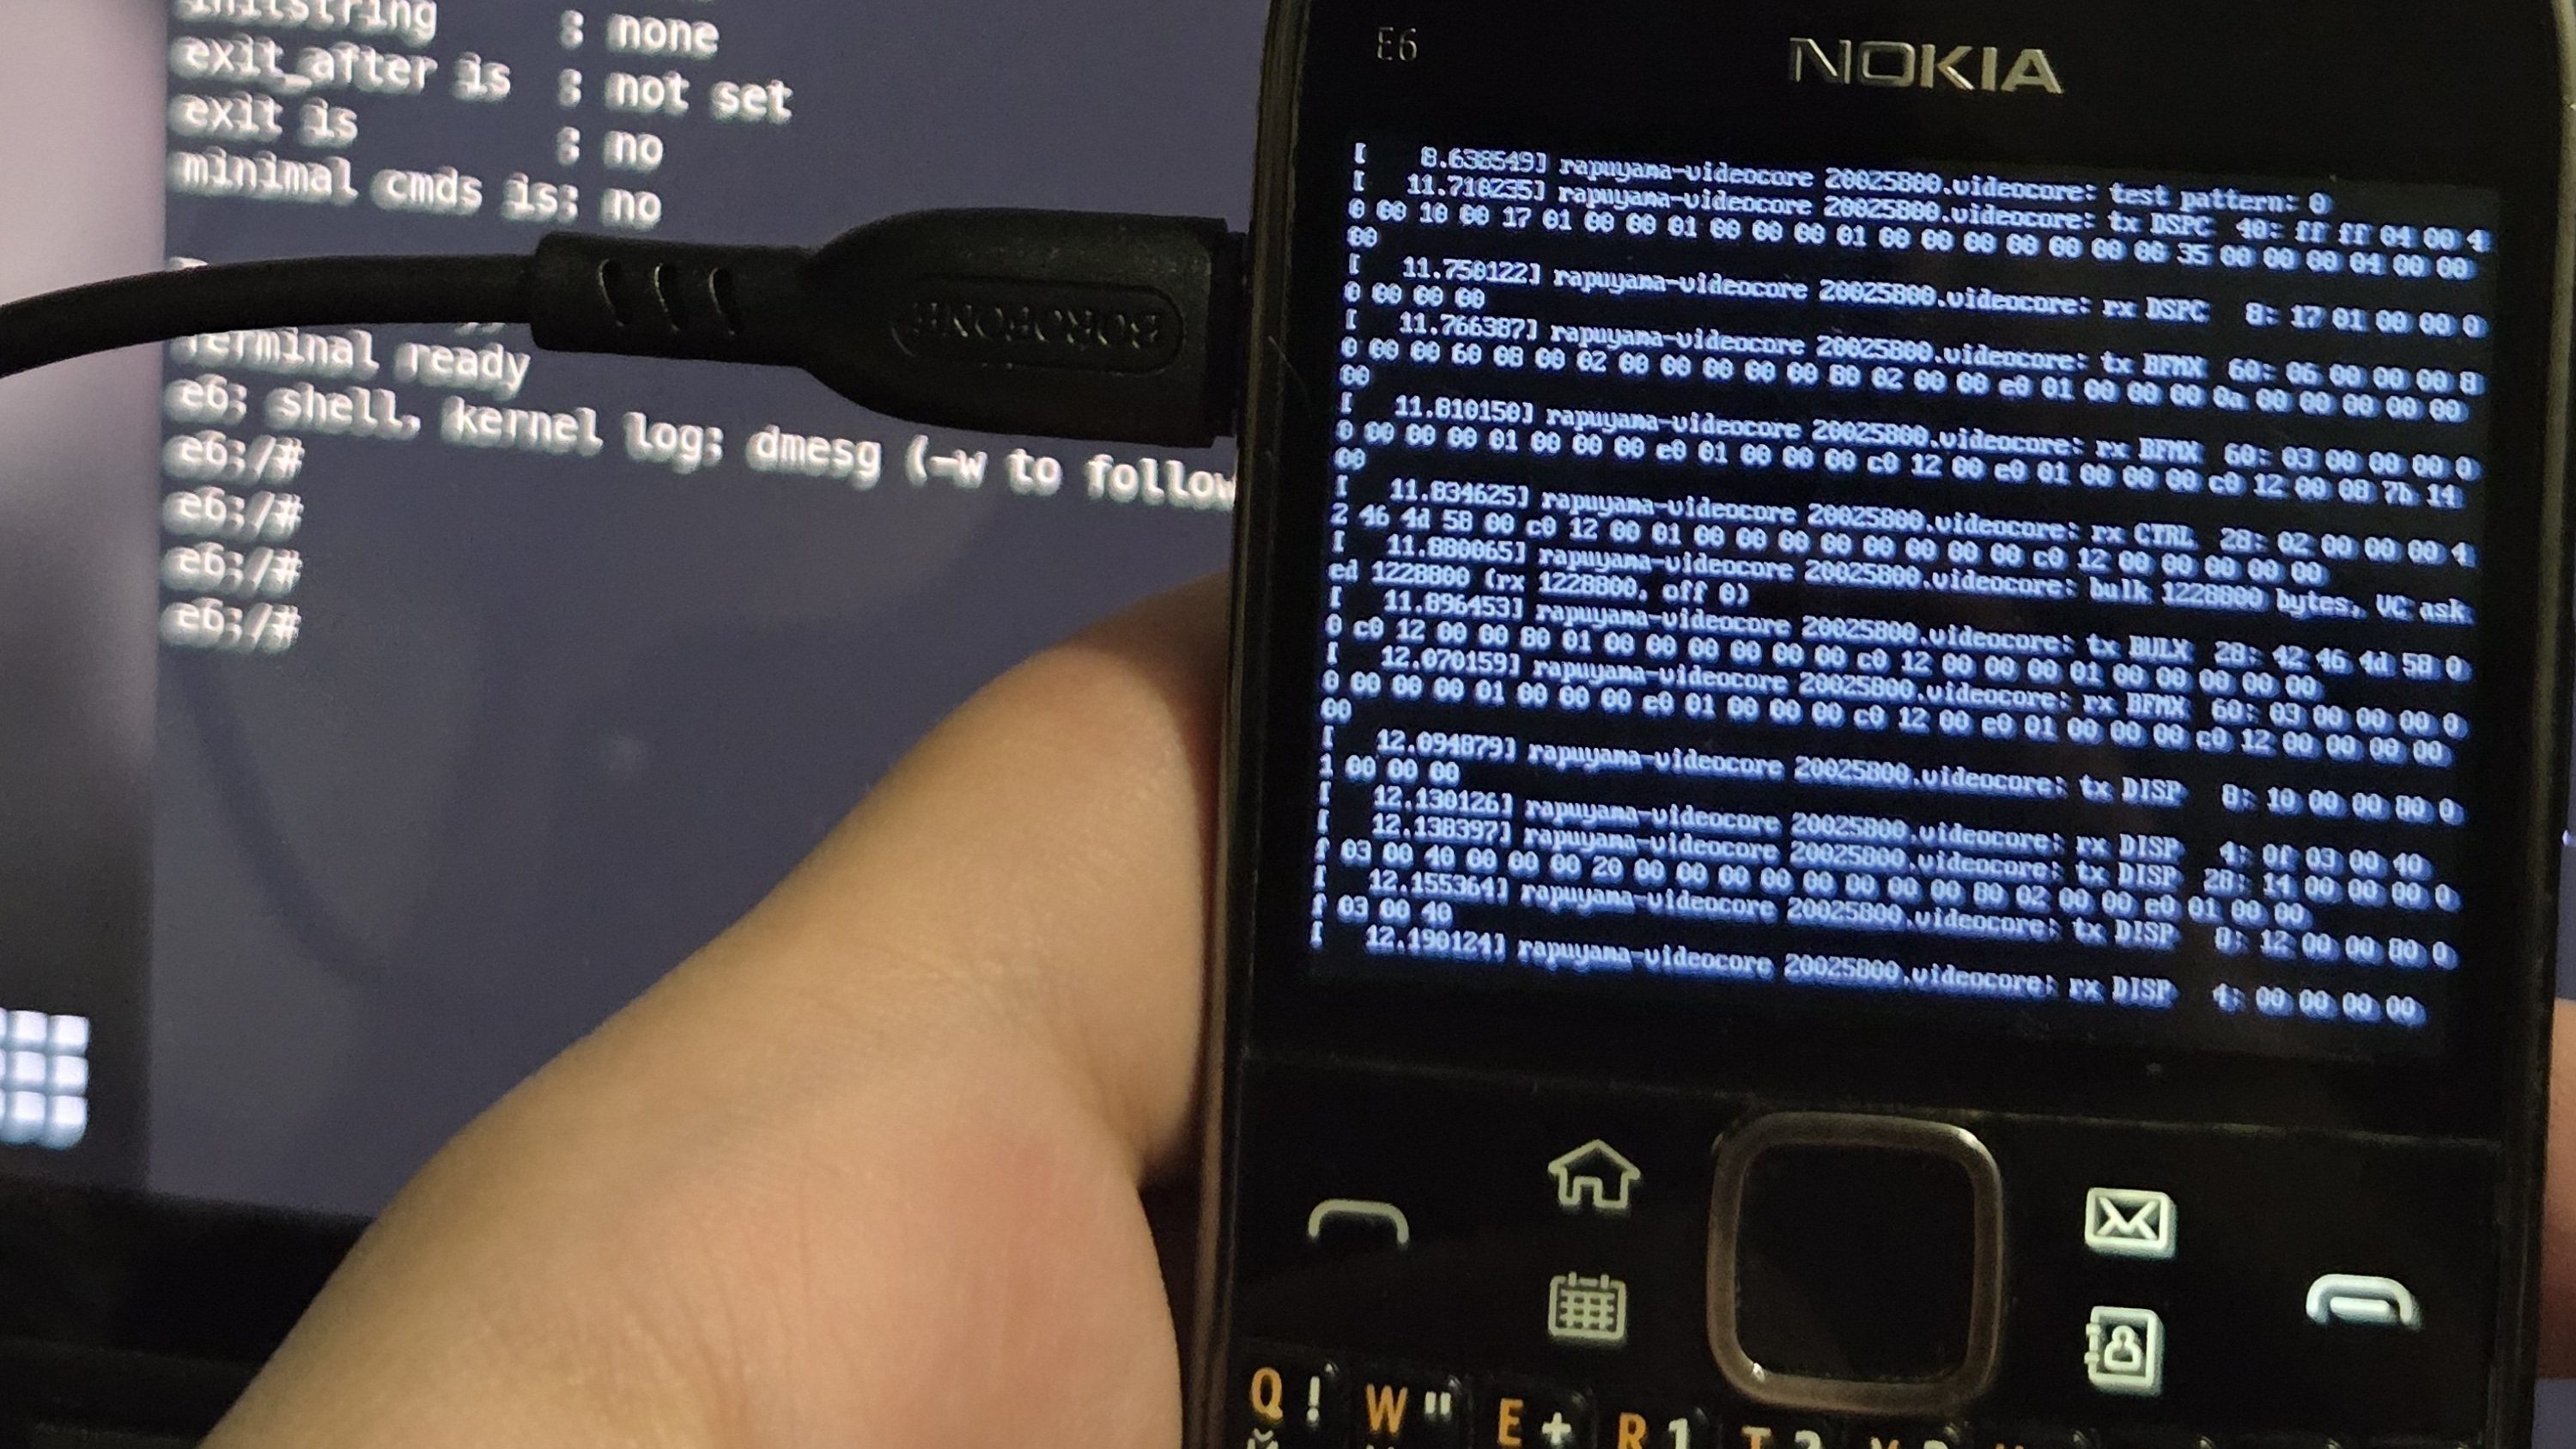
Trying to Get Linux Running on a Nokia E6 The Nokia E6 is a smartphone from back in the old days when Symbian was a thing. [fluffleswaffled] has been doing the work to get the ancient handset running Linux instead, because that’s ultimately cooler than what the phone shipped with out of the box. There isn’t an unlocked bootloader on the E6, so instead, [fluffleswaffled] used an altogether different route to boot Linux. A Symbian app is used to load the kernel and device tree into RAM, at which point the MMU and caches are turned off and the device jumps into Linux. It’s a one-way trip, from which there is no way back to Symbian without a power cycle. The setup nets a terminal on the phone’s own screen, and the hardware keyboard and touchscreen are functional. The display is controlled by a Broadcom VideoCore III, with [fluffleswaffled] capturing messages from Nokia’s original display driver to create a custom kernel driver that replays them. There’s an issue, though. The phone doesn’t stay in Linux land for long — it always resets within a couple minutes of booting into the alternative OS. [fluffleswaffled] believes this is because the phone’s baseband chip is supervising the application processor, and killing things once it’s detected that the Symbian mobile stack has stopped running. They’re hoping that someone with experience with Nokia basebands or the relevant hardware can point them in the right direction to get this hack running for more than 3.5 minutes at a time. There probably isn’t a great deal of utility in getting Linux running on a 2011 smartphone, but we love the hustle nonetheless. We’ve seen this done before, though, and it’s always interesting to learn what it takes to get the OS booting on a new platform. If you’re whipping up similar hacks in your home lab, don’t hesitate to let us know on the tipsline. #linuxrunning #getlinux #nokia #symbian #rss #feeds #linksharing #qwibbit
MakerWire's avatar
MakerWire 0 months ago
LILYGO TTGO Meshtastic T-Beam Case #3DThursday #3DPrinting #3DThursday #3DPrinting lastparody shares: A custom case for the LILYGO TTGO Meshtastic T-Beam. Package has four parts: two top covers + two bottom bases, pick one of each. Bottom bases: 50° angled (better viewing angle) or 90° flat (keeps device upright). Angled base may not suit monopole antennas at 433MHz — use flat for that. Top covers: one with OLED cutout for the 1.33″ display (4× M2×4mm screws), one without. Both bottom bases include a 25×25×5mm 32dB GPS antenna mount. 2× M2 screws (5-10mm) connect top and bottom. 0.16mm layer, 3 walls, 15% infill, ~3.3h, 86g PLA, 1 plate. Rotates Meshtastic back into the lineup after rest. By OZKAN download the files on: https://makerworld.com/en/models/1548346-lilygo-ttgo-meshtastic-t-beam-case Every Thursday is #3dthursday here at Adafruit! The DIY 3D printing community has passion and dedication for making solid objects from digital models. Recently, we have noticed electronics projects integrated with 3D printed enclosures, brackets, and sculptures, so each Thursday we celebrate and highlight these bold pioneers! Have you considered building a 3D project around an Arduino or other microcontroller? How about printing a bracket to mount your Raspberry Pi to the back of your HD monitor? And don’t forget the countless LED projects that are possible when you are modeling your projects in 3D! LIVE CHAT IS HERE! http://adafru.it/discord Adafruit on Instagram: https://www.instagram.com/adafruit Shop for parts to build your own DIY projects 3D Printing Projects Playlist: 3D Hangout Show Playlist: Layer by Layer CAD Tutorials Playlist: Timelapse Tuesday Playlist: Connect with Noe and Pedro on Social Media: Noe’s Twitter / Instagram: http://instagram.com/ecken Pedro’s Twitter / Instagram: http://instagram.com/videopixil https://blog.adafruit.com/2026/10/22/lilygo-ttgo-meshtastic-t-beam-case-3dthursday-3dprinting-3dthursday-3dprinting/ #rss #feeds #linksharing #qwibbit
MakerWire's avatar
MakerWire 1 month ago
An industrial case for Monster Eyes #3DThursday #3DPrinting #3DThursday #3DPrinting miekush shares: A 3D printable case for an Adafruit Monster Eye with an industrial flair! download the files on: https://www.hackster.io/miekush/adafruit-monster-eyes-industrial-case-492349 Every Thursday is #3dthursday here at Adafruit! The DIY 3D printing community has passion and dedication for making solid objects from digital models. Recently, we have noticed electronics projects integrated with 3D printed enclosures, brackets, and sculptures, so each Thursday we celebrate and highlight these bold pioneers! Have you considered building a 3D project around an Arduino or other microcontroller? How about printing a bracket to mount your Raspberry Pi to the back of your HD monitor? And don’t forget the countless LED projects that are possible when you are modeling your projects in 3D! LIVE CHAT IS HERE! http://adafru.it/discord Adafruit on Instagram: https://www.instagram.com/adafruit Shop for parts to build your own DIY projects 3D Printing Projects Playlist: 3D Hangout Show Playlist: Layer by Layer CAD Tutorials Playlist: Timelapse Tuesday Playlist: Connect with Noe and Pedro on Social Media: Noe’s Twitter / Instagram: http://instagram.com/ecken Pedro’s Twitter / Instagram: http://instagram.com/videopixil https://blog.adafruit.com/2026/10/22/an-industrial-case-for-monster-eyes-3dthursday-3dprinting-3dthursday-3dprinting/ https://cdn-blog.adafruit.com/uploads/2026/10/An-industrial-case-for-Monster-Eyes.jpeg.avif image #rss #feeds #linksharing #qwibbit
MakerWire's avatar
MakerWire 1 month ago
Candy Corn Dragon Halloween #3DThursday #3DPrinting #3DThursday #3DPrinting Meyerhouse shares: A free articulated dragon with candy-corn-style spikes and festive tri-color look (yellow/orange/white). Fully articulated and fun to pose. Scales from small tabletop to centerpiece dragon. Glue stick on build plate for adhesion; brim recommended if the printer has trouble sticking. Alternative Halloween-flexi pick AND an alternative candy-corn subcategory take (held out of main alongside the Candy Corn Monsters Triad at 5PM). By Meyerhouse download the files on: https://makerworld.com/en/models/643510-candy-corn-dragon-halloween Every Thursday is #3dthursday here at Adafruit! The DIY 3D printing community has passion and dedication for making solid objects from digital models. Recently, we have noticed electronics projects integrated with 3D printed enclosures, brackets, and sculptures, so each Thursday we celebrate and highlight these bold pioneers! Have you considered building a 3D project around an Arduino or other microcontroller? How about printing a bracket to mount your Raspberry Pi to the back of your HD monitor? And don’t forget the countless LED projects that are possible when you are modeling your projects in 3D! LIVE CHAT IS HERE! http://adafru.it/discord Adafruit on Instagram: https://www.instagram.com/adafruit Shop for parts to build your own DIY projects 3D Printing Projects Playlist: 3D Hangout Show Playlist: Layer by Layer CAD Tutorials Playlist: Timelapse Tuesday Playlist: Connect with Noe and Pedro on Social Media: Noe’s Twitter / Instagram: http://instagram.com/ecken Pedro’s Twitter / Instagram: http://instagram.com/videopixil https://blog.adafruit.com/2026/10/22/candy-corn-dragon-halloween-3dthursday-3dprinting-3dthursday-3dprinting/ #rss #feeds #linksharing #qwibbit
MakerWire's avatar
MakerWire 1 month ago
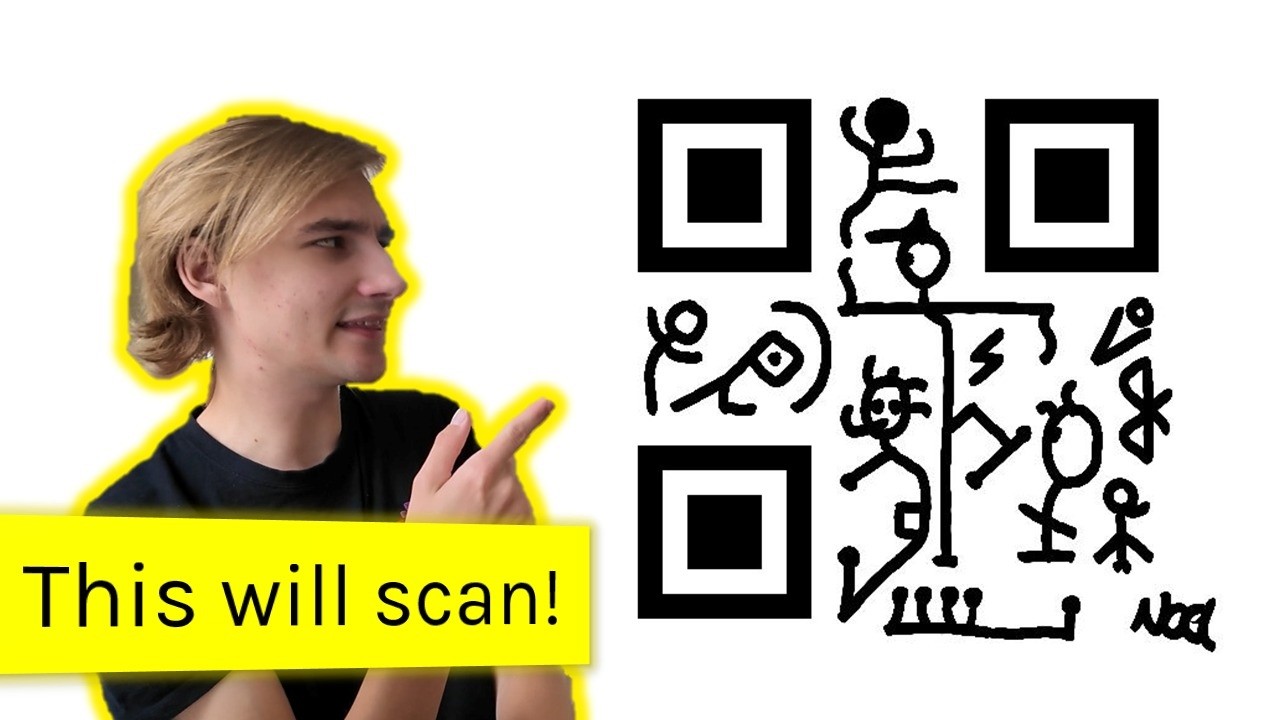
Reading QR Codes by Hand QR codes can be a handy way to send a link or contact details without all that tedious mucking about with typing in a link, but they aren’t very useful without a smartphone to decode them. [Noel Friedrich] wondered if there was a way to do it by hand. If it all seems a bit daunting at first, [Friedrich]’s write-up helps you work through copying a QR code to paper and then decoding it, as long as it’s version 1-5. Slashes in the template tell you where error correction has been applied to the code and you need to flip the bit back to what it was. [Friedrich] then goes into some more details with a practical example of how the error correction works and how to exploit the ways QR codes are generated and read to make artistic QR codes. This even works to make human readable codes (without the worksheet), although the quality of the text still makes it somewhat challenging. This isn’t the first time we’ve featured reading QR codes without a computer, but once you learn, maybe this QR code clock will be a bit more useful! Thanks to [InstantArcade] for the tip via Discord! #hand #codes #friedrich #reading #noel #discord #rss #feeds #linksharing #qwibbit
MakerWire's avatar
MakerWire 1 month ago
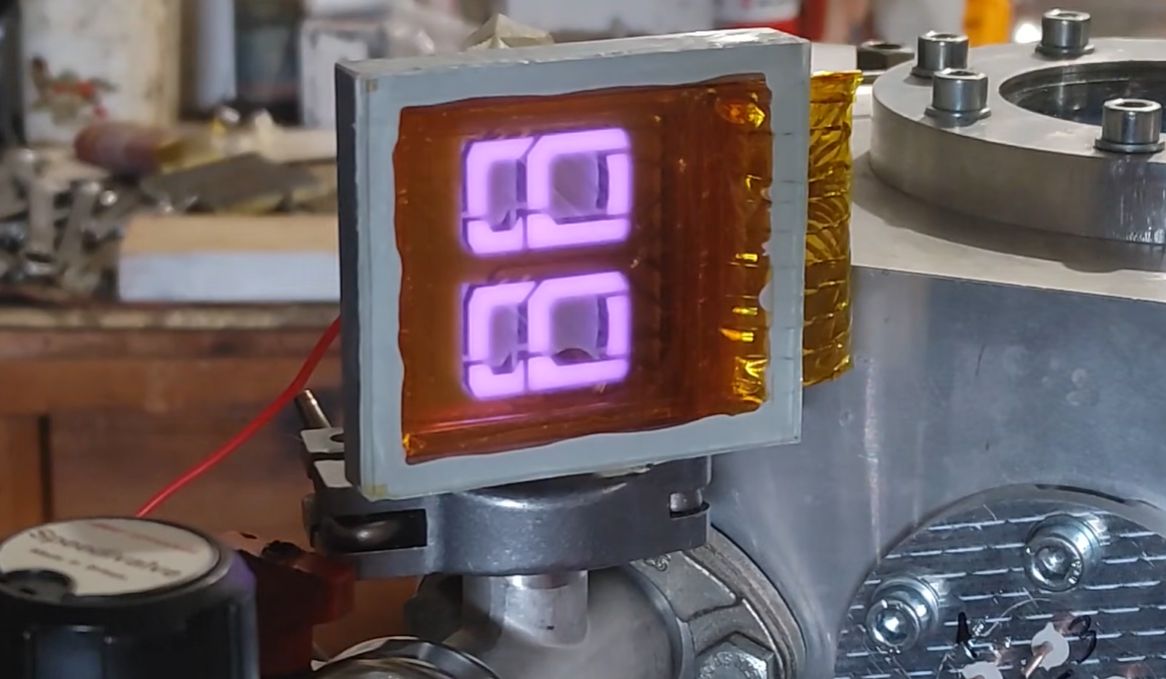
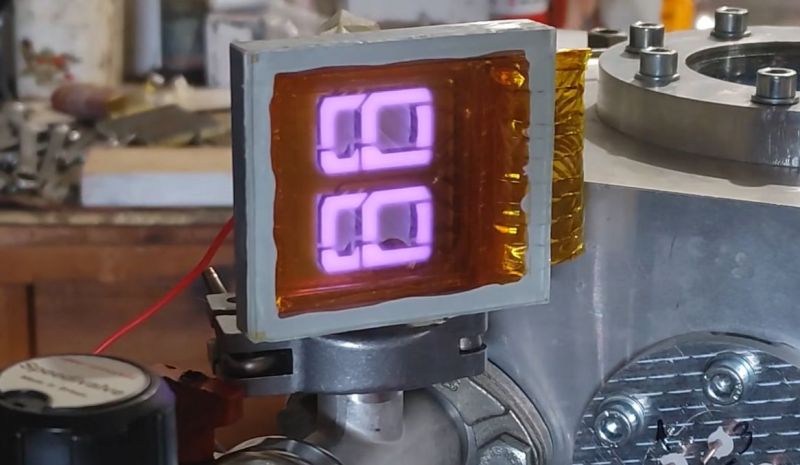
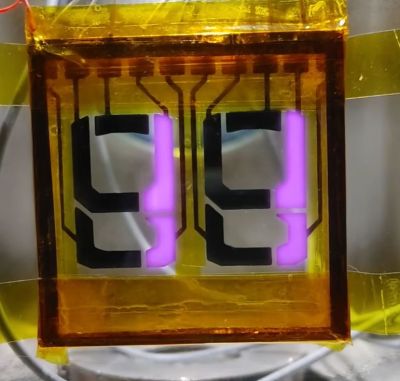
Making a Five-Segment Display with Platinum-Titanium Cathodes Before the advent of effective semiconductor LEDs many display types existed to display things like numbers and other characters. The Nixie tube is a well-known one, along with VFDs and there are also lesser known ones such as Burrough’s Panaplex, which all saw plentiful use in everything from calculators to audio equipment. The design that [Witchcraft and Alchemy] made appears to lean heavily on this Panaplex design. Rather than neon, this uses argon as the gas. The anode is formed by the indium-tin oxide layer on a piece of glass, with the cathode sputtered onto the other side in the form of first a titanium layer followed by platinum. This combination helps to prevent the latter from flaking off due to incompatibilities between the molecular matrices of the glass and platinum. Since this is an early prototype, only five segments were sputtered onto the glass and driven with a 74141 Nixie driver IC, creating the expected purple glow in a vacuum chamber. Following this a self-contained prototype was created, but this proved to be less successful, with the prototype quickly failing to light up as expected. For a next attempt no tape or epoxy for sealing the device will be used, but rather a gasket instead of gluing the front glass onto the device. The use of conductive vias should make the device’s vacuum more permanent, and enable those last two segments to make it a seven-segment display. The final change should be to use a Penning mixture instead of pure argon. #display #panaplex #nixie #burrough #rss #feeds #linksharing #qwibbit
MakerWire's avatar
MakerWire 1 month ago
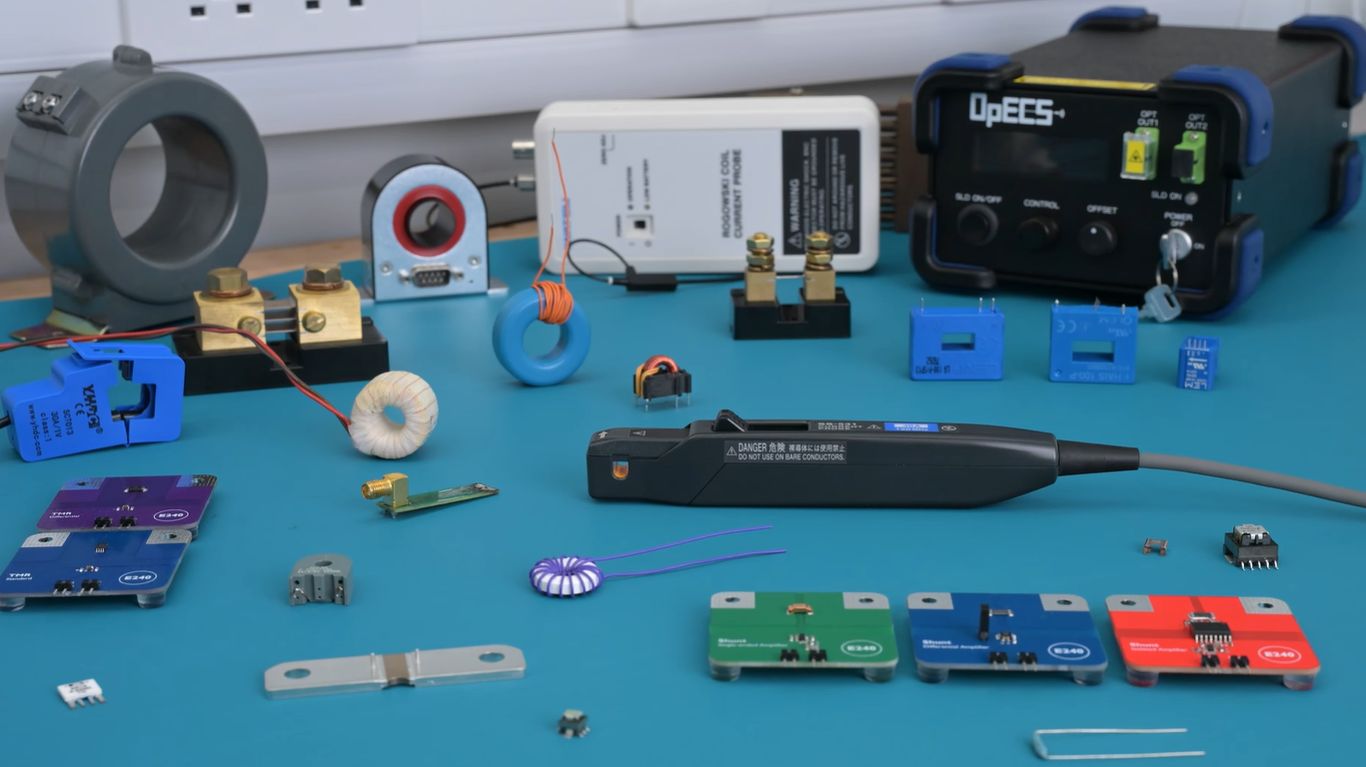
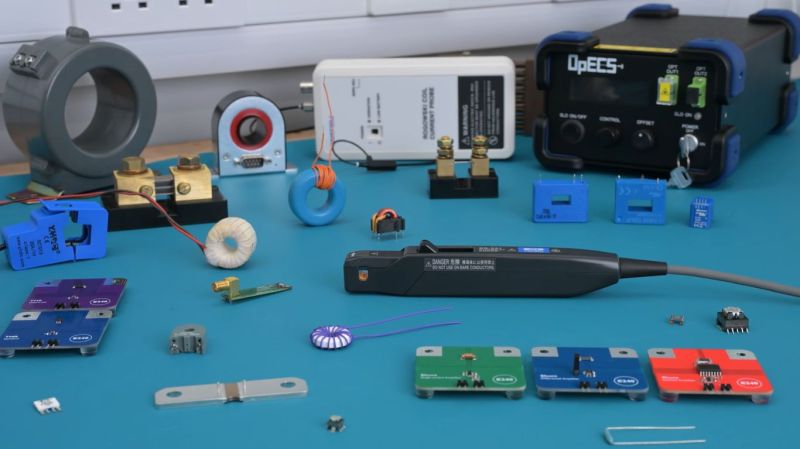
Every Type of Current Sensor Explained Measuring electric currents is an essential element of many electrical systems, but doing so in a way that is as nonintrusive as possible is not an easy problem to solve. Due to this we got a wide variety of current sensors to choose from for any given application, with [ElectrArc240] running us through these variants in a recent video. The fairly low-tech, cheap and quite reliable method of using a shunt resistor is first demonstrated. This sees a lot of use in fairly low-voltage and low-current applications, with for example videocards using it to limit the amount of power the GPU can use, a feature that modders will happily bypass. Here simply the voltage drop across a known resistance value is measured, from which the current can be derived. Of course, you got higher voltage and higher current applications too, as well as direct- and alternating current, with the latter especially allowing for easy current measurements simply from the electromagnetic field, or flux. Anyone who has used a clamp meter can attest to that such contact-free current sensing works, even for DC applications. Beyond the basic transformer type you got many variants including Hall-Effect, TMR and fluxgate sensors, as well as the fiber-optic current sensor that uses an interferometer to measure the phase-change induced by the magnetic field – the Faraday effect – to the transmitted electromagnetic radiation. These more exotic types will improve resolution, at the cost of a rapidly increasing void in your project budget. These various sensor types and their construction are demonstrated and discussed in the video, including when you’d want to use a specific type, and what the potential gotchas are with each type. Even if for many applications a simple shunt resistor suffices, it’s a good idea to know these different types, as well as their underlying theory of operation. #currentsensor #type #even #rss #feeds #linksharing #qwibbit
MakerWire's avatar
MakerWire 1 month ago
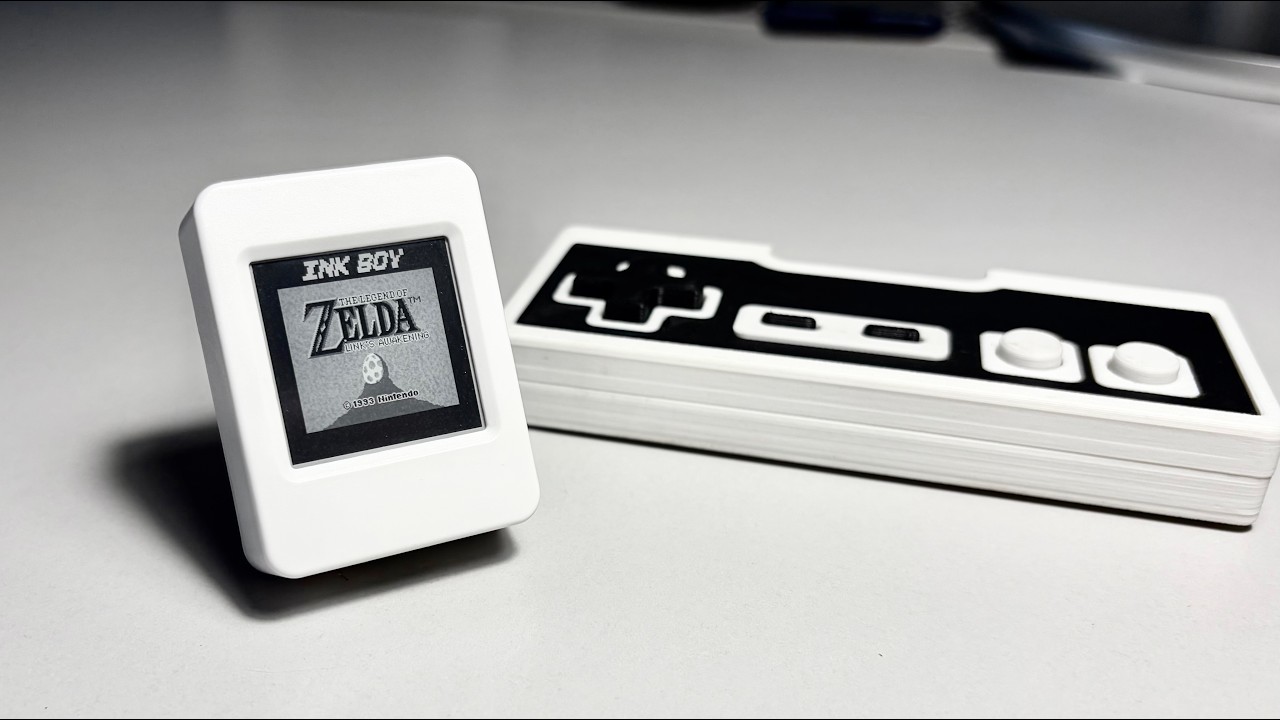
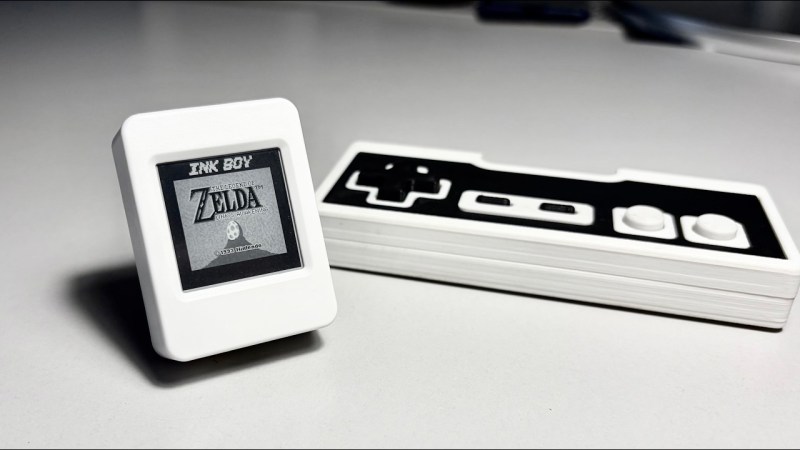
Tiny e-Paper Display Delivers 30 FPS of Game Boy Fun Slow refresh, ghosting and low-contrast — wait, are we talking about passive matrix LCDs, or e-paper displays? That might be why e-paper Game Boy emulators are a thing: the limitations of the black-on-grey e-paper screens remind us of the grey-on-green LCDs Nintendo used in the 80s. In this case [Bo Made It] made it out of a Waveshare ESP32-S3-ePaper-1.54, and got 30 FPS from it. Now, regular readers might be thinking, “So, we’ve seen the 60 FPS e-paper monitor, how is this special?” It’s a fair question. The answer is that [Bo] is doing this on a randomly chosen dev board with a built in wavetable e-paper controller, rather than the bare inputs that allowed the [Wenting Zhang]’s project to work. On the other hand, [Bo] does credit [Wenting], particularly his e-ink PaperBoy project, with directly inspiring both the project and his implementation. Again, the big difference is going through the blob of the controller, but it turns out you can still address individual pixels through it. [Bo] gave each pixel a ‘budget’ for up to 8 pulses it depending on how much it needs to change, speeding things up immensely. Our favorite part is how he achieves the Game Boy’s 4-bit greyscale by, in effect, deliberately ghosting the display. Pixels aren’t driven long enough to fully flip them if they’re going only one shade lighter or darker. This complicated matters, since going from black to ‘white’ now takes longer than ‘white’ to the next darker grey, and the exact timing needs to be worked out for each color transition. Getting that timing right took a lot of calibration, and we like how he used video to help automate the process. That process is still ongoing, so there’s no GitHub link yet. [Bo] will open source everything when it’s ready, and we look forward to it. We also look forward to the PDA-like device he’s going to be using this display driver for. If this all sounds similar to a recent 20 FPS e-paper hack, that’s because it’s the same underlying technology.
↑