
Here's the 2nd part of #permaculture stacking functions with the effluent from the anerobic digester: The worm bin:
 Right now it's set up to produce worms more than castings in that I'm keeping it very wet.
I have it in an unheated barn that is open to the outside.
I dump the anerobic digester effluent in every few days and also mist the bed with the mist heads attached to the white PVC pipe a few feet above the bed.
The bin is constructed of PVC pipe and a Waste Management Bagster. I got the idea from Meme's Worms on YouTube.
The 1/2" hardware cloth keeps the skunks out. Before I had that the skunks would come in to eat the worms.
Here are some worms uncovered by scratching the surface a bit. They are a mix of Red Wiggler and European Night Crawlers:
Right now it's set up to produce worms more than castings in that I'm keeping it very wet.
I have it in an unheated barn that is open to the outside.
I dump the anerobic digester effluent in every few days and also mist the bed with the mist heads attached to the white PVC pipe a few feet above the bed.
The bin is constructed of PVC pipe and a Waste Management Bagster. I got the idea from Meme's Worms on YouTube.
The 1/2" hardware cloth keeps the skunks out. Before I had that the skunks would come in to eat the worms.
Here are some worms uncovered by scratching the surface a bit. They are a mix of Red Wiggler and European Night Crawlers:
 They were overwintered in this bin just by stacking 18" of leaves above them... the temperature in the compost didn't go below 55 degrees F even though it was 5-10 degrees outside for a few weeks straight.
In addition to manure, straw, compost, shredded cardboard and shredded notices from the IRS, they are fed a mix of ground birdseed, ground corn, azomite, and biochar, all finely ground:
They were overwintered in this bin just by stacking 18" of leaves above them... the temperature in the compost didn't go below 55 degrees F even though it was 5-10 degrees outside for a few weeks straight.
In addition to manure, straw, compost, shredded cardboard and shredded notices from the IRS, they are fed a mix of ground birdseed, ground corn, azomite, and biochar, all finely ground:
 I throw a couple of handfuls on every day or two:
 The plan is to expand the worms in this bin to the other bins in the background and set up mist systems above them all, as well as a gravity fed effluent distribution system.
Once up and running, I've read you can harvest 5-6 lbs of worms per square foot per year. Right now a pound of worms online is going for $40 and in the spring will be around $65 or so. Each Bagster bin is ~32 square feet so you can do the math.
To achieve this though I need to invest in some better separating methods like a trommel of some sort. The beds are also way to wet for any sort of automated separation right now. Right now I'm in production mode to grow out to the rest of the beds.
#worms #vermiculture #grownostr #plantstr #garden #valueprinting #moneyprinting
The plan is to expand the worms in this bin to the other bins in the background and set up mist systems above them all, as well as a gravity fed effluent distribution system.
Once up and running, I've read you can harvest 5-6 lbs of worms per square foot per year. Right now a pound of worms online is going for $40 and in the spring will be around $65 or so. Each Bagster bin is ~32 square feet so you can do the math.
To achieve this though I need to invest in some better separating methods like a trommel of some sort. The beds are also way to wet for any sort of automated separation right now. Right now I'm in production mode to grow out to the rest of the beds.
#worms #vermiculture #grownostr #plantstr #garden #valueprinting #moneyprinting
Right now it's set up to produce worms more than castings in that I'm keeping it very wet.
I have it in an unheated barn that is open to the outside.
I dump the anerobic digester effluent in every few days and also mist the bed with the mist heads attached to the white PVC pipe a few feet above the bed.
The bin is constructed of PVC pipe and a Waste Management Bagster. I got the idea from Meme's Worms on YouTube.
The 1/2" hardware cloth keeps the skunks out. Before I had that the skunks would come in to eat the worms.
Here are some worms uncovered by scratching the surface a bit. They are a mix of Red Wiggler and European Night Crawlers:
They were overwintered in this bin just by stacking 18" of leaves above them... the temperature in the compost didn't go below 55 degrees F even though it was 5-10 degrees outside for a few weeks straight.
In addition to manure, straw, compost, shredded cardboard and shredded notices from the IRS, they are fed a mix of ground birdseed, ground corn, azomite, and biochar, all finely ground:
I throw a couple of handfuls on every day or two:
The plan is to expand the worms in this bin to the other bins in the background and set up mist systems above them all, as well as a gravity fed effluent distribution system.
Once up and running, I've read you can harvest 5-6 lbs of worms per square foot per year. Right now a pound of worms online is going for $40 and in the spring will be around $65 or so. Each Bagster bin is ~32 square feet so you can do the math.
To achieve this though I need to invest in some better separating methods like a trommel of some sort. The beds are also way to wet for any sort of automated separation right now. Right now I'm in production mode to grow out to the rest of the beds.
#worms #vermiculture #grownostr #plantstr #garden #valueprinting #moneyprinting I've been feeding it cow and pig poop.
 The "main" output is biogas, but the other output is this effluent rich in microbes (in the 5 gallon bucket), which goes into the worm bin for production of worms and castings.
 I'm hauling the effluent to the worms by hand every couple days, but I set up the anerobic digester purposefully uphill of the worms so eventually I can gravity feed the effluent to the worms automatically.
#grownostr #permaculture #biogas #vermiculture #worms
I'm hauling the effluent to the worms by hand every couple days, but I set up the anerobic digester purposefully uphill of the worms so eventually I can gravity feed the effluent to the worms automatically.
#grownostr #permaculture #biogas #vermiculture #worms About a month ago, I planted some 1' OP-367 Hybrid Poplars.
Here they are planted into some landscape fabric to keep down the weeds, about a month ago:
About a month ago, I planted some 1' OP-367 Hybrid Poplars.
Here they are planted into some landscape fabric to keep down the weeds, about a month ago:
 Now here they are 1 month later, I'd say average 2 stems, each 18" to 2' tall:
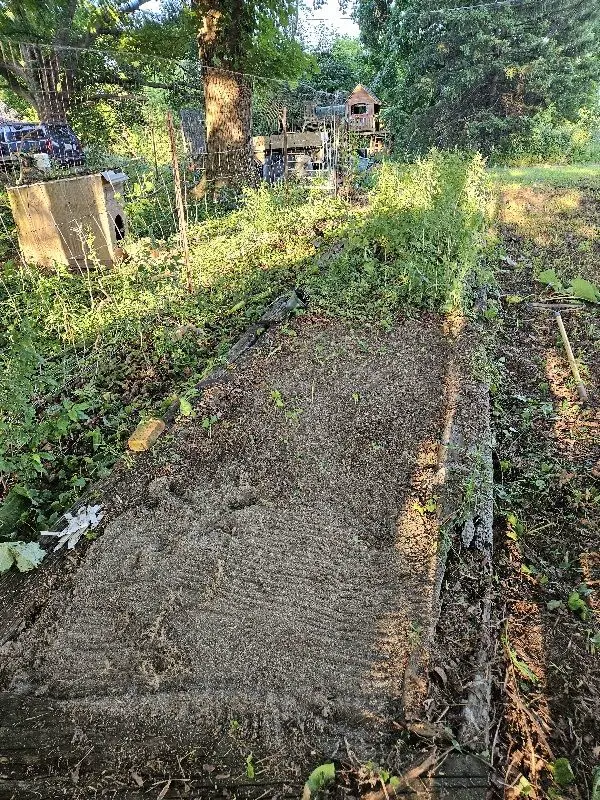
 Here are some Silky Willows (Steamco) I planted last Thursday. Already putting on growth. Planted in 3' wide landscape fabric with drip irrigation under the fabric.
 That's a black walnut in the background. Printing more trees via propagation from nuts.
Now let's look at the economics. 1 month in I have 4x'ed my cutting length on the poplars, which I bought for $2.50. In the fall if they grow no taller than they are now, I have $10 worth of cuttings.
This is the 2nd year for those basket willows. I cut them down to the ground in March and they've put on 7-8' of growth already on conservatively 30 stems on each plant. Say conservatively we have 210, 1' cuttings. So now I have $500 worth of cuttings per year possible from that one plant.
Let's say we pot them up and sell them like "fastgrowingtrees.com" does for $86.95 a plant! Now we have our single "parent" plant making us $15,000+.
At this point it's a marketing game.
Or all you chicken and duck farmers, use these plants in your chicken and duck yard for cover for your birds as well as to soak up the nitrogen in their poop. The birds will weed the trees for you and help them grow faster. Stack functions in your businesses and life.
Also as an aside.... these cuttings should go in the ground earlier than July! But they still work. Pretty forgiving.
#permaculture #grownostr #propagation #nursery #business #plantstr #garden
That's a black walnut in the background. Printing more trees via propagation from nuts.
Now let's look at the economics. 1 month in I have 4x'ed my cutting length on the poplars, which I bought for $2.50. In the fall if they grow no taller than they are now, I have $10 worth of cuttings.
This is the 2nd year for those basket willows. I cut them down to the ground in March and they've put on 7-8' of growth already on conservatively 30 stems on each plant. Say conservatively we have 210, 1' cuttings. So now I have $500 worth of cuttings per year possible from that one plant.
Let's say we pot them up and sell them like "fastgrowingtrees.com" does for $86.95 a plant! Now we have our single "parent" plant making us $15,000+.
At this point it's a marketing game.
Or all you chicken and duck farmers, use these plants in your chicken and duck yard for cover for your birds as well as to soak up the nitrogen in their poop. The birds will weed the trees for you and help them grow faster. Stack functions in your businesses and life.
Also as an aside.... these cuttings should go in the ground earlier than July! But they still work. Pretty forgiving.
#permaculture #grownostr #propagation #nursery #business #plantstr #garden Here are the wands. They have a pin that goes down into a hole in the head to create the mist. They haven't been cleaned in years.
 I cleaned them up in some citric acid:
 Here is the valve I use to control the mist wands. It's wired into a controller in the house, and connects to a piece of 3/4" PVC pipe with holes drilled in every 4' or so to accept the lines from the mist heads. The other end is fed by a 3/4" poly water line (not shown):
 Finally, the controller: A Galcon 8056 AC 6S. This will control 4 valves and can be programmed down to the second which is useful for the mist system since I'm on from 8-15 seconds every 10 minutes depending on wind, temperature, etc.
 #permaculture #plantstr #garden #grownostr #propagation
 First, pick out a small bunch and hold them at the level you'd like to plant:
 Next trim off the tops and roots. It looks harsh, but it is good for the plant: it encourages branching both above and below ground:
 Next plant them in some cell flats and put under intermittent mist for a few weeks:
 After they've acclimated under the mist, they can be placed under daily irrigation for a few months. Their next step is into "Trade 1" (3/4 gallon) pots.
#permaculture #plantstr #grownostr #gardening #propagation
After they've acclimated under the mist, they can be placed under daily irrigation for a few months. Their next step is into "Trade 1" (3/4 gallon) pots.
#permaculture #plantstr #grownostr #gardening #propagation I wanted to share some quick notes on propagation by cuttings in case there is interest. Many woody perennials are propagated this way, not from seed. We are "cloning" the plant so we get a copy.
This is just one technique for propagation.
Where a plant stem has leaves coming out, provides us with the cells needed to produce roots. This area on the stem is called a "node". Therefore, for most varieties of plants we need a set of nodes below the soil to provide cells for roots.
Here is a 2 node cutting from a butterfly bush called 'Black Knight', before and after making the cutting. The leaves are stripped from the bottom node that will go under the soil. The leaves are also cut back to reduce water loss from drying out:
BEFORE:
I wanted to share some quick notes on propagation by cuttings in case there is interest. Many woody perennials are propagated this way, not from seed. We are "cloning" the plant so we get a copy.
This is just one technique for propagation.
Where a plant stem has leaves coming out, provides us with the cells needed to produce roots. This area on the stem is called a "node". Therefore, for most varieties of plants we need a set of nodes below the soil to provide cells for roots.
Here is a 2 node cutting from a butterfly bush called 'Black Knight', before and after making the cutting. The leaves are stripped from the bottom node that will go under the soil. The leaves are also cut back to reduce water loss from drying out:
BEFORE:
 AFTER:
 If we have some plants that would have a very short space between nodes, we can make longer cuttings. Again, one node with leaves cut back that go above the ground and then strip off the leaves on all other nodes. I also wound the bottom of the cutting a bit to encourage rooting. These are cuttings from a Korean lilac called "Miss Kim":
BEFORE:
If we have some plants that would have a very short space between nodes, we can make longer cuttings. Again, one node with leaves cut back that go above the ground and then strip off the leaves on all other nodes. I also wound the bottom of the cutting a bit to encourage rooting. These are cuttings from a Korean lilac called "Miss Kim":
BEFORE:
 AFTER:
 One exception to the rule is hydrangeas, those you can get away with a single node above ground and they will then root from the stems. This is an Annabelle Hydrangea:
BEFORE:
One exception to the rule is hydrangeas, those you can get away with a single node above ground and they will then root from the stems. This is an Annabelle Hydrangea:
BEFORE:
 AFTER:
 Regardless of the cutting type, I dip the cuttings in a rooting hormone called "Dip And Grow" and stick the cuttings fairly close in a bed full of concrete sand. This bed is in the shade.
 The cuttings should root within a few weeks. I mist 8-12 seconds every 10 minutes from 8:00 AM until about 8:30 PM at night with an automated timer.
After they root, I can leave them in the sand bed until they go dormant, or if I dig them up and pot them up I just need to keep them misted until they recover from the transplant shock.
An other option other than the mist bed is to stick them right in plastic cell packs and mist them there. That alleviates the transplant shock but takes up more room.
It varies a bit, but you can figure you can get about $1.35 per well rooted cutting, or if these are grown out and sold next year I'll be asking $10 for them.
The last thing I'll say is you can only do this legally, freely,with plants that are not patented, or whose patents have expired.
Please feel free to ask questions!
#propagation #permaculture #grownostr #plantstr #garden
The cuttings should root within a few weeks. I mist 8-12 seconds every 10 minutes from 8:00 AM until about 8:30 PM at night with an automated timer.
After they root, I can leave them in the sand bed until they go dormant, or if I dig them up and pot them up I just need to keep them misted until they recover from the transplant shock.
An other option other than the mist bed is to stick them right in plastic cell packs and mist them there. That alleviates the transplant shock but takes up more room.
It varies a bit, but you can figure you can get about $1.35 per well rooted cutting, or if these are grown out and sold next year I'll be asking $10 for them.
The last thing I'll say is you can only do this legally, freely,with plants that are not patented, or whose patents have expired.
Please feel free to ask questions!
#propagation #permaculture #grownostr #plantstr #garden #grownostr #beekeeping #bees #beestr
 What we are looking for is a medium that drains easily, yet retains moisture. The cost is also a factor.
Since we pot mostly perennials, I also am looking for a fungally dominant potting mix vs. bacterially dominant as you'd have with fresh compost.
Wood chips around here are easy to get by the truckload, and I use well rotted ones for the basis of my compost mix. And by "rotted" I mean "rotted": They look like soil and are completely broken down by fungus, it takes about 2-3 years.
What we are looking for is a medium that drains easily, yet retains moisture. The cost is also a factor.
Since we pot mostly perennials, I also am looking for a fungally dominant potting mix vs. bacterially dominant as you'd have with fresh compost.
Wood chips around here are easy to get by the truckload, and I use well rotted ones for the basis of my compost mix. And by "rotted" I mean "rotted": They look like soil and are completely broken down by fungus, it takes about 2-3 years.
 On top of the wood chips I add about 5% by volume charged biochar. About half of this is sifted to 1/4" + and the other half of the biochar is right out of the leaf vacuum I use to crush it up. The biochar is charged with azomite, sea minerals, worm casts, and effective microorganisms (EM-1). We make the biochar right here on the farm. It serves both to provide and retain nutrients and moisture as well as provide drainage:
 Then worm castings sifted to 1/8" and finer at around 5% by volume. I also raise the worms for the casts, the current system involves growing them in 4'x8' Waste Management Bagsters:
 Finally about 1 quart of activated EM-1. This is 1 oz Terraganix EM-1 mixed with 1 oz blackstrap molasses in 30 oz of water:
 This all gets mixed up by hand, and then we use it to pot our plants.
I mix it in a gorilla cart which will provide enough for about 25-30 trade gallon pots.
#grownostr #permaculture #fungi #plantstr #garden
This all gets mixed up by hand, and then we use it to pot our plants.
I mix it in a gorilla cart which will provide enough for about 25-30 trade gallon pots.
#grownostr #permaculture #fungi #plantstr #garden This device here takes the calcium ions in our water and carbonate ions in the water and combines them back together into a form of calcium carbonate crystals called vaterite, which is like talc powder when dried.
Since the ions are combined into the crystal and remain crystalized in the water, they won't bond with other ions in the water or soil.
This helps prevent a few things for us in the garden:
- the calcium and carbonate ions from bonding with other fertilizers, helping to lessen the amount of fertilizers needed and improving the efficiency of microbes in the soil getting needed nutrients to plants
- helps us from getting water spots on our plant leaves in the nursery and clogging irrigation parts with minerals. The vaterite will wash off in the rain rather than form crystals on the plant surfaces.
Incidentally we're using this to treat all the water in our house/farm since it's in-line with the line from the well. So this helps with clogged shower heads and sinks and water spots as well as making soap go farther.
Inside this device is a core which is coated with a catalyst to combine the calcium and carbonate ions into crystals. The rough surface helps add turbidity to the water to ensure the ions come in contact with the catalyst:
This device here takes the calcium ions in our water and carbonate ions in the water and combines them back together into a form of calcium carbonate crystals called vaterite, which is like talc powder when dried.
Since the ions are combined into the crystal and remain crystalized in the water, they won't bond with other ions in the water or soil.
This helps prevent a few things for us in the garden:
- the calcium and carbonate ions from bonding with other fertilizers, helping to lessen the amount of fertilizers needed and improving the efficiency of microbes in the soil getting needed nutrients to plants
- helps us from getting water spots on our plant leaves in the nursery and clogging irrigation parts with minerals. The vaterite will wash off in the rain rather than form crystals on the plant surfaces.
Incidentally we're using this to treat all the water in our house/farm since it's in-line with the line from the well. So this helps with clogged shower heads and sinks and water spots as well as making soap go farther.
Inside this device is a core which is coated with a catalyst to combine the calcium and carbonate ions into crystals. The rough surface helps add turbidity to the water to ensure the ions come in contact with the catalyst:
 The core fits into a pipe which goes in-line with your water line, so it doesn't impeded the flow of water:
 This gets cleaned out 2-3x per year with some CLR (Calcium-Lime-Rust) solvent just to clean up the catalyst. There are no filters or consumables other than the CLR cleaner.
Here is the website for the company describing the science behind it:
This gets cleaned out 2-3x per year with some CLR (Calcium-Lime-Rust) solvent just to clean up the catalyst. There are no filters or consumables other than the CLR cleaner.
Here is the website for the company describing the science behind it:


 Here's a closeup of the bag. Looks like the cardboard is starting to break down in here.
 Not ideal that the tree isn't in the ground yet, but if you need to preserve some plants until you have time to plant them, this works pretty well for me.
I can share some other resources on Effective Microorganisms (EM) if you're interested.
The other thing cool about EM-1 was discovered after the Fukashima nuclear plant accident. At a nursery in Japan, they were testing the crops after the fallout to make sure that there were not radioactive elements present in the food.
One of the fruit nurseries does a soil drench and foliar application of EM-1 to build up the biology in the soil and on the leaves.
They found that the fruit from this nursery had very little or no contamination from the radioactive elements.
My understanding is the EM-1 helps establish good fungal and bacterial presence in the soil and on the leaves which forms a sort of protection from the radioactive elements. Instead of taking in the raw element as ions, the fungi is preventing the plant from taking them in as the plants are relying on the fungi to provide them with what nutrients they need, and not just taking them from the soil.
#grownostr #permaculture #gardening #plantstr
Not ideal that the tree isn't in the ground yet, but if you need to preserve some plants until you have time to plant them, this works pretty well for me.
I can share some other resources on Effective Microorganisms (EM) if you're interested.
The other thing cool about EM-1 was discovered after the Fukashima nuclear plant accident. At a nursery in Japan, they were testing the crops after the fallout to make sure that there were not radioactive elements present in the food.
One of the fruit nurseries does a soil drench and foliar application of EM-1 to build up the biology in the soil and on the leaves.
They found that the fruit from this nursery had very little or no contamination from the radioactive elements.
My understanding is the EM-1 helps establish good fungal and bacterial presence in the soil and on the leaves which forms a sort of protection from the radioactive elements. Instead of taking in the raw element as ions, the fungi is preventing the plant from taking them in as the plants are relying on the fungi to provide them with what nutrients they need, and not just taking them from the soil.
#grownostr #permaculture #gardening #plantstr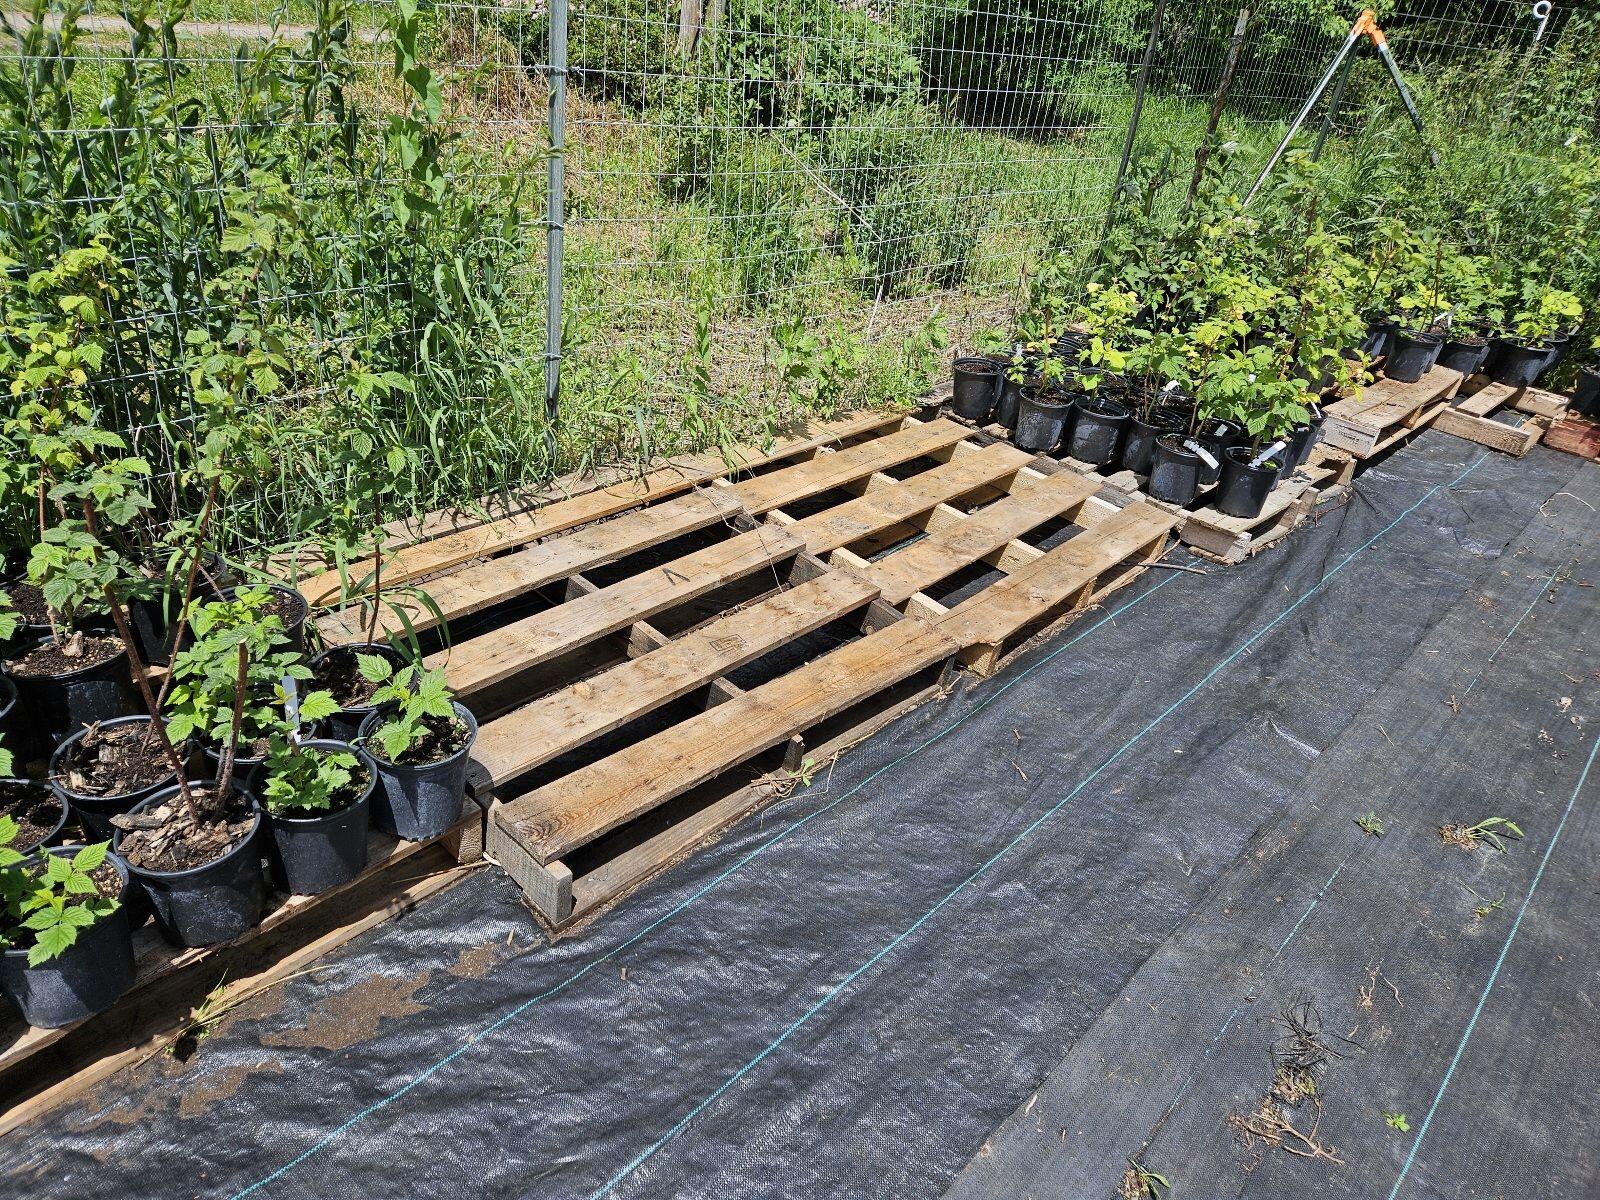 #nursery #permaculture #plantstr #business #grownostr


 I can fit about 4500 -5000 cuttings in here.
After it is cleaned out, I'll set up the intermittent mist system, which is made from 4 misting heads, a propagation water controller, and a water valve I can control from the controller.
The controller will turn on about 15 seconds every 10 - 12 minutes to mist the cuttings.
The cuttings are cut with multiple lead nodes. The bottom leaves are stripped off and only the top left on, and those are trimmed as well. They are then dipped in rooting hormone and put in the sand. The mist keeps them from drying out until they root.
#plantstr #gardening #propagation #nursery #grownostr
I can fit about 4500 -5000 cuttings in here.
After it is cleaned out, I'll set up the intermittent mist system, which is made from 4 misting heads, a propagation water controller, and a water valve I can control from the controller.
The controller will turn on about 15 seconds every 10 - 12 minutes to mist the cuttings.
The cuttings are cut with multiple lead nodes. The bottom leaves are stripped off and only the top left on, and those are trimmed as well. They are then dipped in rooting hormone and put in the sand. The mist keeps them from drying out until they root.
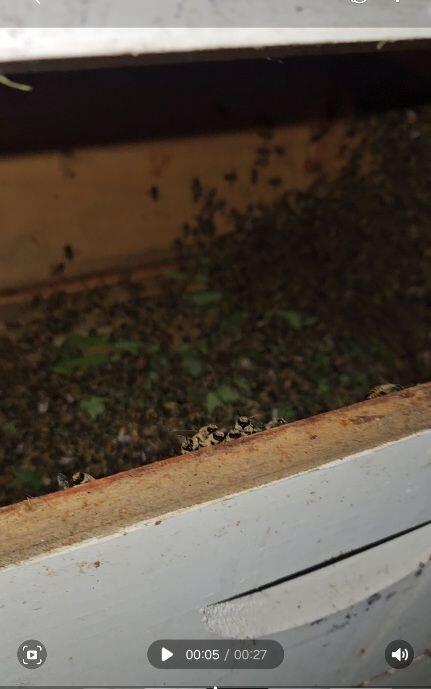
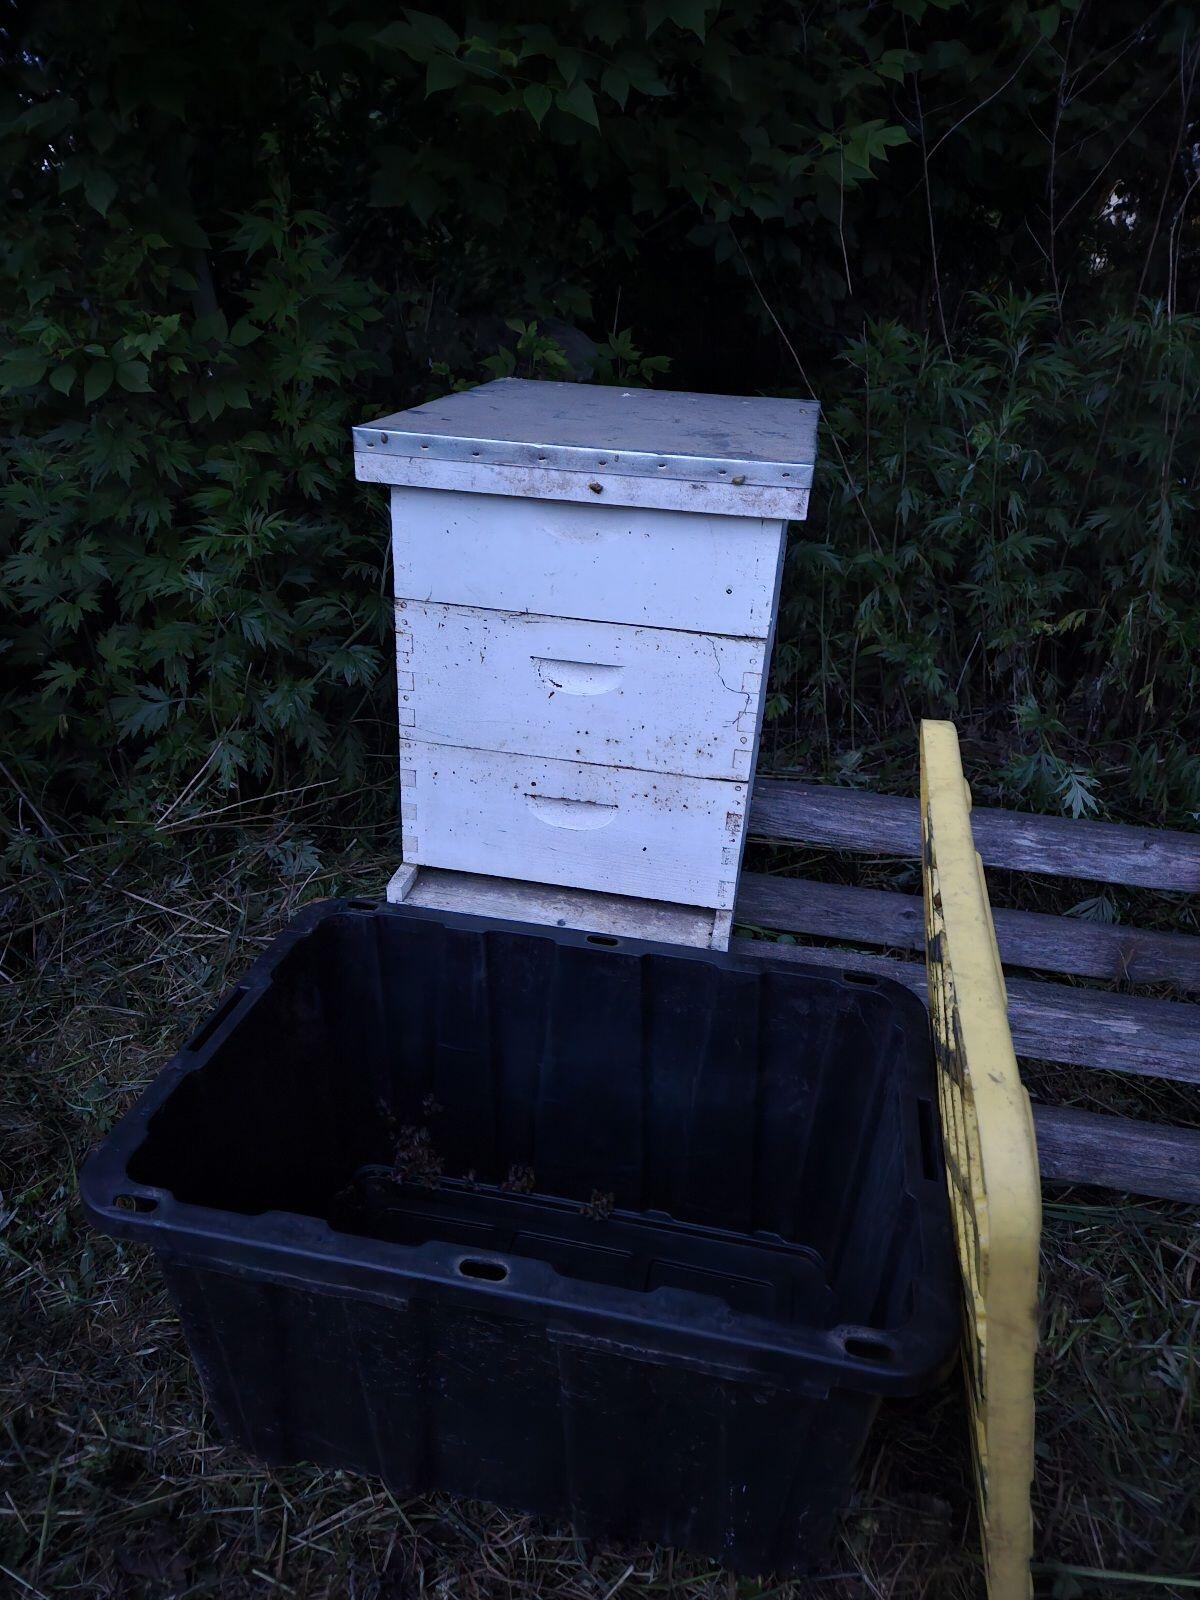
#plantstr #gardening #propagation #nursery #grownostr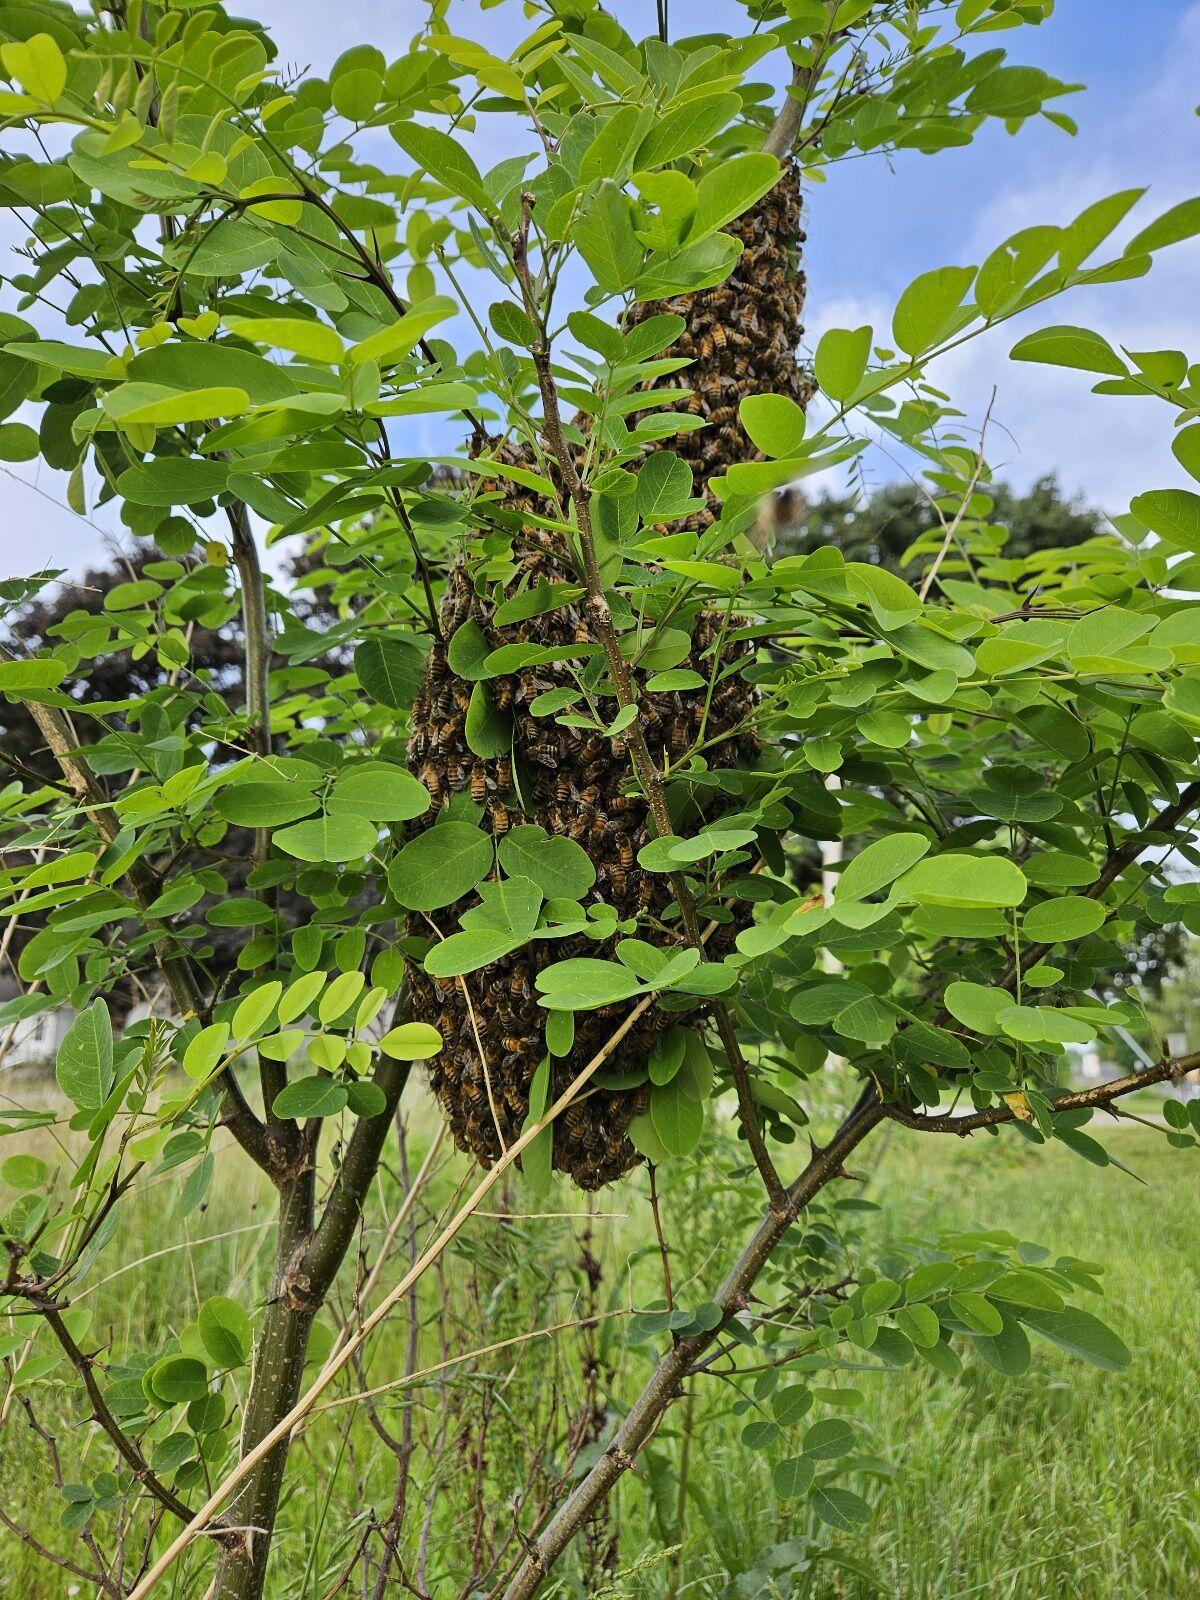 Put the branch and bees into a hive.
2 deep supers... didn't have foundation so there are just frames in them. I figure the bees know what to do.
Then a medium super in top with no frames... the bees were on a branch so I dumped the branch into the medium on top. Should I fish that branch out in a few days?
Put the branch and bees into a hive.
2 deep supers... didn't have foundation so there are just frames in them. I figure the bees know what to do.
Then a medium super in top with no frames... the bees were on a branch so I dumped the branch into the medium on top. Should I fish that branch out in a few days?
 Anyway... nice surprise ending to the day!
 #beestr #beekeeping #grownostr
 If you look closely you will see 2 kinds of canes: The 2 older looking, taller, darker canes, and then a small plant that looks like it's sprouting from the base.
Those canes are from last year are called the "floricanes", and will bear this year's fruit. It's forming now, here's a zoomed in picture.
If you look closely you will see 2 kinds of canes: The 2 older looking, taller, darker canes, and then a small plant that looks like it's sprouting from the base.
Those canes are from last year are called the "floricanes", and will bear this year's fruit. It's forming now, here's a zoomed in picture.
 The canes from this year are the "primocanes". They will grow this year and will become floricanes next year. Here is a different angle so you can see the primocane forming at the base:
 The plant spreads underground and will pop up new primocanes further and further from the parent plant. Some of my patches now are 20' long and thick with plants produced by only 3 parent plants. after about 4 or 5 years.
To propagate this type of raspberry, in the spring, I will dig up the plant around the floricanes coming into their second year and pot them up. The root base from that plant will then send out roots which will sprout into primocanes and continue the plant.
You may also see "bare root" raspberries, those are plants that have been dug up as I describe and sold prior to the plant putting on any growth. They are cheaper, but, as some of my customers have mentioned, when you get them, they "look like sticks" and so are not as attractive for retail customers.
#grownostr #gardening #permaculture #fruit #plantstr
The plant spreads underground and will pop up new primocanes further and further from the parent plant. Some of my patches now are 20' long and thick with plants produced by only 3 parent plants. after about 4 or 5 years.
To propagate this type of raspberry, in the spring, I will dig up the plant around the floricanes coming into their second year and pot them up. The root base from that plant will then send out roots which will sprout into primocanes and continue the plant.
You may also see "bare root" raspberries, those are plants that have been dug up as I describe and sold prior to the plant putting on any growth. They are cheaper, but, as some of my customers have mentioned, when you get them, they "look like sticks" and so are not as attractive for retail customers.
#grownostr #gardening #permaculture #fruit #plantstr There is a 25 PSI pressure reducer in-line to reduce our house water pressure which tends to be around 40 PSI off our well.
 I have the irrigation come on each morning for 90 minutes. I have a timer running off of our spigot at the house that controls the watering.
 If I were to water just the plants I have now by hand it would take me at least 20 minutes, so the automation is a time saver as well.
I've found that with a hose and hand watering you just can't get the same deep watering as you can with a light overhead watering over the course of an hour. With hand watering, the water seems to just run through the pots whereas a light rain-like watering over the course of 90 minutes daily will really help the plants stay hydrated.
I have the wobblers up 5' in the air on 3/4" PVC water line risers. The PVC lasts about 3 years out in the sun before needing replacement.
You can really see how they wobble back and forth and spin when they are in action!
If I were to water just the plants I have now by hand it would take me at least 20 minutes, so the automation is a time saver as well.
I've found that with a hose and hand watering you just can't get the same deep watering as you can with a light overhead watering over the course of an hour. With hand watering, the water seems to just run through the pots whereas a light rain-like watering over the course of 90 minutes daily will really help the plants stay hydrated.
I have the wobblers up 5' in the air on 3/4" PVC water line risers. The PVC lasts about 3 years out in the sun before needing replacement.
You can really see how they wobble back and forth and spin when they are in action!
 #plantstr #garden #propagation #permaculture
 The long term plan is to get completely away from the commercial fertilizer by fertilizing with compost tea, but I'm not there yet.
The more I interact with people, the more I realize what I'd consider common knowledge, is not common. Specifically worm castings, I sold some blackberries yesterday and mentioned that I had just top dressed them with worm castings, and the customer had never heard of using worm castings as a fertilizer, or even what they were.
Other things to teach is the seasonality of fruits, and that different varieties of the same fruit produce at different times. For instance, I have 4 different varieties of red raspberries that, when planted out, should produce most of the summer up to the frost. But people don't know that so you have to mention it.
The long term plan is to get completely away from the commercial fertilizer by fertilizing with compost tea, but I'm not there yet.
The more I interact with people, the more I realize what I'd consider common knowledge, is not common. Specifically worm castings, I sold some blackberries yesterday and mentioned that I had just top dressed them with worm castings, and the customer had never heard of using worm castings as a fertilizer, or even what they were.
Other things to teach is the seasonality of fruits, and that different varieties of the same fruit produce at different times. For instance, I have 4 different varieties of red raspberries that, when planted out, should produce most of the summer up to the frost. But people don't know that so you have to mention it.
 Final thing to mention is this little garden scooter that I got a few months ago from AM Leonard. This thing is a back saver and puts you right where you need to be at eye level with the plants.
 #permaculture #gardening #wormcastings #propagation